Showing posts with label seafood. Show all posts

Wednesday, March 6, 2013

Bravo's Lemon Shrimp Florentine Pasta

It's no secret that BRAVO! Cucina Italiana is one of our favorite Italian restaurants.  Imagine my delight when I found Bravo recipes direct from the source so that I could make it at home!  And, it's designed as 2 servings so it's perfect for my husband and I to have "date night in" :).

One of my recent favorite dishes to order is their Lemon Shrimp Florentine Pasta.  The menu describes it as "sauteed shrimp tossed with tomatoes, Boursin, spinach, Feta, and linguine in a creamy lemon sauce".  I just call it delicious.  It's slightly tart and tangy, a bit creamy, and a treat for the taste buds.  Perfect for Lent or any other time you want restaurant quality pasta at home!

Looking for other Christine's Kitchen Chronicles tested Bravo copycat recipes?  Try:
Any other reader copycat recipe requests, Bravo or otherwise?

Three Years Ago: Jalapeno Cornbread Whoopie Pies, Awesome Slow Cooker Pot Roast, and Peanut-Butter Oatmeal Chocolate Chip Cookies

Bravo's Lemon Shrimp Florentine Pasta


Ingredients
  • 1/4 lb Linguine (I felt it was a bit saucy and would recommend at least 1/3 lb)
  • 2 Tbsp olive oil
  • 1/2 lb shrimp, peeled and deveined
  • 1 tsp garlic, chopped
  • 1/4 cup grape tomatoes, halved
  • 1/2 cup vegetable stock
  • 2 tsp freshly squeezed lemon juice
  • 2 Tbsp roasted garlic, pureed with oil (I roasted my own homemade roasted garlic and then mashed it up.  There wasn't a lot of oil)
  • 4 Tbsp crumbled Feta cheese, divided
  • 2 Tbsp Boursin cheese (I used cream cheese)
  • Salt and pepper to taste
  • 2 Tbsp butter
  • 1 cup fresh spinach leaves
  • 2 Tbsp toasted bread crumbs
Directions
  1. Cook pasta to al dente according to package directions.  Set aside and keep warm.
  2. Heat oil in a large saute pan on medium heat.  Add shrimp and cook slowly for 2 minutes.  Add chopped garlic and tomatoes and cook for 30 seconds more.  Add vegetable stock, lemon juice, roasted garlic, and 2 Tablespoons each of Feta and Boursin cheese.  Bring to a simmer.  Season with salt and pepper to taste.  Add butter and cook to a sauce consistency.  Add spinach and cooked pasta to pan.  Stir to combine.
  3. Divide into two serving plates.  Garnish each plate with 1 Tablespoon of Feta cheese and 1 Tablespoon of toasted bread crumbs.
Source: BRAVO! Cucina Italiana

Wednesday, October 3, 2012

California Roll Lettuce Roll-Ups

I love it when the stars seem to align between what I receive my CSA basket for the week and the things I have bookmarked to make.  My only regret is having had to wait this long to share this recipe with you since I had been traveling so much recently (food photo adventures have been shared on facebook!).  But, I'll call it a nod to my recent trip to Japan by sharing it now :).

What I loved about this recipe was how quickly you could put it together and how healthy it was.  If you love the flavor of California Rolls but don't want the hassle of creating actual sushi rolls, this is the way to go.  I could even see adding some chopped nori (seaweed sheets) to really get the full flavor experience.  And why stop there?  You could adapt this recipe as a vehicle to contain the flavors of any of your favorite sushi rolls!

One Year Ago: Homemade Girl Scout Samoa Cookies and Chicken, Blueberry, and Summer Squash Salad

California Roll Lettuce Roll-Ups


Yields: 4 servings (3 wraps each)

Ingredients

  • 1 cup dry rice
  • 2 Tbsp seasoned rice vinegar
  • 1 head (~12 leaves) Boston lettuce, leaves removed and washed
  • 1/2 English cucumber, seeded and cut into 1-inch matchsticks
  • 1/2 cup (about 2) carrots, shredded or cut into 1-inch matchsticks
  • 5 oz surimi (imitation crab meat), cut into 1-inch matchsticks
  • 1/2 avocado, diced
  • 3 Tbsp pickled ginger, chopped (optional)
  • 2 Tbsp low-sodium soy sauce
Directions
  1. Cook rice according to package directions.  Once cooked, stir in the vinegar and then set aside.
  2. Assemble the lettuce roll-ups by layering several tablespoons of rice in each lettuce leaf.  Then add 2-3 pieces of cucumber, carrot, crab, and avocado.  Top with pickled ginger if desired and finish with a dash of soy sauce.

Source: Adapted by and as seen on PreventionRD from Good Housekeeping

Monday, July 2, 2012

Smoked Salmon Tea Sandwiches

These dainty little tea sandwiches were delightful at my friend Jackie's bridal shower and though very simple, would make the British Royals proud.

At first when I looked at the recipe I had to do a double take on the butter for a couple of reasons: 1) 1 teaspoon per slice of bread?? and 2) unsalted?  Well, after some thought, the reason for the latter was clear to me - smoked salmon is salty so you don't need any from the butter, too.  As for the entire teaspoon of butter on each bread slice...I just couldn't bring myself to do that.  When I researched the rationale, tea sandwiches are usually heavily buttered because it supposedly provides structure for the bread.  For the calories though, I was willing to take my chances and am happy to report that I was able to get away with using about 1/2 teaspoon per slice of bread.

If you're making a lot of sandwiches like I did (13 in total!), you will probably want to do it assembly line style buttering all the bread first, then moving on to the cream cheese, then finally the salmon and cutting.  After taking a couple sandwiches all the way through from start to finish I realized it was a mess and not so effective since handling the salmon made my hands pretty slimy.

I'm a little anal and actually weighed out my cream cheese and salmon as I put them on my bread slices (mostly because I didn't want to run out before I had made enough sandwiches because I bought just enough!).  If you're trying to stretch your dollar, you can get away with using less of both (about 0.8 oz cream cheese and 1.3 oz salmon seemed okay to me).  The end product will not suffer as there is plenty of flavor to go around.  Oh, and I couldn't resist but to add fresh cracked pepper and a few squeezes of lemon juice to brighten the flavor.

Three Years Ago: Peanut Butter Cookie Treats

Smoked Salmon Tea Sandwiches

Smoked Salmon Tea Sandwiches
Photo Credit: Emily H.
Ingredients:
  • 2 small slices bread (I used white and wheat sandwich breads for variety and less waste on cutting since the edges are straight instead of round on top)
  • 1 teaspoons unsalted butter, softened
  • 1 tablespoon minced fresh dill
  • 1 ounce low fat cream cheese, softened
  • 1.3-2 ounces smoked salmon
  • Lemon juice (optional)
  • Pepper (optional)

Directions:

  1. Spread one teaspoon of butter on one side of each slice of bread. 
  2. Mix the dill into the cream cheese. If desired, add a few squeezes of lemon juice and freshly ground pepper to taste.  Spread the cream cheese on the buttered sides of bread. 
  3. Layer the salmon on the cream cheese on one slice of bread, and cover with other bread slice. 
  4. Cut the crusts off the sandwich and then on the diagonals to create four triangles.
Source: Slightly modified from About.com

Friday, May 11, 2012

Foil-Baked White Fish with Ginger Over Wilted Greens

It's springtime but this recipe was tried LAST FALL.  By the time I got around to posting it though, the veggies weren't in season so I decided to hold on to posting until this year.  Good thing these types of greens are prevalent in both ends of the growing season...enjoy!
-----------------------------------
I've been getting a crazy amount of greens from our farmshare lately.  Spicy greens, napa cabbage, lettuce, spinach, swiss chard, turnip greens.  Seriously.  You name it, I've probably gotten it in the past month.  Chris and I could only eat so many salads and honestly, I was starting to run out of foods to make with all these greens.  That was, until I saw this recipe in our CSA newsletter.

I'm a sucker for baked foil packet fish.  The last version that I made (Foil-Baked Fish with Black Beans and Corn) pretty much knocked my socks off.  This one was great too!  The foil packet preparation results in a moist fish that cooks in all the yummy juices that you add.  This recipe tasted just like my favorite Chinese Steamed Fish but simpler with its "one dish" preparation.

Do you have any other favorite foil-baked recipes?  I kind of feel like the possibilities are endless!


Foil-Baked White Fish with Ginger Over Wilted Greens


Ingredients

  • 6 cups baby spinach OR any mixed greens
  • 4 – 5 ounce white fish filets
  • 4 teaspoons minced fresh ginger
  • 2 teaspoons minced garlic
  • ½ cup Marsala wine or chicken broth
  • 8 teaspoons soy sauce
  • 2 teaspoon sesame oil
  • 1 lime quartered
  • 2 Tablespoons basil chiffonade
Directions

  1. Preheat oven 400 degrees.
  2. Tear off 4 sheets of foil or parchment paper that are 12 inches long. On individual squares: Place 1 ½ cups of greens in center of the square then on top of the greens add the fish. Sprinkle 1 teaspoon into each packet of ginger, garlic, soy sauce, ½ teaspoonful sesame oil.  Drizzle 2 Tablespoons of liquid or wine.  Bringing the two long sides of the square together, fold over the food.  Fold over three or more times.  Fold and crimp the remaining sides. Repeat until all 4 packets are made.
  3. Bake 10 minutes in hot oven.  Let sit 5 minutes before opening.  Squeeze lime juice and sprinkle basil into each packet and enjoy!
Source: Cedarmore Farm CSA Newsletter

Wednesday, October 26, 2011

Shrimp with Green Apple Chipotle Salsa

All of the recipes that Emily and I made during our apple extravaganza were sweet with the exception of this one.  I have had this particular recipe bookmarked in my Google Reader forever and had suggested this as a savory option for our collection.  To be honest, I'd take savory over sweet any day, anyway!  When it came time to pick the final recipes I actually didn't end up picking this one but it was Emily's husband Scott that chose it to be made.  Yep, we gave the boys a say.  They were going to be eating everything, after all, so it only seemed fair.

I really liked the bold slightly spicy flavor of the shrimp in this recipe and overall it was quite a delicious dish.  It certainly gave our sweet tastebuds a break.  What we all agreed was disappointing was the fact that the apple was completely overwhelmed by the red onion and cilantro.  It really isn't all that surprising given how strong those particular flavors are and if it weren't for the whole "apple" theme it wouldn't matter at all.  Eh...who am I kidding...to me, it still didn't matter at all.  I happily gobbled up this savory treat and was so glad that Scott added it back into the mix :).

Only two more recipes left to share!  Tomorrow I'll be sharing Emily's favorite recipe from the batch.  Hint: It's a Paula Deen so get ready to get your butter on.

Shrimp with Green Apple Chipotle Salsa

Photo Credit: My friend Emily

Ingredients

For the salsa

  • 1/2 c. diced Granny Smith apple
  • 1/4 c. diced red onion
  • 1/4 c. diced red bell pepper
  • 2 TBSP chopped fresh cilantro
  • 2 TBSP apple cider vinegar
  • 1/4 tsp. chipotle chile powder
  • 1/8 tsp. Cayenne pepper
  • salt and black pepper, to taste 
For the shrimp
  • 1 TBSP olive oil
  • 1 lb. shrimp, peeled and deveined
  • 1/2 tsp. paprika
  • 1/2 tsp. ground cumin
  • 1/4 tsp. black pepper
  • 1/4 tsp. salt
  • 1/2 tsp. chili powder
  • 1/2 tsp. ground ginger
  • 1 tsp. light brown sugar
Directions
  1. Combine all ingredients for salsa in a medium bowl and mix well.  Cover and refrigerate at least one hour before serving.
  2. To cook the shrimp, heat the oil in a large saute pan over medium heat.  Meanwhile, combine shrimp and all spices in a large bowl.  Toss to coat.  Place shrimp in the saute pan and cook one to two minutes per side, depending on size of shrimp.
  3. Serve shrimp over a bed of salsa. Serves four.

Source: Scoot Uehlein, Canyon Ranch Cooks as adapted by and seen on Apple a Day

Monday, September 19, 2011

Foil-Baked Fish with Black Beans and Corn

This past Friday night I was in a pinch for a quick meal and so I went scavenging my freezer to see what I could find.  This is when I came across these fish foil packets and my mouth immediately began watering.

The first time I made these they were SO GOOD.  And, since the recipe made 4 packets, I figured I'd freeze the other 2 for later.  Trust me, you want all of those packets of goodness since it freezes well and tastes great.  The texture didn't get all weird and the flavor was not at all subdued by the freezing process.  When I put the fish in my mouth the second time, it was just as wonderful as I remembered.

Spicy and zesty from the orange-chipotle compound butter, this fish is just bursting with flavor and is very moist.  The fact that it's contained in a foil packet makes clean-up a breeze.  It just may be one of my favorite fish preparations.  If you can't handle heat, I'd use fewer chipotle peppers.  Chris and I love spicy foods and even this was bordering too hot for us!

Don't forget to freeze some extra packets to grow your freezer stock!

One Year Ago: Pineapple Teriyaki Chicken
Two Years Ago: Slow Cooker Pulled Pork (or make it with chicken) - This is a staple for dinners and potlucks alike for me.  It's gobbled up in full every time.  I even made it on our recent vacation to Orlando.  Yes, I brought my crockpot with me on vacation.  Don't judge.

Foil-Baked Fish with Black Beans and Corn


Foil Baked Fish with Black Beans and Corn

Ingredients
  • 4 skinless white fish fillets (6 to 8 oz each), 1-inch thick
  • salt and pepper
  • 4 Tbs unsalted butter, softened
  • 2 tsp minced chipotle chiles in adobo sauce
  • 1 tsp grated orange zest
  • 2 Tbs freshly squeezed orange juice
  • 2 cloves garlic, minced
  • 1 (16-oz) can black beans, rinsed and drained
  • 2 cups corn kernels
  • 1/2 red onion, minced
  • 2 scallions, minced
  • 1/4 cup chopped fresh cilantro
Directions
  1. Adjust the oven rack to the lower-middle position and heat to 450 degrees.
  2. Pat the fish dry with paper towels and season with salt and pepper.  Using a fork, mix together the butter, 1 teaspoon chipotle, orange zest, half the garlic, 1/2 tsp salt, and 1/4 tsp pepper in a medium bowl until well-combined.  Spread butter mixture over the fish.
  3. Combine the beans, corn, onion, scallions, 2 tablespoons of cilantro, orange juice, remaining chipotle, remaining garlic, scallions, 1/2 teaspoon salt, and 1/4 teaspoon pepper in a bowl.
  4. Lay four 14-inch lengths of foil on the counter and divide the bean mixture evenly over the lower half of each piece of foil.  Top with fish, and fold the foil over the fish, folding the edges to seal.
  5. Arrange the packets in a single layer on a rimmed baking sheet and bake until the fish is just cooked through, 15 to 20 minutes*.  Carefully open the packets and sprinkle with remaining cilantro.  Serve.
Make ahead notes: If you are freezing the packets, follow all the steps through #4.  When you're ready to eat them, either thaw in the fridge overnight then cook as directed above or take the packets straight from the freezer and cook about 45 minutes or until fish is opaque and flakes with a fork.  

Source: America's Test Kitchen, The Best Simple Recipes as seen on Pink Parsley

Monday, August 29, 2011

Grilled Maple-Chili Salmon

This was my play on words for our most recent Dinner Club.  We grilled our salmon up on cedar planks so called it Cedar PLANKed Salmon to go along with the pirate theme.  It was Chris and my first time using cedar planks so we're just glad it didn't catch fire on the the grill :D.  I LOVED the way that this dish turned out.  The flavor was fantastic and I will for sure be making this again.

We bought a gigantic 2.7 pound wild salmon filet from Costco and the maple syrup that I used came from one of our new Dinner Club members, Delia.  She hails from the border of NY and VT so gets some of the best maple syrup.  Scott was skeptical when he saw me drizzling it on as the finishing touch.  I could see it in his eyes lol.  But I think it's safe to say he's converted.  The sweet, smokey, and savory is a wonderful combination.  A total hit!  And if you don't have a cedar plank, no worries, you can do without it and Shawnda from Confections of a Foodie Bride says she and her husband actually prefer it that way.

See the rest of our Pirate themed menu at our Dinner Club blog.  Since we've renewed the club by saying goodbye to two couples due to relocation and welcomed two new ones, we're going to try to make an effort to do a better job of updating the blog :).

Grilled Maple-Chili Salmon


Yields: 3-4 servings

Grilled Maple-Chili Salmon

Ingredients
  • 1 lb salmon, cut into 3-4 fillets
  • 1 tsp chili powder
  • 1/2 tsp paprika
  • 1/2 tsp cumin
  • 1/8 tsp garlic powder
  • 1/8 tsp cinnamon
  • 1/4 tsp salt
  • Fresh ground black pepper
  • 1 Tbsp creole mustard (or any spicy brown mustard)
  • 1 Tbsp olive oil
  • 3-4 tsp maple syrup
Directions

  1. If using, soak the cedar plank per the manufacturer instructions.
  2. Stir together the dry ingredients and then stir in the olive oil and mustard.
  3. Spread the rub over the top and sides of the fillets and let sit while the grill heats.
  4. Preheat grill to medium-high.  Place fish on the soaked plank and cook for ~15 minutes, until the fish flakes and the internal temperature reaches 140.  If not using the plank, place skin side down and cook 8-10 minutes.
  5. Remove from heat and immediately drizzle each fillet with ~1 tsp of maple syrup.
Source: Confections of a Foodie Bride

Friday, August 19, 2011

Fish Tacos with Lime-Cilantro Crema

Tomorrow, I'm going to check something off of my bucket list.  I'm going whitewater rafting!!  I'm incredibly excited for this trip and glad I was finally able to make it on my friend Vanessa's annual trip.  There are 18 of us going to a huge 9BR/9BA cabin and then 16 going rafting.  We'll be spending a full day going down the Lower New River (dubbed the Grand Canyon of the East) which is Class I - V.  I have ZERO experience and was told that even though some of these rapids are almost the most challenging class possible, this run is suitable for beginners.  Pray that I come back intact in one piece and don't end up swimming with the fishies too much!

That brings me to my recipe for today.  Fish!  I previously posted a recipe for fish tacos and they're both quite nice.  What makes this recipe stand out is the Lime-Cilantro Crema.  Don't skip that.  The contrasting cool and fresh flavor is outstanding!  I was also excited to use my cabbage and tomatoes to top these tacos.

PS:  I just realized 3 recipes I've posted this month have cilantro in them.  Clearly I'm on a cilantro kick.  I just LOVE the unique flavor!  For those that aren't fans, you can leave it out.  And, just for you, I promise my next post won't have cilantro in it :).


Fish Tacos with Lime-Cilantro Crema
Printer-Friendly Version


Yield: 4 servings (2 tacos each).

Ingredients

For the Crema
  • 1/4 cup (about 3) green onions, thinly sliced
  • 1/4 cup fresh cilantro, chopped
  • 3 Tbsp low-fat mayonnaise (I used unflavored Greek yogurt)
  • 3 Tbsp reduced-fat sour cream
  • 1 tsp lime rind, grated
  • 1 1/2 tsp fresh lime juice
  • pinch of salt
  • 1 garlic clove, minced
For the Tacos
  • 1 tsp ground cumin
  • 1 tsp ground coriander
  • 1/2 tsp smoked paprika
  • 1/4 tsp ground red pepper
  • 1/8 tsp salt
  • 1/8 tsp garlic powder
  • 1 1/2 lbs mahi mahi fillets (I used tilapia)
  • Cooking spray
  • 8 (6-inch) corn tortillas
  • 2 cups cabbage, shredded
Directions
  1. Preheat oven to 425 F.
  2. To prepare crema, combine the first 8 ingredients in a small bowl; set aside.
  3. To prepare tacos, combine cumin and next 5 ingredients (through garlic powder) in a small bowl; sprinkle spice mixture evenly over both sides of fish. Place fish on a baking sheet coated with cooking spray. Bake at 425 for 13-15 minutes or until fish flakes easily. Break fish into pieces with a fork. Heat tortillas according to package directions. Divide fish evenly among tortillas; top each with 1/4 cup cabbage and 1 tablespoon crema.
Source: Cooking Light, December 2006 as adapted by and seen on Prevention RD

Nutrition Information (per serving): 323 calories; 7 g. fat; 124 mg. cholesterol; 401 mg. sodium; 28.5 g. carbohydrate; 3.3 g. fiber; 35.5 g. protein

Sunday, June 19, 2011

Singapore Mei Fun

Remember my 23 Things in 2011 list?  Yeah...totally not on track for completing that right now since April and May were totally non-productive.  Up until that point though I had been very good about making roughly 2 items off the list per month but (as usual) not as good about blogging about them in a timely manner.  The only reason I'm blogging about this particular recipe now is because my facebook fans voted on it to be my next blog post!

Singapore Mei Fun made my list of things I wanted to make this year because it is one of my favorite dishes that my mom makes.  Interestingly enough, I recently learned from an Asian Heritage Month work event that this dish isn't even authentic Sinaporean food.  Oh well.  It's delicious.  And it's easy!  I think the real secret to making a good Singapore Mei Fun (Rice Noodle) dish is the fact that the noodles are "cooked" by soaking them in water instead of boiling like your typical noodle.  A quick stir fry is all it takes to finish it off!

My mom gave me a "recipe" but as with all of our family's "recipes" they are more loose guidelines of what ingredients and generally how to make the dish.  There's not any specifics of how much or how long so that's where my Google research helped.  Thank goodness for Google to help fill in the gaps.  This was just like Mom's!

One Year Ago: Firecracker Shrimp


Singapore Mei Fun (Curry Noodles)

Singapore Mei Fun (Curry Noodles)

Yields: 4-6 servings

Ingredients

  • 8 ounces rice vermicelli (mei fun - check your Asian aisle at the local grocer)
  • 2 tablespoons rice cooking wine 
  • 2 teaspoons reduced sodium soy sauce
  • 1 1/2 teaspoons sugar 
  • 1/2 teaspoon salt 
  • 4 tablespoons vegetable oil 
  • 4 ounces small shrimp, shelled and deveined 
  • 1/2 cup finely shredded scallions 
  • 1 small onions, sliced
  • 1 green bell pepper, sliced
  • 1 Tablespoon yellow curry powder 
  • 3/4 cup Chicken Broth 
  • 4 ounces other meat such as Chicken, Beef, or Chinese Barbecued Pork, cut into julienne
  • 1 egg, scrambled, fried, and cut into julienne (optional)
Directions
  1. In a large bowl, soak the rice noodles in enough cold water to cover overnight, or until noodles are limp and softened. Drain in a colander and set aside. In a small bowl, combine the soy sauce, rice wine, sugar, and salt. Set aside.
  2. Heat a 14-inch flat-bottomed wok or skillet over high heat until hot but not smoking. Add 1 tablespoon vegetable oil and stir fry the chicken and/or beef until nearly cooked through.  Remove and set aside on a plate.  Add additional 1 tablespoon oil and shrimp, and stir-fry 10 seconds. Add the scallions and stir-fry 30 seconds, or until shrimp have just turned orange but are not cooked through. Transfer the shrimp mixture to a plate and set aside.
  3. Add the remaining 2 tablespoon vegetable oil, onions and green pepper, and stir-fry 30 seconds. Add the curry powder and stir-fry 10 seconds, or until fragrant. Restir soy sauce mixture and swirl it into the wok. Add the chicken broth, and 1/3 cup cold water, and bring to a boil over high heat.
  4. Add the drained rice noodles and return to a boil, stirring noodles to completely coat in curry mixture (chopsticks work best for this!). Add the meat mixture, and cook, stirring, 1 to 2 minutes, or until shrimp are just cooked through and liquid has been absorbed by the noodles. Add the cooked egg, if desired.  Serve immediately.
Source: Inspired by my Mom and The Wisdom of the Chinese Recipe. Published by Scribner, 1999.  As seen in an Cooking Light message board.

Tuesday, May 3, 2011

Shrimpo de Gallo

It's recipe numero quatro of the Cinco Recipes for Cinco de Mayo series.  We're nearly done but don't worry, the fiesta has yet to begin!  The title of this particular recipe makes me laugh...as does Ree's (AKA Pioneer Woman) struggle to determine what it should be named... 

Shrimp Pico de Gallo
Shrimpy Pico de Gallo
Pico de Shrimpo
Shrimpo de Gallo
Shrimp Salsa


No matter what the name, this dip is a nice change from the traditional salsa and will win your heart over.  (And then give you some heartburn if you can't take the heat and/or you over-fiesta!).  It can be thrown together quickly for those last minute fiestas if you get your slicing and dicing on.

This recipe is Tapas Themed Dinner Club approved and once again, I suck and forgot to take a picture so thank you Emily for the photo!  The dip is in the center and NO, you don't dip the churros into the Shrimpo de Gallo.  Use tortilla chips, silly!  (The items were plated this way for ease of transport.)

One Year Ago: Hm yeah seriously...apparently I took the entire month of May off so...nothing.  I blame being on vacation and then trying to catch up from vacation.  Sorry!
Two Years Ago: Blonde Brownies...because blondes have more fun?

Shrimpo de Gallo
Printer-Friendly Version


Prep Time: 15 minutes
Yields: 12 servings 

Ingredients
  • 1 pound Cooked Cocktail Shrimp (tails removed), Chopped
  • ½ whole Red Onion, Diced Finely
  • ½ cups Green Or Black Olives, Chopped (I omitted...I hate olives, yuck!)
  • 2 whole Tomatoes, Diced
  • 2 whole Fresh Jalapeno Peppers, Minced (I used about 15 slices from a jar)
  • 2 whole Avocados, Chopped
  • 2 whole Limes, Juiced
  • Kosher Salt To Taste
  • 2 cups Cilantro, Chopped

Instructions
  1. Combine shrimp, red onion, olives, tomatoes, and jalapenos in a large bowl. Add lime juice to taste, then a dash of kosher salt. Add cilantro. Stir gently with a spoon, then taste on a tortilla chip so you’ll have an accurate gauge of the salt content. Add more salt and/or lemon juice if needed.
  2. Chill until serving. Note that the avocado will brown if too much time passes, so if you want to make this ahead of time, leave out the avocado until just before serving.
  3. Serve with tortilla chips!

Source: Pioneer Woman

Tuesday, April 12, 2011

Chinese Steamed Fish

Well, based on my Google Analytics for the month, fish is pretty much the new black.  Or, it could just be Lent.  So, as Easter is coming up and you're rounding up the last of your Lenten specialties or you just want to try to eat healthier, I encourage to give this a try.

Asian-style steamed fish is one of my favorite things to order at Chinese restaurants.  I made this along with several other Chinese goodies as part of my Chinese New Year celebration.  Fish, or "yu", is symbolic of richness and abundance.  If you eat the fish for Chinese New Year, you will be prosperous.  And, the saying goes that you should leave a little bit on your plate to save for later...so that you have prosperity in the future, too!  I don't know about all the traditional/superstitious mumbo jumbo but prosperity sounds good to me :).

If you're going all out, you'd buy a very fresh piece of intact fish - skin, bones, and *gasp*...head!  In Chinese culture, it's the head (with the fish's clear glassy eyes) that lets you know that it's really fresh.  Heck, you might have even selected it from the tank yourself!  Since I live in Cincinnati and am personally a bit squeamish, I went with filets and it still tasted just like the restaurants to me.  And, less work because you don't have to pick out tiny bones or (if you're like me), discard the skin while you're eating it.  My mom eats the skin though.  And the meat in the head.  She'll fight you for it because she claims the cheek meat is the sweetest.  Don't worry Mom, it's all yours!

This preparation of fish is relatively healthy since it is steamed.  There is a moderate amount of oil used in the "sauce" but you can either reduce the amount used or just not spoon as much of the "sauce" on top of your fish serving when you go to eat it.  The flavor really comes from the ginger and scallions that flavor the oil in addition to the soy sauce.  Yum!

One Year Ago: Slow Cooker Carnitas
Two Years Ago: Cake Balls (Truffles)

Chinese Steamed Fish
Printer-Friendly Version


Ingredients
  • 1 pound whole fish (or fillets 1″ or thicker) yields the best results
(A)
  • 4 stalks, scallions – cut into 3″ lengths
  • 3″ piece of ginger – slice into “coins”
  • small bunch of cilantro
  • 1 1/2 tablespoons Shaoxing wine to pour on fish prior to steaming (or any cooking wine like dry sherry)
  • salt and pepper
(B)
  • 2 tablespoons rough chopped cilantro
  • 1 teaspoon sesame oil
  • 2 tablespoons soy sauce
  • 1/2 teaspoon sugar
  • 1/4 teaspoon salt + 1/4 teaspoon white pepper (or black pepper if you don’t have white)
  • fresh chilli – thinly sliced (optional)
(C)
  • 2 stalks, scallions – cut into 3″ lengths
  • 2″ piece of ginger – finely julienned to the skinniest, thinnest strips you can possibly manage without a microscope
  • 2 tablespoons cooking oil
Equipment: shallow pan to hold fish and large pot or wok for steaming. If you don’t have a fancy steamer or steamer insert, take a shallow-ish bowl and invert to use as a stand. Or…3 shot glasses inverted.

Directions
  1. Clean and Stuff: Clean your fish, pat dry. Season generously inside and out with salt and pepper. Take half of (A) and stuff inside the fish. If you are using fillets, skip this.
  2. Make your bed: Take the other half of (A) and lay it in a shallow pan. If using fillets, just use all of (A) for the bed. Lay the fish on top of the bed. If fish is too long, cut in half. Pour 1 1/2 tablespoons Shaoxing wine on top of the fish. 
  3. Steam: Add 2″ of water to your large pot, cover and boil. When it is boiling, uncover and wipe the inside of the cover clean of any condensation (all this condensation will drip back down on your fish, diluting the flavor) Put your fish pan inside, propped up with a small inverted bowl. Steam the fish on medium (see below for cooking times).
  • Whole fish 1 lb: check at 12 minutes, add 2 minutes for every 1/2 lb
  • Fillets 1″ and thicker: check at 10 minutes, add 2 minutes for every 1/2″ more thickness
  • Fillets less than 1″: check at 7 minutes
  • Super thin fillets: check at 5 minutes
    1. Check to see if its done at the times indicated.  Poke your chopstick at the flesh near the top fin. If flesh flakes easily near the top fin, then its done. If flesh sticks together still, then add 1-2 more minutes to cooking time. For fillets, just gently poke at the flesh in the middle. Timing really depends on the thickness of your fish.  Also check to make sure you haven’t run out of steaming water.
    2. Aromatics: Towards the end of the steaming process, you’ll want to start preparing the aromatics that garnish the finished dish. Take a microwave-safe bowl, add (B) and microwave for 30 seconds. Set aside. When fish is done steaming, carefully lift the fish out onto a serving platter, discarding all of the cooked cilantro/ginger/scallions and the fish juice in the pan. Pour the hot (B) over fish.
    3. Now we’ll work with (C): In a separate pan or wok, heat up cooking oil until you see smoke. Add the ginger and scallions, fry for 10 seconds to “pop” the flavors. Pour this cooking oil + herbs over the fish. You’ll hear a very satisfying sizzle!
    Source: Steamy Kitchen

    Sunday, April 3, 2011

    Fish Tacos

    One fish, two fish.  Red fish, blue fish.  Okay...I'm no Dr. Seuss and this is actually a white fish.  A little white fish that has taken the food blogging world by storm.  Why it's taken me so long to try I do not know.

    It's light and fresh.  Perfect for the weather as it begins heating up and/or if you're needing some easy family-pleasing seafood recipes for lent.  I feel like most Americans really only know one kind of fish.  Fish sticks fried to a golden crisp and served with a big side of tarter sauce for dipping.  Or, maybe you're like Cincinnati and have a bazillion Fish Frys on Fridays during lent.  No shame in that.  I'll admit I kind of like fish sticks and even McD's Filet-O-Fish...but...the friedness and tarter sauce, though yummy, are not so healthy.  Good thing I only eat them once in a blue moon.
    This recipe will expand your fish horizons and it's healthy enough to eat without shame.  It's not fried and there is no tartar sauce (*gasp*).  Speaking of, I personally I am in love with the sauce in this recipe.  But then again, I'm a cilantro lover.  Yum!  The flavor reminds me of the uber delicious fish tacos that I got at Maui Taco when I was in Hawaii last year.  Ahhh...Hawaii.  Let's leave this post with that thought in mind.  *cue ukulele*

    One Year Ago: Berry Buttermilk Cake.  Wow I'm glad this popped back up because I just so happen to have some leftover buttermilk to use AND last year when I discovered this recipe I made it twice in a single week.  Yep, it's that good!

    And hey, did you remember to enter my 2nd Blogiversary Givaway yet?  If the drawing were today you'd have about a 1 in 30 chance of winning your very own AUTOGRAPHED Pioneer Woman Cooks cookbook!  I'd say those are some pretty good odds :).  But don't drag your heels too long.  Contest ends at 11:59PM this Friday!
    Fish Tacos


    Ingredients

    For the fish

    • 2 Tbsp. freshly squeezed lime juice
    • 3 Tbsp. extra virgin olive oil, divided
    • 3 Tbsp. minced cilantro
    • 1/4 tsp. cumin
    • 2 cloves garlic, minced
    • 1 lb. white fish (halibut, cod, tilapia, etc.)
    • Salt
    For the cilantro cream sauce
    • Juice of 1/2 lime
    • 1 Tbsp. cilantro, minced
    • 1/3 cup nonfat greek yogurt
    • 1 clove garlic, minced
    • Pepper, to taste
    For serving
    • Cherry tomatoes, quartered
    • Green onions, chopped
    • Red cabbage, shredded
    • avocado slices
    • 6-inch flour tortillas
    Directions
    1. Combine the lime juice, 2 tablespoons of the olive oil, cilantro, cumin, and garlic in a shallow dish.  Whisk together until well blended.  Place the fish in the mixture, turning to coat.  Let marinate 15-30 minutes.
    2. Meanwhile, prepare the cilantro cream sauce.  Combine the lime juice, cilantro, greek yogurt, garlic and pepper in a small bowl.  Mix until well blended.  Refrigerate until ready to use.
    3. Heat the remaining 1 tablespoon olive oil in a large skillet over medium-high heat until shimmering.
    4. Place the fish in the pan and cook without disturbing for about 3 minutes.  Flip the fish and cook on the second side 2-3 minutes more.  (Cook until fish reaches 130 degrees)
    5. Remove to a plate and season with salt and let rest for a few minutes.  Shred the fish into bite-sized pieces with two forks.
    6. Assemble tacos on flour tortillas with shredded fish, cilantro cream sauce and toppings as desired.
    Source: As seen on Christine's Cuisine, Annie's Eats, and it all began with The Way the Cookie Crumbles

    Sunday, January 2, 2011

    2010 Recap Part 2: Personal Favorites

    Day 2 of the New Year and here I am with another post!  2 posts yesterday and another today, I'm on a roll :).  Woo hoo!  And, since yesterday's posts I realized that I have 1 new blogger and 1 new Google Reader subscriber (or could be the same person for all I know).  Either way, welcome new readers!  And, welcome back to my loyal readers, too!

    You know what else has happened since yesterday?  I made a quiche! (and it was so very delicious - recipe and pictures to come.)  Check that one off of the 23 things to make in 2011.  Man, I'm on fire!

    Okay so yesterday in Part 1 of my 2010 Recap we reviewed your favorites.  While I agree that those were great picks there are some other gems on this blog that I love and also feel deserve their time in the spotlight, too.  Now, a lot of blogs that I follow break it down by favorite posted each month but as I look at the history I realized some months I literally posted ONE TIME (d'oh!) and I don't know that they're necessarily worthy of a "best of" tag.  What's also sad is the fact that some of the favorite things I made this year I realized I didn't even blog about yet...a true tragedy and disservice to my readers!  (No worries, this just means they'll go in the 2011 Recap!).  So instead, I'll compromise and just go with Top 12 over the whole year.  It's a tough job to narrow them down but someone's got to do it.

    January: Baked Sausage Ziti

    Photo credit: The Piggly Wiggly
    
    It's a bit labor intensive with its two sauces but for the flavor it is totally worth it and your guests will thank you.  I think my sister and her friends who ate this for their Junior Prom dinner would definitely agree.  Those boys were eating Tums afterward like they were candy...I might be a little heavy handed on my red pepper.  My bad.  By the way, the fresh mozzerella melts so much better than that pre-shredded stuff so definitely don't scrimp there.


    February: Grandma B's Chicken a la King


    This is Chris' favorite meal of all time so I can't let this blog entry pass without putting it in the best of recap.  His grandma used to make it for him and then his mom and now me (with my slightly tweaked version to help thicken the gravy more).


    February Part Deux:  Ham, Cheese, and Green Pepper Pretzel Bites


    There's something about bite-sized treats that make them extra irresistable.  I served these with a homemade honey mustard dipping sauce and my family gobbled them right up.  This post is also special because it marked my 100th one!


    February Part Trois: Chocolate Chip Cookie Dough Truffles


    Everytime I make these things it makes people go gaga over them.  Perhaps it is the bite-sized nature of them that we talked about above?  Chris practically begs me to make them and many ladies at the Cincinnati Nest/Bump Cookie Exchange this year felt they were the best of the bunch which was quite flattering.  The best part?  They're eggless.  Cookie dough lovers rejoice and have no fear of samonella!


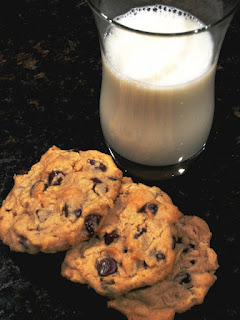
    March: Peanut Butter-Oatmeal Chocolate Chip Cookies


    Do I really need to explain this one because the title really says it all.  Three classically delicious cookies rolled into one and it has stolen my heart.


    April: Berry Buttermilk Cake


    I know it doesn't look like much in this picture but this one was so good that I made it two weeks in a row.  And, my co-worker Beth told me she made it about five times.  Bonus: Great way to use up the ubiquitous leftover buttermilk!  (Psst, need more leftover buttermilk recipe ideas?  Checkout my buttermilk tag.)


    June: Firecracker Shrimp


    Why I only made this once I am not sure.  This was so easy and so delicious!  Can't wait for grilling season to begin again.  Either that or I'm about to invest in a cast iron grill pan...


    July: Fajitas


    If you need to add a good fajita recipe to your arsenal look no further than this one.  Hasta la vista Don Pablo's (or [insert the name of your favorite local Mexican restaurant here]).


    July Part Deux: Cinnamon Chocolate Chip Sour Cream Coffee Cake


    A contender for my favorite coffee cake of all time.  (The other one would be one that my Mom used to make called Walnut Wonder Cake...mmm).


    October: Who Loves Ya Babyback?


    First - whoa did you see that jump from July to October?  I call that the lost quarter of blogging.  Sorry about that...

    Back to this recipe.  Not your standard ribs slathered in BBQ sauce nor a dry rub.  It's something even more impressive and delicious.  Better yet, it's easier than I imagined ribs could be.


    December: Island Spice Pork (Tender)loin


    Add this to your "good enough for compnay" list.  Bursting with flavor like you've been slaving in the kitchen all day but only you'll know how simple it truly is to prepare.


    December Part Deux: Linguine with Clam Sauce


    Maybe it's just because this is one of the last things of 2010 that I made or it could be the fact that this was so simple to make.  I will for sure be making this lots in the future and sorry Maggiano's but this is yet one more thing that I can now make at home.


    Alright so technically we're done reviewing 12 Personal Favorites from 2010.  But, because I love my readers so much I'm throwing in a couple bonuses.  One to represent each of the men in my life.

    Chris' Pick - Peanut Butter-Fudge Cheesecake


    No big surprise that this is his favorite dish from 2010.  And this is exactly why I chose this recipe for his birthday.  Chris has requested that this be his birthday cake each and every year from here on out.

    Toby's Pick - Chicken and Cheddar Dog Treats


    OK so Toby didn't *really* pick this recipe but it is the only one that I posted in 2010 that was especially for him and I think this picture is just precious.  Say it with me now...awwww!  This year maybe I'll make him more treats.  Anyone have any good dog-friendly recipes to share?


    And that's a wrap.  Over and out!

    Tuesday, December 14, 2010

    Linguine with Clam Sauce

    This steamy bowl of pasta will comfort you on the coldest of winter days.  It's easy AND elegant.  I almost have to laugh at myself for being intimidated by making a clam sauce at home.  There was nothing hard about this.  And canned clams?  A bit pricey but surely easier and cheaper than fresh and I couldn't tell a difference.  I guess if you wanted to make the presentation more impressive you could put a few fresh steamed clams in the dish.  It took minutes to cook and was restaurant quality.  Watchout, Maggiano's and Bravo, you may be my favorite Italian restaurants now but I might not need you anymore soon ;).

    I personally added a touch of white wine to my sauce because I feel like that's a standard ingredient in most white clam sauces?  If you'd rather you can leave it out and I'm sure it will still taste fantastic.  I also added some dried basil because what Italian dish doesn't need some basil??  Oh, and I used spaghetti because my store was out of linguine.  How that's possible I don't know...

    By the way, I thought this dish tasted EVEN BETTER the next day when I reheated it in the microwave for lunch.  Crazy, I know.

    One Year Ago: Cincinnati Style Chili, Chinese Chicken Corn Soup, and Spicy Rapid Roast Chicken

    Linguine with Clam Sauce
    Printer-Friendly Version


    Ingredients:
    • 12 oz. linguine pasta
    • 2 Tbsp. extra-virgin olive oil
    • 2 Tbsp. unsalted butter
    • 2-3 cloves garlic, minced
    • 2 (6.5 oz) cans minced clams, juices reserved
    • 1/4 cup dry white wine (optional)
    • ½ cup heavy cream (or half-and-half)
    • ½ tsp dried basil
    • Salt and pepper
    • Grated Parmesan and fresh parsley, for serving
    Directions:
    1. Bring a large pot of salted water to boil. Cook pasta according to the package directions until al dente. Drain well.
    2. Meanwhile, in a large skillet or saucepan, heat the olive oil and butter over medium-high heat until the butter is completely melted. Add the garlic to the pan and sauté until golden and fragrant, about 1 minute. Add the reserved clam juice and if desired, dry white wine to the pan, bring to a simmer, and reduce by about half. With the heat on medium-low, stir in the clams, heavy cream, and basil. Season the sauce to taste with salt and pepper.
    3. Portion the pasta into serving bowls. Spoon some of the sauce over the pasta and top with grated Parmesan and parsley, if desired. Serve immediately.
    Source: Very slightly modified from Annie's Eats originally from The Frugal Gourmet Cooks with Wine by Jeff Smith

    Monday, June 21, 2010

    Firecracker Shrimp

    Quick.  Run!  Make this for your graduation party, your Fourth of July party, your random summer grill-out parties, and (*sniff*) your end of summer Labor Day party, too.  But wait, why am I talking about the END of Summer when today it has officially just begun?!  They're sure to be the hit of the party.  This recipe is SO AWESOME that even though I am backlogged on posting recipes from May (finally got through April with that last Orange Berry Muffin recipe!) I just had to share this one with you.

    Watch out, they're fiery little guys.  A mini explosion of fire inside of your mouth!  The beauty of this recipe is it is ridiculously easy to make.  Very few ingredients involved and fast cooking.  Watch the shrimp carefully so that they're not overdone.  You want them pink, opaque, and slightly charred but a couple of minutes on the grill is all it takes.  Good thing, too, because you'll be downing these shrimps like snacks.  Oh, and don't forget the water to quench your thirst!

    Oh, and another thing.  Use the Sriracha hot sauce.  It really is THE BEST hot sauce in the world.  It's commonly used in Asian cooking and so you can usually find it in the Asian section of your local grocery store.  It's a clear bottle with red chili sauce inside and a green cap.  The easiest identifier is the rooster depicted on the front.  If you don't already have some, go buy some!  You won't regret it and it's totally versatile.  I put that s*** on everything!  Oh wait...that's supposed to be Frank's Red Hot.  But really, this is better...and I do put it on pretty much everything (lo mein, pizza, chili, etc.!).  It's sweet AND spicy.  Winning combination!

    I served this one as a side dish for our Father's Day meal.  Kudos to Chris for grilling this one up all nice and yummy!  All I did was marinate them :).  Lots more delicious recipes on that one to come.  I was excited that there wasn't a single bad dish in that meal.  But this one, this is a keeper for sure.  Enjoy!

    One Year Ago: Chicken Gyros with Tzatziki Sauce and Pasta Salad

    Firecracker Shrimp

    Firecracker Shrimp


    Ingredients
    • 1 pound large (16 to 20 count) shrimp, peeled and deveined.
    • 2 tablespoons hot chili sauce (Sriracha is the best!)
    • 2 tablespoons olive oil
    • 1/4 teaspoon salt
    • 2 teaspoons sugar
    • 4 to 5 cloves garlic, pressed
    Directions
    1. Combine all ingredients in a large Ziploc bag, then add shrimp and marinate for 20 minutes to 2 hours.
    2. Skewer shrimp and grill until opaque and with black bits (couple minutes ought to do it!).
    3. Serve hot with lots of cold drinks handy!
    Source: The Pioneer Woman

    Tuesday, February 23, 2010

    Red Lobster's Parmesan Crusted Tilapia

    This recipe comes straight from the Red Lobster's website.  I actually wanted to make their Fish in a Bag because that's my favorite meal there but ended up feeling that was too complex for a week night.  It was extremely simple to put together and a perfect dinner during Lent.  It's so good and easy it's worth considering adding this to your regular meal rotation because we all know we should add more lean protein like fish to our diets :).  I intended to also try the Red Lobster Copycat Cheese Biscuit Recipe from Jes' blog but got too lazy that night.  Maybe next time...

    I halved the recipe for the two of us but will leave the original recipe for 4 intact. I ended up using those individually wrapped tilapia filets that you can get at like Kroger and then brushed each with a thick coat of alfredo and then sprinkled some bread crumbs, parmesan, and parsley on top instead of pre-mixing them in a bowl.  I figured it would taste the same and was much easier :).  The bread crumbs give it a nice crunch to an otherwise tender and flaky fish but without the whole frying thing (which, I think we established in the Pretzel Chicken Tenders post I just prefer to avoid...).  Sadly, I didn't have any panko on hand and settled for the regular italian seasoned bread crumbs that I had.  I know it would have been a million times better with panko.

    I chose to use my Quick and Easy Alfredo Sauce (leftover from when I made Pasta Bravo) as the sauce for the fish and pasta for simplicity but you can always use the recipe supplied here.  Again, multiple sauce use makes life easier!

    Need more ideas for Lent?  There are many meals on my blog with which you can subsitute meat choices (ex: Chicken Lo Mein or Fried Rice but with shrimp instead of other meats).  I also found there to be plenty of delicious looking recipes on Red Lobster's Recipe Files (amazing that they can share so many of what you'd think are top secret recipes!). 

    You can also try one of these seafood recipes from my blog:
    Parmesan Crusted Tilapia
    Printer-Friendly Version


    Yields: 4 Servings

    Ingredients:
    • 4 ea 5-6 oz Tilapia Fillets
    • Non-stick Cooking Spray
    • ½ lb. Linguini, cooked
    For the Parmesan Crust:
    • ½ cup Panko Bread Crumbs
    • ½ cup Parmesan Cheese, pre-shredded
    For the Parmesan Base:
    • ½ cup Parmesan Cheese, pre-shredded
    • 1 Tbsp. Parsley, dried
    • 10 oz Prepared Refrigerated Alfredo Sauce
    For the Parmesan Cream Sauce: (used Quick and Easy Alfredo, instead)
    • 1.2 Tbsp. Fresh Basil, Chopped
    • 2.¼ cup Chablis or Chardonnay Wine, optional
    • 3.¼ cup Half and Half
    Directions
    1. Preheat oven to 425 degrees.
    2. Spray a 9X13 baking dish with Non-stick Cooking Spray. Place the 4 Tilapia fillets in the dish and set aside.
    3. In a small bowl, mix the Panko bread crumbs and ½ cup Parmesan cheese to make the crust for the topping. Set aside.
    4. To assemble the Parmesan Base, place ½ cup Parmesan cheese, 1 Tbsp. parsley and the prepared Alfredo sauce in a medium bowl and stir well. Remove ½ cup of the mixture (reserving the rest to make the Parmesan Cream Sauce) and brush onto the 4 pieces of Tilapia, making a thick, even covering on the fish. Evenly sprinkle the Parmesan Crust on top of the fish. Bake on the top shelf of the oven for 15-20 minutes or until fish reaches 140-150 degrees and the crust is golden brown.
    5. Meanwhile while the fish is baking, make the Parmesan Cream sauce if desired for using on pasta. Place the remaining Parmesan Base in a medium sauce pan, add the fresh Basil, Wine, and Half and Half and heat over medium heat until the sauce is simmering, stirring often.
    6. Toss the Parmesan Cream Sauce (or other prepared alfredo sauce) and the Linguini together and serve with the Parmesan Crusted Tilapia. Sprinkle with additional Parmesan cheese if desired.
    Source: Red Lobster