Showing posts with label cookies. Show all posts

Thursday, February 6, 2014

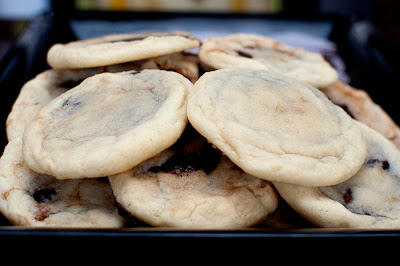
Vanilla Cookies with Nutella Filling

I missed World Nutella Day yesterday.  Doh!

I also have had this recipe saved since *2012* specifically to post on the next World Nutella Day.  But dang, apparently I need a reminder on my phone or something to help me remember when it comes around each year!  So instead of making you wait yet another year for sharing this recipe, I'm sharing it a day late.  Because better late than never, right?

Brace yourself for surprise smooth nutella goodness enveloped in a vanilla cookie...yum!

Vanilla Cookies with Nutella Filling


Ingredients
  • ½ cup (220g) nutella (I used homemade nutella!)
  • 10 Tbsp. (140g) unsalted butter, softened 
  • 1 cup (220g) granulated sugar 
  • 1 large egg 
  • ½ tsp. vanilla extract 
  • 2 cup (250g) all-purpose flour 
  • ½ tsp. baking soda 
  • ½ tsp. salt
Directions

  1. Line a small baking sheet with wax paper or silicone baking mat
  2. Transfer the nutella to a small plastic bag. Cut off one corner of the plastic bag and gently squeeze the nutella out onto the wax paper or baking mat into 24 evenly-sized chips. Place the baking sheet in the freezer until the nutella is firm, about 30 minutes. 
  3. Preheat the oven to 350 F. Grease a baking sheet with butter, cooking spray, or line with another silicone baking mat. 
  4. Beat the butter and sugar together until light and fluffy. Add the egg and vanilla and beat well. Add the flour, baking soda, and salt and stir with a spoon until fully incorporated. Divide the dough into 24 even balls and flatten each into a disk. 
  5. Remove the frozen nutella chips from the freezer. Working quickly, press each chip into one ball of dough and roll the dough into a ball around the nutella. Place the cookie dough balls 3 inches apart on the prepared baking sheet. 
  6. Bake, just until the edges start to turn slightly golden, 6-8 minutes (keep an eye on them towards the end – do NOT overbake these). Allow cookies to cool on the baking sheet for 5 minutes before transferring to a cooling rack.

Source: Slightly modified from Inquiring Chef

Monday, January 20, 2014

SRC: S'mores Bites (Dairy-Free/Vegan)

It's a somewhat sad day for me because this is my last Secret Recipe Club.  After being a part of this group for a few years now I've decided that I needed to step away from it all.  I simply don't have the time to dedicate to creating things on a set schedule and commenting on others' posts like I used to.

For my final assignment I am honored to have my fellow Cincinnati blogging friend Desi of SteakNPotatoesKindaGurl.  We "met" through this club.  Though we live in the same city, we have never actually met in person.  She did, however, contribute a beautiful guest post of Grilled Filet with Bourbon Butter to my blog when I was on vacation.  If I learned anything about Desi it's that the girl LOVES bacon.  So when I went to choosing a recipe, I thought I'd make something with bacon in it.  Then I took a completely different direction when I saw her post for one of her other loves...s'mores.  I considered throwing some bacon crumbles in with the chocolate center and/or on top as a garnish as a tribute but tried to stay true to the recipe ;).

Many of you know that I've gone dairy-free for my son who is nursing and I suspect to be sensitive to it.  Since I could customized the cookies, I made mine dairy-free while using regular Hershey milk-chocolate for my husband's cookies.  I tried to make some substitutions of coconut oil instead of butter and dark chocolate instead of milk to keep it dairy-free (and vegan for that matter!).  Finding graham cracker crumbs that were dairy-free was also surprisingly challenging.  I usually buy store brand to save a few bucks but the store brand and most national brands for that matter had dairy in them.  Boo!  The only dairy-free graham crackers I could find were Nabisco Honey Maid.

The taste was awesome.  I actually loved the not-so-subtle coconut flavor.  It kind of reminded me of my favorite Girl Scout Cookie, samoas...which, I also can't eat right now.  Sad face.  The only problem was that my cookie crust was too crumbly and totally didn't hold together right on removal.  I'm not sure if substituting my coconut oil 1:1 for butter was the issue or if I just didn't bake it long enough.  Still experimenting with this whole dairy-free baking thing.  The fact that my cookie crumbled didn't stop me from enjoying these little s'mores bites straight out of the pan with a spoon ;).  Don't judge.

As I say goodbye to my SRC friends I want to thank you all for being awesome and for helping me to discover your wondering blogs.  And of course a special shout out to our hostess, Debbi.  I hope that you all will continue to follow me even as I leave the club...and probably post less frequently.

On an unrelated note...have you entered my Wildtree giveaway??

S'mores Bites (Dairy-Free/Vegan)


Ingredients
Directions
  1. Preheat oven to 350°F.  
  2. If using whole graham crackers, place inside a ziplock bag and then crush with a rolling pin.  Combine graham cracker crumbs, sugar, and melted coconut oil into a bowl. 
  3. Divide crumb mixture into each cup of a 24 cup mini muffin pan. Press crumbs to form shallow cups.
  4. Bake for 4-5 minutes or until edges are bubbling. 
  5. Meanwhile, break two of the candy bars into rectangles. Break the rectangles in half. 
  6. Remove pan from oven; place 2 rectangle halves into each cup. Place one marshmallow half, cut-side down, into each cup. Return to oven for 3 minutes or until marshmallows are just slightly softened.  If desired, flip on the broiler to lightly toast the tops.  Watch them carefully because they burn quickly!  
  7. Using remaining candy bars, break into rectangles and top each marshmallow with a piece of chocolate.
  8. Cool on a cooling rack for 15 minutes before carefully removing cups from pan. Cool completely on wire rack.
Source: Modified from SteakNPotatoesKindaGurl

Thursday, October 10, 2013

Chewy Butterfinger Cookies

See the giant chunks of Crispity Crunchity Butterfinger Goodness in the photo below?  They were apparently too much for my body to handle.  These will forever be known as "Labor Cookies" thanks to my friend Scott.  Literally the same night that I made and ate (probably too many of) these cookies, I went into labor after going nearly two weeks post-date.  My camera went from taking glamour food photos like this...


To the next photo of my son wailing while getting his first bath at home.  To say our lives changed in a blink is an understatement...


Yep...he really hated bath time in that infant tub.  It caused my husband and I much distress and we dreaded bath days.  The only upside was that he was so tired afterward that he would often sleep through the night (7 straight hours!).  But as for the bath thing, thankfully some mommies on my local message board suggested using the regular tub and getting in with him.  He seems to like this much better.

I digress.  You're here for the Labor Cookies.  I mean, Chewy Butterfinger Cookies.  For those that are currently pregnant, fear not for these cookies will not induce labor.  That is, unless you want them to.  Then it can't hurt to try.  But no, really.  There's no medical reason that these will do anything to you other than spike your blood glucose and make your mouth and tummy feel really happy.

This is a quick and delicious way to use up those candy bars that you'll get at Halloween.  Or...on clearance after Halloween.  Or heck, for those Butterfingers that you have just because they're delicious.

Maybe my son would like some Lactation Cookies, next...

Chewy Butterfinger Cookies


Yield: About 2.5 dozen cookies

Ingredients
  • 1 and 3/4 cups all-purpose flour 
  • 3/4 teaspoon baking soda 
  • 1/4 teaspoon salt 
  • 3/4 cup granulated sugar 
  • 1/2 cup (1 stick) salted butter, softened 
  • 1 large egg
  • 8 fun sized (or 2 King sized) Butterfinger candy bars, chopped
Directions
  1. Preheat oven to 375F degrees.
  2. Combine flour, baking soda, and salt in small bowl and set aside. 
  3. With an electric mixer, beat together sugar and butter until creamy. Beat in egg until just combined. Gradually add in flour mixture. Gently stir in Butterfinger pieces. The dough will be very thick  (if it's too dry and crumbly you can add an extra egg). Drop by slightly rounded tablespoonfuls onto ungreased baking sheet (or for a perfect shape use my favorite cookie tool...a Medium OXO Cookie Scoop).
  4. Bake for 10-12 minutes or until lightly browned. Allow to cool and enjoy!
Source: Sally's Baking Addiction

Friday, May 24, 2013

Recipe Swap: Peanut Butter Pudding Cookies

Today's What's Cooking Recipe Swap recipe comes from Coleen at The Redhead Baker.  While I'm familiar with her blog, I'm not sure that I've actually made anything from it before because I make far more savory recipes than sweet.  But, as you'd expect from her blog title, there were more sweet treats than not and so that's where I started with my Blogger's Choice assignment.

Even though it has peanut butter in it, for once IT WASN'T MY HUSBAND THAT PICKED THIS RECIPE!  I did.  What drew me to this particular recipe was the use of pudding in the cookie.  Many many years ago when I was in Girl Scoots (Troop #2180 represent!) I remember one of the mom's brought in a chocolate chip cookie that was the absolute softest and puffiest that I ever had.  She shared that the secret ingredient was pudding but I no longer have this recipe.  Another draw for me was the Reese's Pieces.  Friendly's clown ice cream sundaes, anyone?  And unlike Coleen, I peanut M&Ms are one of my favorites so back into the recipe they went.

The name does not do this recipe justice.  It really should be called something like Peanut Butter Candy Explosion Pudding Cookies or something because every bite is chock full of goodies.  My co-worker asked if I was trying to clear the pantry and I told her nope, just an excuse to BUY all sorts of candy ;).

It was a hit in my house but the peanut butter loving husband said that flavor was not prominent enough.  I suggested to him that next time I could use peanut butter pudding mix instead to help boost that flavor profile.  I brought some to my birthing class and it has the stamp of approval of pregnant mommies and daddies to be.  Everyone loved these so thank you Coleen (and Kate)!

Thank you also to Sarah at A Taste of Home Cooking for hosting.  Check out the blog hop to see what everyone else chose as their assignment!

Peanut Butter Pudding Cookies


Peanut Butter Pudding Cookies

Yields: About 3 dozen cookies (I got closer to 4 when using my 1.5 Tbsp cookie scoop)

Ingredients
  • ¾ cup butter, softened 
  • ½ cup creamy peanut butter 
  • ½ cup sugar 
  • ½ cup light brown sugar 
  • 2 large eggs
  • 1 tbsp honey 
  • 1 tsp vanilla extract 
  • 2 ¼ cups all-purpose flour 
  • 1 tsp baking soda 
  • ½ tsp salt 
  • 1 small box (3.4 ounces) instant vanilla pudding 
  • 1 cup chocolate chips 
  • 1 cup Peanut M&Ms 
  • 1 cup Reese’s Pieces
Directions
  1. Preheat oven to 350 degrees and line two sheet pans with parchment paper (I like to use these reusable silicone baking mats). 
  2. In a stand mixer, cream together the butter, peanut butter, sugar and brown sugar. Add in the eggs, honey and vanilla extract and beat again until incorporated. 
  3. In a separate mixing bowl, stir together the flour, baking soda, salt and pudding mix. Gradually add to the cookie dough, mixing on low speed just until incorporated. 
  4. Stir in the chocolate chips, peanut M&Ms, and Reese’s Pieces. 
  5. Drop by the tablespoonful two inches apart onto the sheet pans. (Make your life easier and cookies more uniform by investing in one of these medium sized Oxo cookie scoops!) Bake for 10 to 12 minutes. Allow the cookies to cool on the pans for 3 to 4 minutes, then remove to a cooling rack to cool completely.
Source: Kate's Recipe Box as seen on The Redhead Baker


Friday, May 3, 2013

Chocolate Chip Peanut Butter Cookie Cake

Behold!  Another deliciously sinful dessert baked courtesy of my husband and photography courtesy of me (I had to redo the photo shoot as I was not satisfied with his initial photos...).

Every time we go grocery shopping and he passes the bakery section he drools over the cookie cakes.  He swore to make one at home.  The only problem was that as a family of two (okay..maybe 2.5 right now with Baby Boy on the way!), we really don't need a giant cookie to eat by ourselves.  So, when the opportunity finally arose when we had our Restaurant Copy-Cats themed Dinner Club he jumped on it with this IMPROVED cookie cake.

Why is it improved, you ask?  Just take a deeper look into this picture...

Chocolate-Chip Peanut Butter Cookie Cake Slice

It starts with not just a regular chocolate chip cookie but rather one in which the cookie dough is infused with peanut butter (of course!).  The use of a springform pan results in a thick cookie that is crunchy on the outside and soft and even a bit gooey on the inside.  But it doesn't stop there.  It's enveloped in a layer of fluffy peanut butter frosting and then finished with peanut butter cups held in place by a rich dark chocolate ganache.  Excessive?  Probably.  Delicious?  Yes.

Chris was in a hurry and so he skipped the chilling step of the ganache before piping.  This resulted in a sloppier than desired execution of the peanut butter cup decorations which ended up sliding towards the dip in the center of the cake.  He deemed it "not good enough to serve for dinner club" and considered keeping it hidden away in the refrigerator.  I'm pretty sure had he done that our guests would have revolted.

Happy Friday and have a wonderful weekend!

Two Years Ago: Celebrate Cinco de Mayo with Guacamole, Spicy Lime and Honey Wings, Shrimpo de Gallo, and Tres Leches Cake
Four Years Ago:  Blonde Brownies and Avocado, Tomato and Mango Salsa

Chocolate Chip Peanut Butter Cookie Cake

Chocolate-Chip Peanut Butter Cookie Cake
Ingredients
For the Cake
  • 1/2 cup (115g) unsalted butter, softened
  • 1/2 cup (110g) light brown sugar, packed
  • 1/2 cup (100g) sugar
  • 1/2 cup creamy peanut butter
  • 2 large eggs
  • 1 tsp. vanilla extract
  • 1 3/4 cup (220g) all-purpose flour
  • 1 tsp. baking soda
  • 1/2 tsp. salt
  • 1 cup milk chocolate chips
For the Peanut Butter Frosting
  • 1 cup (225g) unsalted butter, at room temperature
  • 3/4 cup creamy peanut butter
  • 1 1/4 cups (150g) powdered sugar (plus up to 1/4 cup more, if needed)
For the Dark Chocolate Ganache
  • 6 oz. (170g) dark chocolate (50% cocoa), roughly chopped
  • 1/3 cup whipping cream
For Topping:
  • 12 Mini Reese’s Peanut Butter Cups
Directions
  1. Preheat oven to 350 degrees. F. Grease a 9-inch springform pan with butter.
  2. In a large mixing bowl using an electric mixer beat together the butter, both sugars, and peanut butter until light and fluffy. Add the eggs and vanilla and beat untilcombined. 
  3. In a small bowl, combine the flour, baking soda, and salt. Add the dry ingredients the wet ones and mix on low until combined. Stir in the chocolate chips. Transfer to the prepared springform pan.
  4. Bake for about 24-26 minutes or until a knife inserted in the center comes out clean. Allow to cool at room temperature.
  5. Make the Peanut Butter Frosting: Using a mixer, beat together the butter and peanut butter until light and fluffy. Add 1 1/4 cups powdered sugar to the bowl and mix in by starting on low and then increasing the mixer speed to high as it gradually becomes incorporated. If needed, add up to another 1/4 cup powdered sugar to bring the frosting to a spreadable consistency. Frost the tops and sides of the cooled cookie cake.
  6. Make the Dark Chocolate Ganache: In a small saucepan over low heat melt the dark chocolate. Remove the pan from the heat and whisk in the whipping cream.  Put the ganache in the refrigerator for about 15 minutes to chill so that it will be easier to pipe onto the cake.  Transfer ganache to an icing bag fitted with a wide frosting tip (or just use a plastic bag with one corner cut off). Pipe 12 evenly spaced dots of chocolate frosting around the edge of the frosted cake.  Top each dot of ganache with one mini peanut butter cup. 
  7. Serve cake immediately or chill until ready to serve.
Source: Barely modified from Inquiring Chef

Friday, November 30, 2012

Recipe Swap: Double Chocolate Cookies with Peppermint Patty Surprise

It's time for my favorite theme of WC Recipe Swap...Blogger's Choice!

I was very tempted to make Char Siu off of Kate's Recipe Box since it's something I felt every good Asian person should try to make at home sometime.  But, in the end the Holiday Bug took over and I decided I'd rather do something more seasonably festive.

These cookies look quite plain on the outside but inside a peppermint patty surprise is hiding and waiting to be unwrapped and discovered.  When you go to mold the cookie, do make sure to seal it well or the surprise will be revealed and melted out.  Kate left her cookies completely naked but I thought they could use a little holiday sparkle so I rolled them in sugar before baking.  It wasn't until later that I realized the original recipe from Rachael Ray actually called for a white chocolate drizzle and crushed candy canes.  The photos I saw from other blogs were SUPER CUTE and FESTIVE!  Another difference in Kate's recipe is that the peppermint patties and molded cookies weren't chilled.  I'd recommend doing this so the cookies stay thick and don't spread so much.

I brought some into work and they were a crowd pleaser.  It reminded me of a thin mint but soft and with a creamier interior.  By the end of the day I had THREE co-workers asking me for the recipe and telling me they were stalking my blog for it to be posted.  Definitely add this to your Christmas cookie plate!

Thank you Kate for sharing and Sarah at Taste of Home Cooking for hosting.

One Year Ago: Tex-Mex Meatloaf with Chipotle-Tomato Glaze and Emily's guest post for General Tso's Chicken
Three Years Ago: It was clearly Thanksgiving time because I shared tons of different posts!  Sweet Bacon Wrapped Pork Loin, Baked Mac and Cheese (from Pioneer Woman), Pumpkin Fluff Dip, and Broccoli Salad

Double Chocolate Cookies with Peppermint Patty Surprise


Double Chocolate Cookies with Peppermint Patty Surprise

Yields: 2 dozen cookies

Ingredients
  • 1 1/2 cups flour 
  • 1/2 cup unsweetened cocoa powder 
  • 1/2 cup granulated sugar 
  • 1/4 cup light brown sugar 
  • 1 teaspoon salt 
  • 1/2 teaspoon baking soda 
  • 1 1/2 sticks (6 oz.) unsalted butter, slightly softened 
  • 1 egg 
  • 24 miniature (about 1 1/2-inch) peppermint patties, such as York, unwrapped and chilled 
Optional for decorating:
  • Granulated sugar
  • 6 ounces white chocolate (not chips), chopped 
  • Peppermint candy canes or candies, crushed or finely chopped
Directions
  1. Using an electric mixer, beat the flour, cocoa powder, sugars, salt and baking soda on low speed. Beat in butter, then the egg.   It will be crumbly but don't worry, it all works out when the heat of your hands makes the dough soft and pliable during molding.  Turn the dough onto a large piece of plastic wrap and flatted into a disk; seal. Refrigerate until firm, about 1 hour. 
  2.  Preheat oven to 350F degrees. Like 2 large cookie sheets with parchment. Working with 1 tablespoon of dough at a time (highly recommend the medium sized Oxo Cookie Scoop to make this task a breeze!) , evenly encase each peppermint patty with dough. If desired, roll each cookie with granulated sugar.  For a cookie that doesn't spread as much, chill in the refrigerator.  Bake until just firm to the touch, about 15 minutes. Remove pans from the oven and let cool slightly on the pan (until anything that oozed out sets and is firm enough so it won't explode when you move it!). Transfer the cookies on the parchment to a rack to cool completely. 
  3. If decorating with white chocolate and candy canes: Meanwhile, in a double broiler or small, heatproof bowl, set over a small saucepan of simmering water, melt half of the white chocolate, stirring until melted.  Remove from the heat and stir in the remaining white chocolate until smooth.  Drizzle the white chocolate over the cookies.  Immediately sprinkle with crushed peppermint candies.  Let set completely before serving or storing.
Source: Every Day with Rachael Ray, December 2011 as seen on Kate's Recipe Box

Monday, October 29, 2012

Peanut Butter, Banana, and Nutella Bars

Sorry, I missed my posting on Friday.  Did anyone even notice?  Good.  Anyhow, remember months ago when I made Homemade Nutella?  I had so much of it that I hardly knew what to do with it all so began to collect recipes to help use up my stash.

Can you guess who picked this particular recipe?  I'll give you a hint: peanut butter.  That'd be my husband.  Although, I have to admit that lately, I've been digging his signature flavor, too.  The banana made these bars ultra moist and the flavor combination of peanut butter, banana, and chocolate is classic.

One Year Ago: Apple Cider Butter and Shrimp with Green Apple Chipotle Salsa
Three Years Ago: Turkey Bean Pumpkin Chili

Peanut Butter, Banana, and Nutella Bars


Peanut Butter, Banana, and Nutella Bars
Photo Credit: Emily H.
Ingredients

  • 6 Tbsp butter, melted
  • 1 cup dark brown sugar
  • 1 egg
  • 1 tsp vanilla extract
  • 1/4 tsp salt
  • 1 cup flour
  • 1/2 cup mashed bananas (about 1 banana)
  • 1/2 cup creamy peanut butter
  • 1/2 cup chopped hazelnuts
  • 1/4 cup Nutella chocolate hazelnut spread (I used my homemade Nutella!)

Directions

  1. Preheat oven to 350 degrees F.  Butter an 8x8 pan and set aside.
  2. Mix melted butter with brown sugar and beat until smooth.  Beat in egg and then vanilla.  Add salt and stir in flour.  Mix in bananas, peanut butter, and hazelnuts.  Pour into prepared pan.
  3. Melt the Nutella in the microwave for about 10-15 seconds.  Drop by the spoonfuls over the batter and then swirl with a knife.
  4. Bake for 20-25 minutes or until set in the middle.  Cool on a wire rack before cutting.

Source: The Spiffy Cookie

Friday, September 14, 2012

Guest Post by Jenna's Cooking Journey: Oatmeal Caramelitas

Today I'm happy to share with you a blogger from a local online cooking community that I participate in, What's Cooking?.  I love how vibrant the community is and there are people on there from novices to the food blog famous.  Each day, everyone shares the recipes that they've created.  It is also how I came to become part of the Recipe Swap.

Jenna and I both started cooking about the same stage in our lives - when we were in college and therefore needing to be able to provide sustenance for ourselves.  She, again like me, shares a variety of foods on her blog - mostly savory (such as this Breakfast Grilled Cheese that I think would be delicious...any excuse to eat grilled cheese all times of day!) with a sprinkling of sweet (such as Better than Sex Cake - my mother-in-law introduced me to this dessert...it is pretty darn amazing! and S'mores Brownies).

Please check out the rest of Jenna's blog at Jenna’s Cooking Journey!

Three Years Ago: Sausage, Onion, and Green Pepper Fra Diavolo

-----------------------------------------------------------------------------

When Christine asked for people to guest post on her blog, I jumped at it. I still feel pretty new to blogging (about a year and a half), and have only done one guest post, so I thought it would be fun.

I got into cooking in college, but really started cooking when I met my husband. I love finding new recipes and challenging both of us to try new things. Please drop by my blog Jenna’s Cooking Journey to check out my posts.

These bars are absolutely delicious. It was hard for me to send these bars into my husband’s office because I wanted to keep them all for myself. The bars are a little crumbly, so they definitely have to be paired with a napkin or a plate, but the chocolate and caramel center is so good that you forget about the crumbles going everywhere.


Oatmeal Caramelitas

Ingredients
  • 2 cups all-purpose flour
  • 1 teaspoon baking soda
  • ½ teaspoon salt
  • 2 sticks of butter (1 cup), at room temperature
  • 1 ½ cups light brown sugar, packed
  • 2 cups Quick-Cooking Oats
  • 1 (14-ounce) bag Kraft soft caramel candies (about 50), unwrapped
  • ½ cup evaporated milk
  • 1 ½ cups semi-sweet chocolate chips
Directions
  1. Preheat the oven to 350°F. Grease a 9 by 13-inch baking dish (or use nonstick baking spray).
  2. In a large bowl, whisk together the flour, baking soda, and salt. Set aside.
  3. Place the butter and brown sugar in the bowl of a stand mixer fitted with the paddle attachment and beat on medium speed until creamy.
  4. Slowly add the flour mixture and blend until incorporated. Use a wooden spoon or spatula to fold in the oats. The mixture will be crumbly.
  5. Transfer half (about 3 cups) of the mixture to the baking dish. Use your fingers to gently press and spread the mixture evenly on the bottom of the baking dish. Bake for 10 minutes to set.
  6. While the first layer is baking, place the caramels and milk in a small saucepan. Cook over medium-low heat, stirring constantly, until the caramels are melted. Remove from the heat and let cool slightly.
  7. Remove the crust from the oven. Sprinkle the chocolate chips evenly over the top. Carefully pour the caramel mixture on top of the chocolate chips, and spread evenly. Sprinkle the remaining crumb mixture over the top. Bake for 15 to 20 minutes, until lightly browned.
  8. Remove from the oven and let cool to room temperature. Then refrigerate for at least 2 hours, or until the bars are set. Cut into squares.

Friday, September 7, 2012

Recipe Swap: Oatmeal Lace Cookies

Time for another What's Cooking Recipe Swap and with it comes a pretty new badge (Thanks Coleen at Does Not Cook Well with Others for creating it!) and linky hop party (setup by our hostess Sarah at A Taste of Home Cooking) for instant theme browsing satisfaction!  How cool is that??

The theme for the week was desserts and given that my schedule has been crazy lately, I requested something simple.  Enter these cookies from Joanna at Newly Wed and Newly Cooking.  She's fairly new to cooking and blogging as her blog name would suggest.  In her notes accompanying the recipe, Joanna said it is an old family recipe that her mother or grandmother had found a number of years back.

I'm glad that she chose to share these with me because not only do they form a beautiful, delicate lacy pattern, but they're just plain addicting to eat.  This is a cookie like none other that I have tried!  Very unique!  They are extremely thin and crunchy...almost like a sugar candy.  The flavor is rich and buttery with a hint of chewiness and added nutty flavor from the oatmeal.  You could almost pop them in your mouth one after another as if they were potato chips...but don't do that unless you want to weight 10000 pounds!

I found that I preferred mine cooked only 5 minutes.  By the time they cooled enough on the pan to hold their shape, they got more toasty and caramelized than I'd like.  Some people might like this but I prefer a lighter colored cookie for the aesthetic value and still plenty of crunch.  Last but not least, this made A LOT of cookies...I think about 6 dozen.  So, to balk at temptation, feel free to halve the recipe.

I submitted the Macademia Lemon Bars and hope whoever received them enjoyed them as much as our guests and I did.  I'm pretty much drooling thinking about the buttery, tart goodness of that dessert...

One Year Ago: Swiss Chard Lasagna Florentine
Two Years Ago: Pineapple Teriyaki Chicken
Three Years Ago: Slow Cooker Pulled Pork

Oatmeal Lace Cookies


Oatmeal Lace Cookies

Ingredients
  • 1/2 cup sugar
  • 1/2 cup flour
  • pinch salt
  • 1/4 tsp baking powder
  • 1/2 c oats (not instant)
  • 2 Tbsp heavy cream
  • 2 Tbsp light corn syrup
  • 1/3 cup melted unsalted butter
  • 1 tsp vanilla extract (optional)
Directions
  1. Preheat oven to 375F.
  2. In a medium mixing bowl, sift together sugar, flour, salt, and baking powder.  Add the remaining ingredients and mix together until well blended.
  3. Using a 1/4 tsp measuring spoon, drop heaping spoonfuls about 4 inches apart onto ungreased baking sheets.
  4. Bake for 6-8 minutes until lightly browned.  (As stated above, I preferred 5 minutes)
  5. Let cool a few minutes before removing from baking sheets.
Source: Unknown as submitted by Newly Wed and Newly Cooking


Wednesday, August 22, 2012

S'mores Pizza with Graham Cracker Cookie Crust

S'mores seem to be all the craze these days and after posting a photo of this creation on my facebook page this weekend, Kathy and Whitney pretty much DEMANDED that this recipe be posted immediately.  But, since Monday was Secret Recipe Club reveal day for me, we compromised and settled for Wednesday to post this recipe.  That'd be today and what a lucky day it is for you since normally I wouldn't post so many dessert recipes so close together (in case you haven't noticed, I do mostly savory recipes)!

I think people are familiar with the concept of Fruit Pizzas and this is a similar idea but with all the flavors of S'mores.  Now, I've seen S'mores Pizza recipes on the internet before but they all seem to incorporate a chocolate chip cookie dough or regular pizza crust topped with graham crackers.  I've also seen homemade Graham Cracker recipes floating around, too.  So why oh why has nobody COMBINED the two recipes together yet so that the crust itself is a graham cracker cookie??  Or if someone has thought of this before, I haven't seen it.  Either way, let me feel special for feeling like I invited the idea ;).

I wasn't sure how much cookie dough I would need for the crust so I just went with an entire recipe worth.  I prefer a soft cookie with slightly crunchy exterior.  The cookie crust worked out perfectly for me as written - just like I had envisioned.  I'd venture to say it was about 1/4 inch thick after it was baked.  If you like your cookies really crunchy like a real graham cracker, perhaps use 1/2 - 3/4 of the dough, spread it thinner, and/or bake it longer....play with the idea and let me know what works since I haven't tested this myself!

I LOVED this dessert pizza.  I seriously went back for seconds...and then thirds.  We left the pizza outside in the sun while we played outside and this kept it nice and gooey...the best way to enjoy s'mores!  I was also amazed at how quickly the marshmallows toasted in the oven under the broiler (just 5 quick minutes!).  I might toast marshmallows this way just to eat.  Mmmm...gooey marshmallow centers with toasty outsides.  I'm salivating just thinking about this pizza.  Good thing we ate it all or I'd be going for fourths!

Enjoy, friends!

S'mores Pizza with Graham Cracker Cookie Crust


S'mores Pizza with Graham Cracker Cookie Crust
Wow iPhone photos are actually pretty good!  Natural lighting really is the key to a quality photo!  I only wish that I was able to take advantage of it more often but my day job usually gets in the way of that...
Ingredients

For the Graham Cracker Cookie Crust
  • 2 cups plus 2 Tablespoons (300g) all-purpose flour
  • 1/2 cup (75g) whole wheat flour or whole wheat pastry flour
  • 1 cup (176g) brown sugar, lightly packed
  • 1 teaspoon (6g) baking soda
  • 3/4 teaspoon (4g) kosher salt
  • 7 Tablespoons (100g) unsalted butter, cut into cubes and frozen (at least 20-30 minutes)
  • 1/3 cup (114g) mild-flavored honey
  • 5 Tablespoons (77g) milk, whole preferred
  • 2 Tablespoons vanilla extract
For Topping the Pizza
  • 1 cup bittersweet chocolate chips
  • 1 Hershey's milk chocolate candy bar, cut into bite sized pieces
  • 2 1/2 cups marshmallows (mini or regular sized cut into small pieces)
Directions
  1. Preheat oven to 350 degrees.  Cut a piece of parchment paper to fit a 14" round pizza pan.  Hint: I tore off a piece of parchment big enough to fit the pan then laid it on top of the pan and ran my fingernail around the inner edge of the pizza pan to get the correct size.  Then, I just cut along the crease marks!
  2. Make the graham cracker cookie dough crust, combine the flours, brown sugar, baking soda, and salt in the bowl of a food process fitted with the metal blade.  Pulse to blend.  Add in the butter, pulsing in short bursts until the mixture resembles coarse meal.  If you don't have a food processor, you can also use a mixer, pastry cutter, or in a real pinch - two forks.  
  3. In a liquid measuring cup, combine the honey, milk, and vanilla.  Whisk to blend.  Add the liquid to the bowl of the food processor and process just until the dough has come together.  The mixture will be fairly sticky.  
  4. Form the dough into a ball and press it into the prepared pizza pan.  It doesn't have to be perfectly even because the dough will spread as it bakes.  Bake for 18-23 minutes or until cookie is evenly browned and just crisped.  Remove from oven.  Switch your oven to the broiler and if necessary, move the rack to the highest position.
  5. Top the hot pizza with chocolate chips, chopped candy bar, and marshmallows.  Feel free to use more or less of each to suit your tastes.  Put the topped pizza back into the oven for about 5 minutes until marshmallows are toasted.  Watch carefully and take care not to burn it...mine honestly got a bit more toasty than I personally intended!
  6. Slice into pizza wedges and serve warm to enjoy.  If you're like me, serve outside in the summer sun so it stays gooey longer...that is, if it even lasts that long.  You're welcome!
Source: Inspired by Fake Ginger and Graham Cracker Cookie Crust from Annie's Eats
Friday, July 27, 2012

Recipe Swap: Magic in the Middles

This week's recipe swap was Blogger's Choice.  See the roundup at A Taste of Home Cooking.  I was assigned the blog Cookies on Friday.  I bet it comes as no surprise to you that Nicole, the voice behind this blog, primarily posts cookie recipes.  But, she doesn't just make or post them on Fridays :).  In fact, I was impressed that she has OVER 500 different types of cookies on her blog.  I didn't even know where to begin!  Somehow I narrowed it down to Peanut Butter Nutella Sandwich CookiesMomofuku's Compost Cookies (my cousin Laura's favorite!), and Magic in the Middles before letting my husband, the resident sweets connoisseur  make the final decision.  He believed in magic.

This cookie is basically a soft chocolate sugar cookie with a surprise peanut butter center.  Think of it as cookie stuffed with a buckeye candy filling.  Oh and as you can imagine, it is extra MAGICAL when you eat them warm from the oven or zapped in the microwave for a few seconds so that the filling gets nice and gooey.  *Drool*.  I'm embarrassed to say that I ate two of them straight from the pan.  I just couldn't help myself!  And this is exactly why we decided that sadly, the cookies had to go for the sake of our health and off to work they went.

To say my co-workers LOVED these cookies would be an understatement.  One had one for breakfast (yes cookies are the breakfasts of champions don't ya know?) and then subsequently came back throughout the day for two more, another messaged me and said they were "awesome!!!" (yep, it warranted 3 exclamation points), and one stopped by my desk after their cube neighbor "came back drooling" over the cookies.

Looks like my husband picked a winning recipe.  Thank you so much Nicole for sharing and can't wait to go back and try more cookies from your blog!

Magic in the Middles

Magic in the Middles

Ingredients

For the Chocolate Cookie Dough

  • 1-1/2 cups flour
  • ½ cup cocoa
  • ½ teaspoon baking soda
  • ¼ teaspoon salt
  • ½ cup sugar
  • ½ cup brown sugar, packed
  • ½ cup butter, softened
  • ¼ cup smooth peanut butter
  • 1 teaspoon vanilla
  • 1 egg
For the Filling

  • ¾ cup smooth peanut butter
  • ¾ cup powdered sugar
  • Additional sugar for dipping
Directions
  1. Preheat oven to 375 degrees. Line baking sheets with silicone baking mats.
  2. To make the filling, combine the peanut butter and powdered sugar in a small bowl. Shape the mixture into 26 level teaspoon-sized balls.  Put shaped peanut butter balls in refrigerator while you make and shape the chocolate dough.
  3. In a large bowl, mix flour, cocoa, baking soda and salt; Set aside. In a large mixer bowl, beat together sugars, butter, and peanut butter until light and fluffy. Add the vanilla and the egg and beat to combine. Add the dry ingredients and mix well.   Mixture should not be dry/crumbly.  If it is, add a small amount of milk to smooth it out (it will continue to dry as it sits).
  4. Shape the chocolate cookie dough into 26  level Tablespoon-sized balls. Make an indentation in the dough and press one of the peanut butter balls into the indentation. Mold the chocolate cookie dough around the peanut butter ball, sealing completely and rolling the dough back into a ball shape.  Do not worry if some peanut butter is showing...unless you're a perfectionist then by all means take the extra time and labor to make sure the peanut butter is totally secretive!  Repeat with the remaining dough and filling.
  5. Roll the dough balls in sugar and place on the prepared cookie sheet. Using a drinking glass, flatten the cookies to about ½ inch thick. Bake for 7-9 minutes, until they are set. Cool completely on a wire rack.
Source: King Arthur Flour Cookie Companion as seen on Cookies on Friday

Monday, April 23, 2012

Secret Recipe Club: Chocolate Chip Cookie Dough Stuffed Cinnamon Buns

Hi friends!  I have exciting news to share.  You may have noticed that I've been rather absent from my blog this year.  I've been busy, to say the least.  And so to help me get back to regularly blogging, I was accepted to and joined the Secret Recipe Club.  The idea is simple.  Each month, you are assigned a random blog and then you get to choose a recipe that you'd like to make from it.  On a prescribed day and time, everybody reveals what they've made!

I'm part of Angela's Group.  She's the hostess of Group C and the blogger behind Big Bear's Wife.  This month I was assigned Melissa's Cuisine and boy did things look tasty!  At first, I considered making Grilled Pizza since it's always something I've wanted to try but then I decided I'd use this opportunity to make something sweet instead.  Melissa's blog is FILLED with cinnamon rolls and so I knew that I'd have to try one out.  But the question was....Funfetti Cinnamon Rolls or Cookie Dough and Chocolate Stuffed Cinnamon Rolls?  I went with the latter, knowing one of my husband's absolute favorite desserts are the Chocolate Chip Cookie Dough Truffles that he often begs me to make.

I think that I was not supposed to have chocolate chips in my cookie dough stuffed cinnamon rolls now that I look back at Melissa's pictures so what I ended up with was a hybrid roll.  I don't buy margarine so I used something better...BUTTER!  Yum!  Also, lately in my cooking I've been trying to swap out some of the white flour with whole wheat.  Nutritionally I don't think it makes too much of a difference but psychologically it makes me feel better haha.  I also didn't reserve any cookie dough for the frosting (I was a bit overzealous in stuffing my rolls!) so I winged my own frosting by adding a bit of butter for well...buttery flavor.

Now, I knew that these cinnamon rolls would be rich but I had no idea of the sheer decadence that would explode in my mouth.  They were ADDICTING!  Chocolate chip cookie + cinnamon roll?  This is dessert for breakfast!  What's not to love?  I'm embarrassed to say that my husband and I each ate 3 in a single sitting.  Yup, good thing I added some whole wheat flour to the mix, huh? ;).

Chocolate Chip Cookie Dough Stuffed Cinnamon Rolls

Chocolate Chip Cookie Dough Stuffed Cinnamon Rolls

Ingredients

For the Ready to Eat Chocolate Chip Cookie Dough
  • 1/3 cup butter, softened
  • 1/2 cup brown sugar
  • 1/4 cup sugar
  • 3 Tablespoons milk
  • 1 teaspoon vanilla
  • 1 cup flour
  • 1 cup semisweet chocolate chips
For the Cinnamon Rolls:
  • 2 cups milk
  • 1/2 cup vegetable oil
  • 1/2 cup sugar
  • 1 packet yeast (2-1/4 teaspoons)
  • 4-1/2 cups flour (I used 1-1/2 cups whole wheat and 3 cups all purpose)
  • 1/2 teaspoon baking powder
  • 1/2 teaspoon baking soda
  • 1/2 stick (4 Tablespoons) butter
  • cinnamon
  • sugar
  • 1 batch ready to eat cookie dough
  • 2 cups chocolate chips
For the Icing:
  • 1 1/4 cup powdered sugar
  • 1 teaspoon butter, melted
  • 1 teaspoon vanilla
  • 2 Tablespoons heavy cream or milk
Directions
  1. Make the Cookie Dough:  In a small bowl, cream together the butter and sugars until light and fluffy. Beat in milk and vanilla. Add in flour. Stir in chocolate chips.  Store in an air-tight container in the fridge.
  2. Mix the milk, oil, and sugar in a large pot. Scald milk mixture (heat until not quite boiling) and then let it cool to room temperature.  The cooling step is important because if the liquid is too hot, you will kill your yeast and your rolls will not rise!
  3. Sprinkle yeast over milk mixture and let it sit for a couple minutes.  Stir in 4 cups of flour to form a sticky dough. Cover pan and let the dough rise for 1 hour.
  4. After dough has risen, stir in remaining 1/2 cup of flour, baking powder, and baking soda until well combined. Divide dough in half. On a flour covered workplace (I use my counter), roll the dough out until it's about 1/8" thick and in a rectangular shape about 18 inches long and 12 inches wide.
  5. Melt butter in a glass measuring cup or a small bowl. Pour half of the melted butter over the dough and spread using a brush. Sprinkle with sugar and cinnamon (the amount is up to you). Now top with spoonfuls of prepared chocolate chip cookie dough.
  6. Roll dough toward you, keeping the spiral as tight as possible. Cut into 3/4 inch slices. Place in a greased pan. 
  7. Repeat this process with the other half of the dough. 
  8. Let the cinnamon rolls rise for 30 minutes. Then bake at 350 for 12-15 minutes.
  9. While rolls are in the oven, mix together ingredients for icing.  Add more powdered sugar if the consistency is too thin.  If the mixture is too thick, add more milk or cream.  You want it to be the consistency of a spreadable frosting.  
  10. Let the rolls cool for about 5 minutes before icing.  To really put these over the top and/or for the chocoholics in your life, drizzle with melted chocolate.  Eat them warm right out of the pan...and don't say I didn't warn you!
Make Ahead Tips: Once you have cut your rolls and placed them into the greased pan, you can cover then put them in the refrigerator or freezer to bake later.  To bake straight from the fridge, bake at 350 for 25-30 minutes.  If frozen, thaw in the refrigerator overnight before baking.  Fresh cinnamon rolls hot out of the oven in the morning!  You're welcome!

Source: Slightly modified from Melissa's Cuisine

Thursday, December 22, 2011

Cinnamon Roll Cookies

This cookie looks and tastes just like a cinnamon roll!  It made the house smell fantastic as it baked.  My husband was a little disappointed because they were crispier than he expected but that could be remedied by reducing the bake time or making the slices thicker.

Make this one to add a festive look to your holiday cookie platter!

Cinnamon Roll Cookies
Yields: 48 cookies

Cinnamon Roll Cookies
Photo Credit: Emily H.
For the cookies:
  • 1 cup (2 sticks) unsalted butter, softened
  • 1/2 cup brown sugar
  • 1/2 cup sugar
  • 2 eggs
  • 1 teaspoon vanilla
  • 2 teaspoons cinnamon
  • 3 cups flour
  • 2 teaspoons baking powder
  • 1 teaspoon salt

For the filling:
  • 1/4 cup (1/2 stick) unsalted butter, very soft
  • 1/4, plus 2 tablespoons packed brown sugar
  • 2 teaspoons cinnamon

For the icing:
  • 2 cups confectioners’ sugar
  • 2 tablespoons melted butter
  • 1/2 teaspoon instant espresso powder
  • 2 teaspoons vanilla
  • 2-4 tablespoons milk

Directions

  1. To make the cookies: In a medium bowl, combine the flour, cinnamon, baking powder, and salt; set aside.
  2. In a large bowl, or the bowl of a standing mixer, cream the butter and sugars together until light and fluffy. Add the eggs one at a time, and beat until just combined. Scrape the sides of the bowl, then add half of the flour mixture and mix until just combined. Add the remaining flour mixture and beat until thoroughly combined, scraping the bowl as needed. Scrape the dough into a ball in the center of the bowl, cover with plastic wrap, and chill in the freezer for 30 minutes, or the refrigerator for at least an hour.
  3. Once the dough is chilled, divide it into two equal halves. Place one half back in the bowl and put it back in the refrigerator for now. On a large piece of plastic wrap, pat the first half of the dough into a rectangle about nine inches by twelve inches, and about half an inch thick. Place half of butter on the dough and spread it all the way to the edges. Sprinkle half of the brown sugar evenly over the buttered dough and press the sugar into the dough. Finally, sprinkle half of the cinnamon evenly over the dough. Use the plastic wrap to tightly roll the dough into a log. Place the log in the freezer for 30 minutes or the refrigerator for at least an hour. Repeat with the remaining half of the dough and filling ingredients.
  4. Preheat the oven to 350 degrees. Line a baking sheet with Silpat mats or parchment paper.
  5. After the dough has chilled again, slice each log into half inch slices (about 24 per log). Place on the prepared baking sheets and bake for 10 to 12 minutes. Transfer to a wire cooling rack and allow to cool completely before icing.
  6. To make the icing: In a medium bowl, combine the butter and instant espresso powder. Add the confectioners’ sugar and vanilla and whisk until it just comes together. Next, add the milk, one tablespoon at a time until the desired consistency is reached. It should be thin enough to drizzle, but thicker than a glaze.
  7. With the cookies on a wire cooling rack set over parchment paper, drizzle the icing over the them with your whisk. Allow the cookies to set up for a few minutes before stacking or storing.

Source: Bakingdom as seen on Sing For Your Supper

Wednesday, December 21, 2011

Build Me Up Butterfinger Cup

This cookie was made at the request of my husband.  Apparently he follows the brand page for Butterfinger on facebook and occasionally he will post a photo and tag myself (and Emily, sometimes Jackie, too now!) requesting that we bake it for him.  We joke that we aren't his baking slaves...

Yet, look what I ended up making for him as one of my exchange cookies, anyway.  The name of the cookie is cute...and gets the Build Me Up Buttercup song stuck in my head everytime I read it.  Oh boy.  The cookie is baked in a mini-muffin tin and definitely has the texture of a muffin more-so than a cookie.  That's not to say it's not delicious and the eater is in for a surprise as they get a mouthful of surprise butterfinger!

Make this one for the sweet tooth in your life ;).


Build Me Up Butterfinger Cup
Yields: 24 cookies

Ingredients

  • 6 tablespoons unsalted butter
  • 3/4 cup packed brown sugar
  • 1/2 teaspoon vanilla extract 
  • 2 large eggs, room temperature
  • 3/4 teaspoon baking soda
  • 1/2 teaspoon baking powder
  • 1/4 teaspoon salt
  • 1 3/4 cups all purpose flour
  • 12 mini butterfingers, halved
  • Melted chocolate chips and butterscotch chips (I used caramel) for drizzling, optional
Directions

  1. Melt butter in a small saucepan over medium heat; cook for 2-3 minutes, whisking frequently, until butter foams and starts to brown. Remove butter from heat and pour into a large mixing bowl. Add brown sugar and extract, and mix using a mixer on medium speed for 2 minutes or until well incorporated and mixture is grainy. Beat in eggs until well combined - about 2 minutes. Reduce mixer speed to low and beat in baking soda, baking powder and salt until combined. Beat in flour until just combined.
  2. Freeze or refrigerate batter for 30 minutes or until well chilled. 
  3. Heat oven to 350 degrees F. Coat a (24 cup) mini muffin pan with cooking spray.
  4. Place 1/2 teaspoons of dough into bottom of cups. Press a Butterfinger half into the dough in each cup. Evenly top Butterfingers with remaining dough. Bake 12 minutes or until puffed and light golden brown.
  5. Cool 5 minutes before transferring cups to a wire rack to cool completely. Drizzle with melted chocolate and butterscotch (or caramel).

Source: Sugar Plum Blog

Sunday, December 18, 2011

Peanut Butter Cookie with Salted Peanut Caramel

Hello friends.  I'm sorry that I haven't blogged AT ALL this month.  It's been busy, to say the least.  Somehow, I still found time to participate in not one but two holiday cookie exchanges, though.  So, I figure I'll share the yummy cookie recipes with you all this week.

This one was my favorite of the three that I made.  I'm a sucker for anything with caramel (and, I'll admit to cheating and making semi-homemade caramel in this case but left the original recipe intact in case you have more time than I did).  They're pretty, too.  A wonderful addition to any holiday spread!

Peanut Butter Cookie with Salted Peanut Caramel

Yields: 50 cookies


Peanut Butter Cookie with Salted Peanut Caramel
Photo credit: Emily H.
For the cookie dough
  • 8 tablespoons (115g) unsalted butter, at room temperature
  • 1/2 cup (120g) packed light brown sugar
  • 1/2 cup (100g) granulated sugar
  • 1 large egg, at room temperature
  • 1 teaspoon vanilla extract
  • 3/4 cup (200g) creamy salted peanut butter (see Note)
  • 1 3/4 cups (250g) flour
  • 1/2 teaspoon baking soda
  • 1/4 teaspoon salt
For the salted peanut caramel*
  • 1 cup (250ml) heavy cream
  • 1/2 cup (125ml) water
  • 1 cup (200g) granulated sugar
  • 1 tablespoon light corn syrup
  • 1/8 teaspoon coarse salt
  • 3/4 cup (100g) finely chopped roasted salted peanuts
*Note: If you're feeling lazy like me, just add a splash of cream (or milk) and pinch of salt to caramel candies  and melt those down.  Fill the thumbprint wells with the caramel mixture then top with chopped nuts.


Optional: 4 ounces bittersweet, semisweet, or milk chocolate, melted


Directions 
  1. Preheat the oven to 350F and line two baking sheets with parchment paper or silicone baking mats.
  2. With an electric mixer, or by hand, make the cookie dough by beating the butter, brown and granulated sugar until smooth. Beat in the egg and vanilla until well blended. If using an electric mixer, scrape down the sides of the bowl. Beat in the peanut butter.
  3. In a separate bowl, whisk or sift together the flour, baking soda, and salt. Gradually add the dry ingredients to the peanut butter mixture and stir until there are no patches of flour.
  4. Scoop up tablespoon-sized portions of the dough and roll each piece between your hands so they’re as smooth as possible so they don’t crack at the edges when performing the next step.
  5. Space them 1 1/2-inches (2 cm) apart on the baking sheets, then use the rounded end of a wooden spoon, or your thumb, to make a depression in each one. Don’t worry much if the sides crack; push them back together.
  6. Bake the cookies for 13-16 minutes, rotating the baking sheets midway during cooking, until they are light-golden brown and the edges barely start to darken. Remove from oven, and while they’re warm, press in to reinforce each depression with the end of the wooden spoon. Let cool completely.
  7. Make the salted peanut caramel by warming the cream in a saucepan or microwave, and setting it aside.
  8. Cook the water, 1 cup sugar, corn syrup, and salt to a caramel, gently swirling the pan only if necessary (to ensure it melt and cooks evenly) until it turns a nice golden brown. Remove from heat and immediately whisk in the hot cream in a slow, steady stream.
  9. Cool until warm and pourable, then add the chopped peanuts. Spoon some of the caramel into each cookie, letting it set for about an hour, if you want to drizzle them with chocolate.
Storage: Cookies will keep in an airtight container, at room temperature, for 3 to 4 days. The unbaked dough can be rolled into rounds and stored in a heavy-duty freezer bag in the refrigerator or freezer, until ready to bake.
Source: The Art and Soul of Baking by Cindy Mushet as adapted by and seen on David Lebowitz

Friday, December 2, 2011

Recipe Swap: Cranberry White Chocolate Almond Cookies

I brought these cookies to my family Thanksgiving and all but 3 lonely cookies were devoured despite having some fierce competition from pumpkin pie, oreo ice cream cake, thumbprint cookies, pumpkin rolls, and more.  I had not one person, but three different aunts/uncles that asked me for the recipe.  And now, I'm sharing them with you :).  These cookies burst with goodies...in fact, I might actually decrease the amount of chips in the future out of personal preference for a higher cookie to stuff ratio but left the directions as is for now.

Thanks again for A Taste of Home Cooking for hosting the swap (this edition was Thanksgiving Desserts)!  I'm not sure yet who got my post and I gave them two options so I'll come back and update this post later once I know.  I didn't tell you but I'm secretly floating somewhere in the Caribbean Sea as you're reading this right now.  Ahhh, sand between my toes and sun on my face :D.

Cranberry White Chocolate Almond Cookies

Ingredients
  • 3 cups all-purpose Flour
  • 1 teaspoon Baking Soda
  • 1 teaspoon Salt
  • 1 cup unsalted Butter, room temperature
  • 1 cup Brown Sugar
  • 2 whole large Eggs
  • 1 tablespoon Vanilla
  • 1 cup dried Cranberries
  • 1 cup White Chocolate Chips
  • 3/4 cup chopped Almonds
Directions
  1. Preheat oven to 350F degrees.
  2. Beat butter and sugar in a large mixing bowl until fluffy, about 2-3 minutes.  Beat in eggs, one at a time. Then add vanilla and mix.  Add dry ingredients until just blended.  Add cranberries, chocolate and almonds and incorporate into dough.
  3. Drop by the heaping Tablespoon onto an ungreased cookie sheet leaving 1 - 1.5 inches between each drop.
  4. Bake at 350F degrees for about 12 minutes or until lightly golden brown.
Source: As swapped by Jenna's Cooking Journey and slightly modified from Through the Bugs on my Windshield