Thank you to everyone that entered by Santa Barbara Chocolate giveaway! Those of you that submitted product ideas they sound fabulous and I can't wait to see if the boys at SBC take some of those suggestions and make them into reality! Also HUGE thank you to Santa Barbara Chocolate for sponsoring this giveaway. They've pretty much ruined my chocolate expectations for life now.
So now you're wondering, who won??
Well, take a look below. They are arranged in order of grand prize winner all the way down to third prize winner. I'll be in touch so Jason and Justin can get you your delicious chocolates. Congratulations Kristen, Jessie S., Tamara A., and Dina J.!!!
If you didn't win, don't fret, don't forget you can still get 10% off your order using my special code chrisseskitchen.
a Rafflecopter giveaway
Saturday, April 5, 2014
Monday, March 17, 2014
Santa Barbara Chocolate Review/Giveaway and Triple Chocolate Mousse Cake!
Happy Monday, fans! Oh my do I have an absolute TREAT for you today!
About a month ago I was contacted by a cool dude named Justin at Santa Barbara Chocolate Company. He had stumbled across one of my old blog posts featuring this Chocolate Nutella Fudge with Sea Salt and was wondering if I'd like to partner with them. There was the promise of free organically grown, ethically traded chocolates to be had. If you've been following me on facebook at all you'll know that I've been going dairy free for several months now because my little nursling son is sensitive. Chocolate is often off the menu because many brands contain milk or milk ingredients. My heart sunk at first because I thought "Why? Why NOW do these companies find me when I cannot taste their delicious products and want chocolate sooooo badly???". But then I went to their website and found that they offered many dairy free options! Score! So I shot an email back to Jason explaining my situation and asking that they please send at least one dairy-free option for me to personally try (and my husband Chris - the real sweets lover in this family anyway - could call dibs on whatever else they sent).
Let me just say that Justin is a real SoCal guy who was so much fun to "talk" to and Jason their Maitre Chocolatier BLEW ME AWAY with how fast and personalized he made my package. Not only was there a personal hand-written note but they sent me nearly TEN POUNDS of assorted chocolates to try. Each was even labeled "dairy free" where applicable!

So like kids at Christmas time Chris and I tasted each of the samples.

I started with the Hispaniola Rainforest Dark 60%. It was smooth and rich. The perfect balance of dark and a touch of sweet just like you'd expect from a high quality dark chocolate. It's a very classic dark chocolate so would be very versatile for baking, creating candies, or eating straight out of the bag. Having not had any chocolate in quite some time, it was pure bliss to eat and I knew it would be hard to beat...but there were still seven more samples to go!

Going a little bit darker I found myself trying the Peru Rio Tigre Extra Dark Chocolate 75% next. Visually it was a few shades darker than the previous sample and that's to be expected since there's 15% more cacao. My first taste impression was confusion because it was not as smooth as I'm used to and dare I say even a touch gritty. At first I thought perhaps it was just due to the higher cacao content but I have had dark chocolates as much as 90% cacao and not had the textural impact before. So I gave Justin and Jason a shout. It turns out that Jason designed the chocolate to be this way. The cocao solids (fibre in this case) are not ground as long so that they retain a higher percentage of cocao antioxidants. Sounds healthy to me!
Similarly, I'm not sure that I have ever tasted 100% Pure Cacao. Though I love dark and extra dark chocolates, these ultra dark unsweetened chocolate chunks were too bitter for my personal taste. As for Chris? Forget it! That kid LOVES all things sugar. Jason told me that they're wonderful for those on paleo diets or with low glycemic concerns such as diabetics because they contain no added sugar. He even enjoys them as a fondue or with a cup of hot green tea. I might try melting these down and adding dried fruit and nuts to create a chocolate bark. As an aside, Chris said he had a co-worker who gave their kid 100% pure cacao when they asked to try chocolate. As one would expect, it was not very palatable to a child and thus the parent's scheme to get the kid to not like chocolate worked ;).
The Belgian Dark 64% was good and I think would be excellent for candies but when compared to the rest of the dark chocolate samples, not particularly memorable.
The Manjo Rainforest Dark 66% woke my tastebuds right up! There was a subtle fruitiness to it which I wasn't expecting. You could tell that this was high quality stuff! I had to stop myself from eating the medallions straight from the package. I basically have been eating a chocolate medallion...or two...or three...of the Manjo everyday since receiving the package. It contains 100% cocoa butter so it's velvety smooth and ready to eat. I loved just popping them in my mouth and letting them slowly melt. Frankly I was a little bit sad that Jason and Justin only sent me a smaller sample of this variety. But now I know what I'll be buying to get my dairy-free chocolate fix!! It was my favorite sample by a hair (followed by the Hispaniola Rainforest Dark 60%).
The Belgian Milk Chocolate and Belgian White were taste tested by Chris alone since he is the only one in our family that can eat dairy right now. He happily snacked on them but couldn't really give me a detailed analysis other than that the Belgian Milk Chocolate was his favorite. Go figure since it has the least cacao (40%) of the chocolates we sampled and therefore is sweetest! When I used the Belgian White chocolate in my baking application, it was my father-in-law's favorite of the three layers.
After sampling everything I was left with the difficult decision of how to feature the high quality chocolate varieties. With Jason's guidance that the Peru Rio Tigre Extra Dark Chocolate 75% was designed with pastry applications in mind and in particular, flourless chocolate cakes, I knew exactly what I wanted to make because I remembered a cake which I bookmarked from years ago.
This Triple Chocolate Mousse Cake features three of Santa Barbara Chocolate's finest Couverture chocolates. I intentionally chose two different dark chocolates because the texture of the dark layers is different. The cake is more dense and could stand up to the heartier texture of the Peru Rio Tigre whereas I wanted the dark chocolate mousse layer to be silky smooth so used the Manjo Rainforest there.
While you could use any chocolate to create this cake I cannot stress that the quality of the chocolate you choose to use will impact your final product. In this case, why not give Santa Barbara Chocolate's high quality products a try? You won't regret buying from these guys and after trying their chocolates, you'll wonder how you ever thought those waxy, off-tasting chocolate chips and bars qualified as "chocolate". Plus, your conscious will rest easy knowing that many of the products are organically grown, fair-trade, and formulated with over 100 years of chocolate making experience.
Christine's Kitchen Chronicles readers get 10% off your total order by using the code: chrisseskitchen or enter the Rafflecopter contest at the bottom of this post to win up to NINE POUNDS of your own! There are four different winners in this contest so be sure to be in it to win!
Triple Chocolate Mousse Cake

Ingredients
For the bottom layer
a Rafflecopter giveaway
Disclaimer: Santa Barbara Chocolate Company graciously offered to sponsor this giveaway. I received complimentary samples of chocolate to try and review. All words and opinions are my own.
About a month ago I was contacted by a cool dude named Justin at Santa Barbara Chocolate Company. He had stumbled across one of my old blog posts featuring this Chocolate Nutella Fudge with Sea Salt and was wondering if I'd like to partner with them. There was the promise of free organically grown, ethically traded chocolates to be had. If you've been following me on facebook at all you'll know that I've been going dairy free for several months now because my little nursling son is sensitive. Chocolate is often off the menu because many brands contain milk or milk ingredients. My heart sunk at first because I thought "Why? Why NOW do these companies find me when I cannot taste their delicious products and want chocolate sooooo badly???". But then I went to their website and found that they offered many dairy free options! Score! So I shot an email back to Jason explaining my situation and asking that they please send at least one dairy-free option for me to personally try (and my husband Chris - the real sweets lover in this family anyway - could call dibs on whatever else they sent).
Let me just say that Justin is a real SoCal guy who was so much fun to "talk" to and Jason their Maitre Chocolatier BLEW ME AWAY with how fast and personalized he made my package. Not only was there a personal hand-written note but they sent me nearly TEN POUNDS of assorted chocolates to try. Each was even labeled "dairy free" where applicable!
So like kids at Christmas time Chris and I tasted each of the samples.
I started with the Hispaniola Rainforest Dark 60%. It was smooth and rich. The perfect balance of dark and a touch of sweet just like you'd expect from a high quality dark chocolate. It's a very classic dark chocolate so would be very versatile for baking, creating candies, or eating straight out of the bag. Having not had any chocolate in quite some time, it was pure bliss to eat and I knew it would be hard to beat...but there were still seven more samples to go!
Going a little bit darker I found myself trying the Peru Rio Tigre Extra Dark Chocolate 75% next. Visually it was a few shades darker than the previous sample and that's to be expected since there's 15% more cacao. My first taste impression was confusion because it was not as smooth as I'm used to and dare I say even a touch gritty. At first I thought perhaps it was just due to the higher cacao content but I have had dark chocolates as much as 90% cacao and not had the textural impact before. So I gave Justin and Jason a shout. It turns out that Jason designed the chocolate to be this way. The cocao solids (fibre in this case) are not ground as long so that they retain a higher percentage of cocao antioxidants. Sounds healthy to me!
 |
| Santa Barbara Chocolates from Left to Right: Belgian White, Belgian Milk, Manjo Rainforest Dark, Belgian Dark, 100% Pure Cacao, 100% Pure Cacao Organic |
Similarly, I'm not sure that I have ever tasted 100% Pure Cacao. Though I love dark and extra dark chocolates, these ultra dark unsweetened chocolate chunks were too bitter for my personal taste. As for Chris? Forget it! That kid LOVES all things sugar. Jason told me that they're wonderful for those on paleo diets or with low glycemic concerns such as diabetics because they contain no added sugar. He even enjoys them as a fondue or with a cup of hot green tea. I might try melting these down and adding dried fruit and nuts to create a chocolate bark. As an aside, Chris said he had a co-worker who gave their kid 100% pure cacao when they asked to try chocolate. As one would expect, it was not very palatable to a child and thus the parent's scheme to get the kid to not like chocolate worked ;).
The Belgian Dark 64% was good and I think would be excellent for candies but when compared to the rest of the dark chocolate samples, not particularly memorable.
The Manjo Rainforest Dark 66% woke my tastebuds right up! There was a subtle fruitiness to it which I wasn't expecting. You could tell that this was high quality stuff! I had to stop myself from eating the medallions straight from the package. I basically have been eating a chocolate medallion...or two...or three...of the Manjo everyday since receiving the package. It contains 100% cocoa butter so it's velvety smooth and ready to eat. I loved just popping them in my mouth and letting them slowly melt. Frankly I was a little bit sad that Jason and Justin only sent me a smaller sample of this variety. But now I know what I'll be buying to get my dairy-free chocolate fix!! It was my favorite sample by a hair (followed by the Hispaniola Rainforest Dark 60%).
The Belgian Milk Chocolate and Belgian White were taste tested by Chris alone since he is the only one in our family that can eat dairy right now. He happily snacked on them but couldn't really give me a detailed analysis other than that the Belgian Milk Chocolate was his favorite. Go figure since it has the least cacao (40%) of the chocolates we sampled and therefore is sweetest! When I used the Belgian White chocolate in my baking application, it was my father-in-law's favorite of the three layers.
After sampling everything I was left with the difficult decision of how to feature the high quality chocolate varieties. With Jason's guidance that the Peru Rio Tigre Extra Dark Chocolate 75% was designed with pastry applications in mind and in particular, flourless chocolate cakes, I knew exactly what I wanted to make because I remembered a cake which I bookmarked from years ago.
This Triple Chocolate Mousse Cake features three of Santa Barbara Chocolate's finest Couverture chocolates. I intentionally chose two different dark chocolates because the texture of the dark layers is different. The cake is more dense and could stand up to the heartier texture of the Peru Rio Tigre whereas I wanted the dark chocolate mousse layer to be silky smooth so used the Manjo Rainforest there.
While you could use any chocolate to create this cake I cannot stress that the quality of the chocolate you choose to use will impact your final product. In this case, why not give Santa Barbara Chocolate's high quality products a try? You won't regret buying from these guys and after trying their chocolates, you'll wonder how you ever thought those waxy, off-tasting chocolate chips and bars qualified as "chocolate". Plus, your conscious will rest easy knowing that many of the products are organically grown, fair-trade, and formulated with over 100 years of chocolate making experience.
Christine's Kitchen Chronicles readers get 10% off your total order by using the code: chrisseskitchen or enter the Rafflecopter contest at the bottom of this post to win up to NINE POUNDS of your own! There are four different winners in this contest so be sure to be in it to win!
Triple Chocolate Mousse Cake
Ingredients
For the bottom layer
- 6 tbsp. unsalted butter, cut into 6 pieces (plus extra for greasing the pan)
- 7 oz. bittersweet chocolate, finely chopped (recommend Santa Barbara Chocolate Peru Rio Tigre Extra Dark Chocolate 75%)
- ¾ tsp. instant espresso powder
- 1½ tsp. vanilla extract
- 4 large eggs, separated then allow whites to come to room temperature
- Pinch of salt
- 1/3 cup light brown sugar, packed
- 2 tbsp. cocoa powder, preferably Dutch-processed
- 5 tbsp. hot water
- 7 oz. bittersweet chocolate, finely chopped (recommend Santa Barbara Hispaniola Rainforest Dark 60%)
- 1½ cups heavy cream
- 1 tbsp. granulated sugar
- Pinch of salt
- ¾ tsp. powdered gelatin
- 1 tbsp. water
- 6 oz. white chocolate, finely chopped (recommend Santa Barbara Chocolate Belgian White)
- 1½ cups heavy cream
- 1 can of Pirouette chocolate hazelnut rolled wafer cookies, cut into thirds (there will be some leftover)
- 4 oz bittersweet chocolate, finely chopped (recommend Santa Barbara Chocolate Manjo Rainforest Dark 60%)
- 1/3 cup heavy cream
- To make the bottom layer: Butter the bottom and sides of a 9-inch springform pan. Preheat oven to 325˚ F. In a large glass bowl set over simmer water, combine the butter, chocolate, and espresso powder. Stir occasionally until the mixture is smooth. Remove from the heat and let cool slightly, about 5 minutes. Whisk in the vanilla and egg yolks. Set aside.
- In a stand mixer fitted with the whisk attachment, beat the egg whites and salt on medium speed until foamy, about 30 seconds. Add half of the brown sugar and beat until incorporated, about 15 seconds. Add the remaining brown sugar and continue to beat on high speed until stiff peaks form, about 1 minute more. Whisk in one-third of the beaten egg whites to the chocolate mixture to lighten it. Using a rubber spatula, gently fold in the remaining egg whites until no streaks remain. Pour the batter into the prepared springform pan and smooth the top with a spatula.
- Bake until the cake has risen, is firm around the edges and the center has just set but is still soft (should spring back after pressing gently with a finger), about 14-18 minutes. Transfer the cake to a wire rack to cool completely, at least 1 hour. Do not remove the cake from the pan. (If not making the second layer right away, cover with plastic wrap and refrigerate until ready to proceed.)
- To make the second layer, whisk together the cocoa powder and hot water in a small bowl; set aside. Melt the chocolate in a glass bowl set over simmering water, stirring occasionally until smooth. Once melted, remove from the heat and let cool slightly, 2-5 minutes.
- In the clean bowl of a stand mixer fitted with the whisk attachment, whip the cream, sugar and salt on medium speed until the mixture begins to thicken, about 30 seconds. Increase the speed to high and whip until soft peaks form when the whisk is lifted, 30-60 seconds. Whisk in the cocoa powder mixture until smooth. Using a whisk, mix one-third of the whipped cream to the chocolate mixture to lighten it. Fold in the remaining whipped cream gently with a rubber spatula until no streaks remain. Pour the mousse into the springform pan over the cooled cake and tap gently on the counter 3 times to remove air bubbles. Gently smooth the top with a spatula. Wipe the inside edge of the pan to remove any drips. Refrigerate for at least 15 minutes while preparing the top layer.
- To make the top layer, sprinkle the gelatin over the water in a small bowl and let stand at least 5 minutes to soften. Place the white chocolate in a medium bowl. Bring ½ cup of the cream to a boil in a small saucepan. Remove the pan from the heat, add the gelatin mixture and stir until dissolved. Pour the hot cream mixture over the white chocolate and let stand about 1 minute. Whisk until the mixture is smooth. Cool to room temperature, about 5-8 minutes, stirring occasionally.
- In the clean bowl of a stand mixer fitted with the whisk attachment, whip the remaining 1 cup of cream at medium speed until it begins to thicken. Increase the speed to high and whip until soft peaks form when the whisk is lifted, 30-60 seconds. Whisk in one-third of the whipped cream to the white chocolate mixture to lighten it. Using a rubber spatula, gently fold in the remaining whipped cream until no streaks remain. Spoon the white chocolate mousse into the pan over the middle layer. Smooth the top with an offset spatula. Return the cake to the refrigerator (leaving uncovered) and chill until set, at least 2½ hours.
- To decorate, press cut cookie pieces around the edge of the cake. Bring 1/3 cup of cream to a boil in a small sauce pan. Pour hot cream mixture over the chocolate and let stand about 1 minute. Whisk until the mixture is smooth. Allow the ganache to cool until it is spoonable and can hold its texture. Transfer to a piping bag and decorate the top of the cake as desired. I decorated mine with a cornelli lace pattern using a Wilton #2 Round Tip. If desired, garnish top of cake with additional cookies.
a Rafflecopter giveaway
Disclaimer: Santa Barbara Chocolate Company graciously offered to sponsor this giveaway. I received complimentary samples of chocolate to try and review. All words and opinions are my own.
Thursday, February 6, 2014
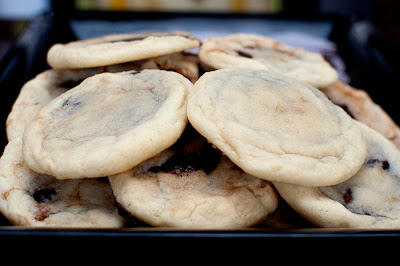
Vanilla Cookies with Nutella Filling
I missed World Nutella Day yesterday. Doh!
I also have had this recipe saved since *2012* specifically to post on the next World Nutella Day. But dang, apparently I need a reminder on my phone or something to help me remember when it comes around each year! So instead of making you wait yet another year for sharing this recipe, I'm sharing it a day late. Because better late than never, right?
Brace yourself for surprise smooth nutella goodness enveloped in a vanilla cookie...yum!
Vanilla Cookies with Nutella Filling
Ingredients
Source: Slightly modified from Inquiring Chef
I also have had this recipe saved since *2012* specifically to post on the next World Nutella Day. But dang, apparently I need a reminder on my phone or something to help me remember when it comes around each year! So instead of making you wait yet another year for sharing this recipe, I'm sharing it a day late. Because better late than never, right?
Brace yourself for surprise smooth nutella goodness enveloped in a vanilla cookie...yum!
Vanilla Cookies with Nutella Filling

Ingredients
- ½ cup (220g) nutella (I used homemade nutella!)
- 10 Tbsp. (140g) unsalted butter, softened
- 1 cup (220g) granulated sugar
- 1 large egg
- ½ tsp. vanilla extract
- 2 cup (250g) all-purpose flour
- ½ tsp. baking soda
- ½ tsp. salt
Directions
- Line a small baking sheet with wax paper or silicone baking mat.
- Transfer the nutella to a small plastic bag. Cut off one corner of the plastic bag and gently squeeze the nutella out onto the wax paper or baking mat into 24 evenly-sized chips. Place the baking sheet in the freezer until the nutella is firm, about 30 minutes.
- Preheat the oven to 350 F. Grease a baking sheet with butter, cooking spray, or line with another silicone baking mat.
- Beat the butter and sugar together until light and fluffy. Add the egg and vanilla and beat well. Add the flour, baking soda, and salt and stir with a spoon until fully incorporated. Divide the dough into 24 even balls and flatten each into a disk.
- Remove the frozen nutella chips from the freezer. Working quickly, press each chip into one ball of dough and roll the dough into a ball around the nutella. Place the cookie dough balls 3 inches apart on the prepared baking sheet.
- Bake, just until the edges start to turn slightly golden, 6-8 minutes (keep an eye on them towards the end – do NOT overbake these). Allow cookies to cool on the baking sheet for 5 minutes before transferring to a cooling rack.
Source: Slightly modified from Inquiring Chef
Wednesday, January 29, 2014
Pepperoni Pizza Sliders
Superbowl weekend is coming up. Frankly, it wasn't even on my radar until I heard people talking about how this crazy polar vortex that we're going through may result in the game being played on a Saturday...or even a Friday...due to the extreme cold weather.
For those still looking for something quick and easy to put on their Superbowl spread, this ought to do the trick. Same goes for the uber delicious Hawaian roll ham and cheese sliders. There's something about mini sammies, melted cheese, and butter that makes for happy people. Since both can be assembled in advance, you could have them in the fridge ready to bake for whenever that game ends up being. It's sure to be a hit with your guests!
More Superbowl food ideas:
Pepperoni Pizza Sliders

Ingredients
For the sandwiches
For those still looking for something quick and easy to put on their Superbowl spread, this ought to do the trick. Same goes for the uber delicious Hawaian roll ham and cheese sliders. There's something about mini sammies, melted cheese, and butter that makes for happy people. Since both can be assembled in advance, you could have them in the fridge ready to bake for whenever that game ends up being. It's sure to be a hit with your guests!
More Superbowl food ideas:
And umm...go...well...yeah. I don't even know who's playing this year so guess I'm not rooting for anybody in particular!
Ingredients
For the sandwiches
- 3/4 cup pizza sauce
- 12 Hawaiian rolls
- 48 slices large deli pepperoni (or 1 lb pepperoni slices)
- 1 cup shredded mozzarella cheese
- Sliced onions, green peppers, olives (optional)
- 4 tablespoons unsalted butter, melted
- 1/2 tablespoons onion powder
- 1/2 tablespoons garlic powder
- 1/2 tablespoons Italian seasoning
- A few dashes Worcestershire sauce
- Preheat the oven to 350 degrees.
- Spread pizza sauce onto both sides of the center of each roll. Place 2 large slices (or a few small slices) of pepperoni and a some shredded cheese inside of each roll. If you want, dress them up with your desired veggies. Close rolls and put into a large baking dish or heavy cookie sheet so that the sandwiches are touching each other.
- In a small bowl, whisk together all of the topping ingredients. Pour evenly over all of the sandwiches, just enough to cover the tops; let sandwiches sit for at least 10 minutes to absorb the butter and seasonings. If desired, sandwiches can be assembled and buttered a day ahead, covered and kept in the fridge until ready to bake.
- Cover with foil and bake at 350 degrees for 12-15 minutes or until cheese is melted. Uncover and cook for 2 additional minutes or until tops are slightly brown and crispy. Serve warm.
Monday, January 20, 2014
SRC: S'mores Bites (Dairy-Free/Vegan)
It's a somewhat sad day for me because this is my last Secret Recipe Club. After being a part of this group for a few years now I've decided that I needed to step away from it all. I simply don't have the time to dedicate to creating things on a set schedule and commenting on others' posts like I used to.
For my final assignment I am honored to have my fellow Cincinnati blogging friend Desi of SteakNPotatoesKindaGurl. We "met" through this club. Though we live in the same city, we have never actually met in person. She did, however, contribute a beautiful guest post of Grilled Filet with Bourbon Butter to my blog when I was on vacation. If I learned anything about Desi it's that the girl LOVES bacon. So when I went to choosing a recipe, I thought I'd make something with bacon in it. Then I took a completely different direction when I saw her post for one of her other loves...s'mores. I considered throwing some bacon crumbles in with the chocolate center and/or on top as a garnish as a tribute but tried to stay true to the recipe ;).
Many of you know that I've gone dairy-free for my son who is nursing and I suspect to be sensitive to it. Since I could customized the cookies, I made mine dairy-free while using regular Hershey milk-chocolate for my husband's cookies. I tried to make some substitutions of coconut oil instead of butter and dark chocolate instead of milk to keep it dairy-free (and vegan for that matter!). Finding graham cracker crumbs that were dairy-free was also surprisingly challenging. I usually buy store brand to save a few bucks but the store brand and most national brands for that matter had dairy in them. Boo! The only dairy-free graham crackers I could find were Nabisco Honey Maid.
The taste was awesome. I actually loved the not-so-subtle coconut flavor. It kind of reminded me of my favorite Girl Scout Cookie, samoas...which, I also can't eat right now. Sad face. The only problem was that my cookie crust was too crumbly and totally didn't hold together right on removal. I'm not sure if substituting my coconut oil 1:1 for butter was the issue or if I just didn't bake it long enough. Still experimenting with this whole dairy-free baking thing. The fact that my cookie crumbled didn't stop me from enjoying these little s'mores bites straight out of the pan with a spoon ;). Don't judge.
As I say goodbye to my SRC friends I want to thank you all for being awesome and for helping me to discover your wondering blogs. And of course a special shout out to our hostess, Debbi. I hope that you all will continue to follow me even as I leave the club...and probably post less frequently.
On an unrelated note...have you entered my Wildtree giveaway??
S'mores Bites (Dairy-Free/Vegan)

Ingredients
For my final assignment I am honored to have my fellow Cincinnati blogging friend Desi of SteakNPotatoesKindaGurl. We "met" through this club. Though we live in the same city, we have never actually met in person. She did, however, contribute a beautiful guest post of Grilled Filet with Bourbon Butter to my blog when I was on vacation. If I learned anything about Desi it's that the girl LOVES bacon. So when I went to choosing a recipe, I thought I'd make something with bacon in it. Then I took a completely different direction when I saw her post for one of her other loves...s'mores. I considered throwing some bacon crumbles in with the chocolate center and/or on top as a garnish as a tribute but tried to stay true to the recipe ;).
Many of you know that I've gone dairy-free for my son who is nursing and I suspect to be sensitive to it. Since I could customized the cookies, I made mine dairy-free while using regular Hershey milk-chocolate for my husband's cookies. I tried to make some substitutions of coconut oil instead of butter and dark chocolate instead of milk to keep it dairy-free (and vegan for that matter!). Finding graham cracker crumbs that were dairy-free was also surprisingly challenging. I usually buy store brand to save a few bucks but the store brand and most national brands for that matter had dairy in them. Boo! The only dairy-free graham crackers I could find were Nabisco Honey Maid.
The taste was awesome. I actually loved the not-so-subtle coconut flavor. It kind of reminded me of my favorite Girl Scout Cookie, samoas...which, I also can't eat right now. Sad face. The only problem was that my cookie crust was too crumbly and totally didn't hold together right on removal. I'm not sure if substituting my coconut oil 1:1 for butter was the issue or if I just didn't bake it long enough. Still experimenting with this whole dairy-free baking thing. The fact that my cookie crumbled didn't stop me from enjoying these little s'mores bites straight out of the pan with a spoon ;). Don't judge.
As I say goodbye to my SRC friends I want to thank you all for being awesome and for helping me to discover your wondering blogs. And of course a special shout out to our hostess, Debbi. I hope that you all will continue to follow me even as I leave the club...and probably post less frequently.
On an unrelated note...have you entered my Wildtree giveaway??
S'mores Bites (Dairy-Free/Vegan)
Ingredients
- 7 whole graham crackers or 1 cup graham cracker crumbs (Nabisco Honey Maid are dairy-free)
- 1/4 cup granulated sugar
- 6 tablespoons coconut oil, melted (use butter if you don't care about it being vegan/dairy-free)
- 4 dark chocolate candy bars, divided (I used Lindt Excellence 85% Cacao Bars for my dairy-free ones and regular Hershey's Milk Chocolate Bars for the hubby)
- 12 large marshmallows, cut in half crosswise with kitchen scissors (Dandies brand are vegan)
Directions
- Preheat oven to 350°F.
- If using whole graham crackers, place inside a ziplock bag and then crush with a rolling pin. Combine graham cracker crumbs, sugar, and melted coconut oil into a bowl.
- Divide crumb mixture into each cup of a 24 cup mini muffin pan. Press crumbs to form shallow cups.
- Bake for 4-5 minutes or until edges are bubbling.
- Meanwhile, break two of the candy bars into rectangles. Break the rectangles in half.
- Remove pan from oven; place 2 rectangle halves into each cup. Place one marshmallow half, cut-side down, into each cup. Return to oven for 3 minutes or until marshmallows are just slightly softened. If desired, flip on the broiler to lightly toast the tops. Watch them carefully because they burn quickly!
- Using remaining candy bars, break into rectangles and top each marshmallow with a piece of chocolate.
- Cool on a cooling rack for 15 minutes before carefully removing cups from pan. Cool completely on wire rack.
Source: Modified from SteakNPotatoesKindaGurl
Tuesday, January 7, 2014
Best of 2013: Blogger's Choice
Each year I do not only a Reader's Choice post but also a Blogger's Choice because sometimes I feel like there are some hidden gems that should not be missed! To see previous year's Best of Lists, click on the Recap tag!


4. Bourbon Street Chicken. Not at all authentic Chinese food and doesn't contain any bourbon but gosh is this one delicious!

5. Steak, Asparagus, and Chimichurri Pasta. Is one of your New Year's Resolutions to eat healthier and maybe even go paleo? This will fit the bill. Regardless, give this recipe a try!

6. Peanut Butter Pudding Cookies. I call them Candy Explosion Cookies. These are the softest, most delicious cookies ever!

7. Brownie Pudding. Everyone went back for seconds when it came to this rich, molten chocolate goodness. When topped a la mode? Heaven.

8. Honey Baked Sriracha Chicken Tenders. You know a recipe is good when I need to drop everything and stay up after baby has slept in order to blog about it. There's no added oil in these baked chicken tenders and they're incredibly crispy! Plus, the sweet spicy flavor is baked right in. Click the link to find out the secret!

9. Asparagus and Ham Stuffed Potatoes. Since it's made in the microwave, it makes it even easier to have everyone make it their own way! Customize the fillings to fit your tastes but I must say it's delicious as written and would be a good way to use up the leftover Easter ham.

10. Hawaiian Roll Ham and Swiss Sliders. Why it took me so long to make these I do not know. Consider making them for your upcoming Superbowl Party. Though, after a bite you'll wish you had made them all for yourself instead of sharing! They're seriously addicting. Don't way I didn't warn you.

BONUS! Normally I ask my husband to pick a recipe to add to this list of favorites but undoubtedly he'd pick the Brownie Bottom Peanut Butter Cheesecake which already appears on the 2013 Reader's Choice List. So, instead, I'm giving the honor of the bonus pick recipe to our son Alex.
Chewy Butterfinger Cookies. Dubbed "Labor Cookies" by my friend as they were the last thing I baked before going into labor. I can't say that they in fact induce labor but seems like Alex liked them enough to FINALLY make his arrival into the world (10 days late!).

In no particular order, here are my Top 10 personal favorites from 2013:
1. Tomato Florentine Soup. I'm a sucker for a good hot bowl of soup. Especially when shrouded in bitter cold like most of us in the US have been lately.

2. Lasagna Soup. Keeping with the soup theme for a moment. This packs all the flavor and comfort of lasagna into an easy to make soup. It'll warm you to the core and make for a happy tummy.
2. Lasagna Soup. Keeping with the soup theme for a moment. This packs all the flavor and comfort of lasagna into an easy to make soup. It'll warm you to the core and make for a happy tummy.
3. Bravo's Shrimp Florentine Pasta. Who doesn't love a good copycat recipe? Even if you're not familiar with this Italian chain restaurant, its light creamy lemon sauce will win you over upon first bite.
4. Bourbon Street Chicken. Not at all authentic Chinese food and doesn't contain any bourbon but gosh is this one delicious!
5. Steak, Asparagus, and Chimichurri Pasta. Is one of your New Year's Resolutions to eat healthier and maybe even go paleo? This will fit the bill. Regardless, give this recipe a try!
6. Peanut Butter Pudding Cookies. I call them Candy Explosion Cookies. These are the softest, most delicious cookies ever!
7. Brownie Pudding. Everyone went back for seconds when it came to this rich, molten chocolate goodness. When topped a la mode? Heaven.
8. Honey Baked Sriracha Chicken Tenders. You know a recipe is good when I need to drop everything and stay up after baby has slept in order to blog about it. There's no added oil in these baked chicken tenders and they're incredibly crispy! Plus, the sweet spicy flavor is baked right in. Click the link to find out the secret!
9. Asparagus and Ham Stuffed Potatoes. Since it's made in the microwave, it makes it even easier to have everyone make it their own way! Customize the fillings to fit your tastes but I must say it's delicious as written and would be a good way to use up the leftover Easter ham.
10. Hawaiian Roll Ham and Swiss Sliders. Why it took me so long to make these I do not know. Consider making them for your upcoming Superbowl Party. Though, after a bite you'll wish you had made them all for yourself instead of sharing! They're seriously addicting. Don't way I didn't warn you.
BONUS! Normally I ask my husband to pick a recipe to add to this list of favorites but undoubtedly he'd pick the Brownie Bottom Peanut Butter Cheesecake which already appears on the 2013 Reader's Choice List. So, instead, I'm giving the honor of the bonus pick recipe to our son Alex.
Chewy Butterfinger Cookies. Dubbed "Labor Cookies" by my friend as they were the last thing I baked before going into labor. I can't say that they in fact induce labor but seems like Alex liked them enough to FINALLY make his arrival into the world (10 days late!).
Monday, January 6, 2014
Best of 2013: Reader's Choice
Happy New Year!
First, let me start out by saying thank you for following my little blog. I know that 2014 will be challenging for me to keep up with posting with the same frequency as I did in 2013 given I now have a little guy to care for. I hope you can bare with me and promise it will be worth it to keep following along :).
Each year I do a little recap of the top recipes as chosen by the readers and then separately, myself. You can find the others by clicking on the Recap tag.
Here are the Top 10 Reader Favorite Recipes in 2013:
Each year I do a little recap of the top recipes as chosen by the readers and then separately, myself. You can find the others by clicking on the Recap tag.
Here are the Top 10 Reader Favorite Recipes in 2013:
#10 - Salted Browned Butter Rice Crispy Treats. Kicking off the list strong with this simple "gourmet" twist on traditional rice crispy treats! If you all didn't pick it for your Top 10 list for the year, I certainly would have. Once you get a taste of the nutty browned butter, you'll wonder why you didn't always make rice crispies this way!

#9 - Balsamic-Honey Glazed Roast Beef Sandwiches with French Dip. Seriously guys, we're on the same wavelength here! Love! Out of all of the easy savory recipes from this year, this was one of my absolute favorites. If you're lazy, you could skip the balsamic reduction and it'd still be delicious. Now go put that slow cooker to work all day so you can take a dip into nirvana tonight!

#8 - Chocolate Chip Peanut Butter Cookie Cake. Move over grocery store cookie cakes! From the outside it looks like a regular single layer cake but just wait until you cut it open. It's a giant cookie with a crunchy exterior, chewy interior, and enveloped in a luscious frosting!

#7 - Ginger Chicken Jook (Chinese Rice Porridge). Spot on with this pick again, my friends. This is the equivalent of Chinese Chicken Noodle Soup and will definitely take the chill of your bones. Some swear it even cures the common cold. Since I've discovered this recipe I just make it anytime I have a rotisserie chicken carcass on hand...

#6 - Cadbury Creme Mini Egg Cupcakes. A Secret Recipe Club Editor's Choice recipe! This is sure to brighten up your child's Easter basket.

#5 - Chocolate Oreo Poke Cake. Doctored cake mix, Cool Whip, and Oreos never looked so good (or so easy)! I'm not sure if this one is popular because of Pinterest (follow my boards here!), my blogiversary giveaway, pure delicious, or maybe all of the above.

#4 - Peanut Butter Cup Bars. I'm not usually a big sweets fan but this one certainly won me over. Very rarely do I make a recipe more than once and this is one of them that had the honor of being a repeat in my kitchen. Click the link to find out what gives this recipe its surprisingly special texture in the peanut filling!

#3 - Grilled Cheese Donuts. I'm not at all surprised to see this recipe make an appearance on this list. After all, who doesn't love grilled cheese?...and donuts?...buttered and then smashed together into a single sweet and salty delight. It may sound odd but I assure you your taste buds will sing when you take your first buttery bite into this Tom+Chee copy cat recipe!

#2 - Philly Cheesesteak Sloppy Joes. A twist on the traditional Joe! This was not only a reader favorite but also a household favorite. Fans have written to tell me that when you're feeling especially lazy, you can skip the sauce and just add a slice of cheese. But then that would be too neat...

#1 - Peanut Butter Cup Brownie Bottom Cheesecake. My husband's pride and joy. His first post to my blog and subsequent claim to internet fame. There was no doubt in my mind that this recipe would take the title of 2013 Reader Favorite Recipe! This photo (and recipe) has been shared on facebook, pinterest, twitter, etc more times than we can count. Sadly often times it is done without any link back to us :(. And yet, over 66,000 of you eventually made it to this post on my page (and hopefully became loyal readers because you saw what you liked!). Thank you so much for the love! It's popular because it's mind boggling to think about and looks (and tastes) really freaking delicious. In fact, my husband once told me that when someone eats his desserts, he only wants them to think about how deliciously over the top it is. It's a brownie crust, ganache, peanut butter cheesecake, more ganache, and lots of Reese Peanut Butter Cups. Don't even think about the calories...something this indulgent just needs to be enjoyed without remorse!

Subscribe to:
Posts (Atom)