Showing posts with label sausage. Show all posts

Monday, November 11, 2013

Apple, Brie, and Sausage Pizza on a Pumpkin Crust

Have you ever had a moment where you looked at a recipe and thought "hmmm...this is interesting...different and could it *really* work?".  This was one of those recipes to me when I was searching for a way to use some of my 16 cups of pumpkin puree.  Yes...you read that correctly.  16 cups.  That's enough for EIGHT pumpkin pies and I wasn't about to do that!

When you get over the fact that this is a non-traditional pizza without any sauce and instead think about the ingredients it does have, it starts to make a lot of sense.  Brie and apples aren't anything out of the ordinary.  Sausage is always delicious.  And pumpkin pizza crust?  Just a small departure from pumpkin bread.  Starting to warm up to the concept already, aren't ya? :)

I have to say that I truly fell in love with this pizza.  It has a subtle pumpkin flavor but you can tell it's there by the fun slightly orange color of the dough.  I'm actually starting to formulate a dessert pizza in my head using this crust...

Melty brie.  Need I say more?

Sweet apples and salty sausage meld together to form this unique glaze-like "sauce" on the crust.  And then to finish, instead of arugula I added some fresh sage which left me wanting more with every bite.

It was really quite a delicious Fall treat!  This pizza could make a great Thanksgiving appetizer (cut into smaller rectangular pieces a la Donatos pizza style) or dinner entree.  Please give this one a try.  You won't regret it!

One Year Ago: Spicy Garlic and Ginger Chicken with Green Beans and Smoked Macaroni and Cheese
Two Years Ago: Caramelized Onion Mashed Potatoes
Four Years Ago: Spinach, Sausage and Cheese Manicotti

Apple, Brie, and Sausage Pizza on a Pumpkin Crust


Ingredients

For the Pumpkin Pizza Dough
  • 1 1/2 tsp yeast 
  • 3/4 cups warm water (~110 F), divided 
  • 5 TBSP + 1 tsp brown sugar 
  • 1 TBSP unsalted butter 
  • 1 tsp salt 
  • 3 cups all-purpose flour
  • 3/4 cups pumpkin puree
For the Pizza
  • Corn meal
  • 4 baking apples such as Fuji, Honeycrisp, or Granny Smith
  • 4 oz brie 
  • 2 spicy Italian turkey sausage links, casings removed 
  • 4-6 fresh sage leaves, rubbed and chopped chiffonade
Directions
  1. In a small bowl, proof the yeast by combining it with 3/8 cup warm water and brown sugar.  Let sit for about five minutes or until it starts foaming. 
  2. Meanwhile, in a small saucepan, combine butter, salt, and the remaining 3/8 cup water. Heat until the butter melts. Let it cool until warm, but not hot. 
  3. Pour butter mixture into the yeast mixture and then into the bowl of a stand mixer. Mix the pumpkin puree into the yeast and butter mixtures. Then mix in the bread flour. Using the bread hook attachment, mix the dough on speed 2 for 10 minutes. Cover the bowl with a damp kitchen towel and allow the dough to rise in a warm place until doubled, about one hour. 
  4. Preheat oven to 500. Sprinkle some corn meal onto pizza pan.
  5. After dough has risen, flour it and shape into a ball.  Stretch into desired size and shape. Place on prepared pizza pan. Bake for 3-4 minutes and remove from the oven. 
  6. Meanwhile, cook sausage in a skillet over medium heat, crumbling it up using a spatula. Cut apples into thin slices. Layer onto pizza. Next layer slices of brie onto the pizza. Sprinkle with turkey sausage. 
  7. Bake assembled pizza for 10-12 minutes or until bottom of dough is starting to get brown.  
  8. Garnish with fresh sage and serve.
Source: Modified from Eats Well with Others as seen on PreventionRD

Thursday, August 8, 2013

Copycat McDonald's Sausage Egg McMuffins

Is anyone else a fan of breakfast?  How about Sausage Egg McMuffins from McDonald's?  I hardly ever eat at McDonald's but I LOVE their Sausage Egg McMuffins.  If I'm feeling really good, I'll even splurge on some hashbrowns.

When it came time to round-out my freezer stash with some breakfasts, I knew I wanted to try to make my own version at home.  What is about to follow is a copycat recipe but honestly, it's such an easy thing to make that I use the term "recipe" loosely.  If you want, you could also leave out the sausage or substitute Canadian bacon or regular bacon.

The hardest part was figuring out how to make a round egg "patty" like they do...because I'm anal and like everything to be round and match.  For that, I used what I had on hand and that was canning bands.  They were slightly smaller than the English muffins but close enough.  I experimented a bit on whether it was better to put them with the thread-side up or down.  In the end, threads up seemed to work better in terms of getting a better spray and containing the eggs (the picture below is from one of my earlier runs but I got better at avoiding spillage over time!).  If you greased your rings well, the eggs should fall out pretty easily but some of them required a little more oomph.  I just separated the crusty parts that stuck to the rings then pushed them out gently with my fingers.

These are totally yummy and I am so grateful to have about 2 1/2 dozen of them stashed away in the freezer. Having a good (and fast, one-handed) breakfast is the key to starting your day off right!

One Years Ago: BLT Corn Salad Wrap
Two Years Ago: Jerk Chicken with Mango Cilantro Relish

Copycat McDonald's Sausage Egg McMuffins


Copycat McDonald's Sausage Egg McMuffins

Ingredients
  • 12 English muffins
  • 12 slices American cheese
  • 12 fully cooked frozen sausage patties
  • 12 large eggs
  • Salt and pepper
Directions
  1. Place canning bands with thread side up into a skillet over medium-high heat (or if you have them or want to buy something fancy you can use something like these egg ring rounds).  Spray pan and inside of bands generously with cooking spray.

  2. Crack an egg into each band and sprinkle each with salt and pepper.  Use a knife to gently break each yolk so that it spreads out.  Don't worry if the egg spills out of the rings, if you're a perfectionist, you can peel or cut them off later.  Cover and cook through.  When eggs are done, remove the egg-filled ring using tongs and gently push the eggs out of the rings.  Set aside for assembly.

  3. Meanwhile, split your English muffin and place a slice of cheese on the top of each muffin half.  If desired, fold over each cheese corner so that it is the same size as the muffin.  Place a frozen sausage patty on the bottom of each muffin then top with a cooked egg round.  Put the two halves together to form the sandwich.
  4. Wrap each sandwich in square of deli paper wrap (or just use parchment paper).  
  5. To enjoy now: Microwave sandwich until sausage patty is cooked through, about 45 seconds to a minute.  To enjoy later: Place wrapped sandwiches into gallon sized freezer bags, squeezing out as much air as possible.  When ready to eat, microwave from frozen until heated through, about one minute to 90 seconds.  Flip the sandwich halfway through cooking for more even heating.
Source: Christine's Kitchen Chronicles as inspired by McDonald's

Tuesday, January 15, 2013

Lasagna Soup

Did you know that January is National Soup Month?  Yeah, me neither.  But I'm a bit of a soup addict and eat mine year round so I don't need a special month to celebrate.  Of course, nothing really hits the spot quite like a steaming hot bowl of soup on a cold Winter day.

When I saw this soup, I knew it would be amazing.  It's essentially a simple, healthier alternative to a comforting family favorite.  All the flavor of lasagna but with a mere 270 calories in a (1.5 cup) serving plus not having to assemble it into layers or bake for an hour?  Yes, yes, YES!  The whole family will be happy :).  What makes this soup outstanding and true to the lasagna flavor is the cheesy mixture of low-fat ricotta and mozzarella.  It melts into the hot soup creating a perfect lasagna flavor and texture.

What's your favorite soup?  I hope you enjoy this recipe as much as we did!

Two Years Ago: Blooming Onion with Dipping Sauce and Peanut Butter Fudge Brownie with Salted Peanuts
Three Years Ago: Baked Sausage Ziti

Lasagna Soup


Lasagna Soup

Ingredients

For the Soup
  • 2 tsp olive oil 
  • 12 oz turkey Italian sausage, casings removed 
  • 1 onion, chopped 
  • 3 garlic cloves, minced 
  • 2 tsp dried oregano 
  • 1/2 tsp crushed red pepper flakes 
  • 2 Tbsp tomato paste 
  • 1 (28 oz) can fire-roasted diced tomatoes 
  • 2 bay leaves 
  • 6 cups low-sodium chicken broth 
  • 8 oz broken up lasagna noodles or fusilli pasta 
  • 1/2 cup fresh basil leaves, finely chopped 
  • black pepper, to taste
For the Cheesy Mixture
  • 8 oz low fat ricotta cheese
  • 1/4 tsp salt
  • Pinch of freshly ground pepper
  • 1/2 cup (2 oz) 2% mozzarella cheese
Directions
  1. Heat olive oil in a large pot over medium heat. Add sausage, breaking up into bite-size pieces and brown for 5-6 minutes. Add onions and cook until softened, about 5-6 minutes. Add garlic, oregano and red pepper flakes. Cook for 1 minute. 
  2. Add tomato paste and stir well to incorporate. Add diced tomatoes, bay leaves and chicken stock. Stir to combine all ingredients. Bring to a boil and then reduce heat and simmer for 10 minutes. 
  3. Add uncooked pasta and cook until al dente, about 10 minutes. 
  4. Meanwhile, prepare the cheesy mixture. In a small bowl, combine the ricotta, salt, pepper, and mozzarella; stir to combine. 
  5. Add the basil and pepper to the soup; stir. To serve, place a dollop of the cheesy mixture in each soup bowl and ladle the hot soup over the cheese. 
Source: Originally from 300 Sensational Soups as seen on PreventionRD

Yield: 8 servings (about 1 1/2 cups each with 2 heaping tablespoons cheesy goodness) 
Nutrition Information as calculated by PreventionRD  (per serving): 270 calories; 7.8 g. fat; 38 mg. cholesterol; 465 mg. sodium; 31.9 g. carbohydrate; 3.4 g. fiber; 16.9 g. protein 

Wednesday, October 10, 2012

Toad in a Hole

Sharing of this recipe is long overdue since it was made at our Olympic themed dinner club back in October but I was waiting for the weather to turn cold and for people to start craving comfort foods again.

Why it is called "Toad in a Hole" was elusive to me but as I read about it, the best explanation that I could find was that the sausages look like little toads popping their heads/bodies out of a hole.  Perhaps with some stretch of the imagination that could be true...or perhaps the Brits were drinking a wee bit too much when they named this common British dish.

It incorporates pork sausages (aka bangers due to the popping sound that they make in the pan as they cook) in a crispy Yorkshire Pudding.  But how do you make it even better?  By wrapping the sausages in prosciutto and then topping the whole dish with deliciously rich, caramelized onion gravy.  Yikes, coronary material in the making and no wonder it tastes amazing!

I personally thought this made way too much gravy so would perhaps recommend halving the recipe for that.  Maybe you're supposed to have your Toads in a Hole swimming in gravy but I prefer just a light drizzle.

One Year Ago: Roasted Butternut Squash Soup

Toad in a Hole


Photo Credit: Emily H.

Yields: 6 servings

Ingredients

  • 4 Tbsp unsalted butter
  • 2 large yellow onions, sliced
  • 1 1/2 cups plus 1 Tbsp flour
  • 2 cups beef stock
  • 1/2 cup madeira wine
  • 1/2 tsp Worcestershire sauce
  • Kosher salt and freshly ground black pepper, to taste
  • 2 tsp dry mustard
  • 1 1/4 cups milk
  • 3 eggs, lightly beaten
  • 8 Tbsp rendered bacon fat (I didn't have enough bacon fat handy so used a combination of about 4 Tbsp bacon fat for flavor + 2 Tbsp vegetable oil + 2 Tbsp vegetable shortening)
  • 6 slices prosciutto
  • 6 large pork sausages (Bangers are best but I couldn't find them so would recommend something mild such as bratwurst)
Directions
  1. Make onion gravy: Heat butter in a 4-qt. saucepan over medium-low heat.  Add onions and cook until golden brown, about 40 minutes.  Stir in 1 Tbsp flour.  Add stock, wine, and Worcestershire.  Bring to a boil and then cook for 5 minutes.  Season with salt and pepper.  Set gravy aside.
  2. Heat oven to 425 degrees F.  Whisk remaining flour, mustard, and pepper together in a bowl.  Whisk in milk and eggs.  Let mixture rest for 15 minutes.  Pour 6 Tbsp bacon fat into a 9"x11" baking dish.  Heat in oven for 10 minutes.  (This heating of the fat in the pan is the key to getting a good puff to your pudding!)  In a 12" skillet over medium heat, heat up the remaining bacon fat.  Wrap 1 slice prosciutto around each sausage then place in skillet and brown all over, about 8 minutes.  Pour batter into the hot baking dish then arrange the wrapped sausages in the dish.  Bake until golden, about 25-30 minutes.  Serve with onion gravy.
Source: Saveur

Thursday, June 21, 2012

Chorizo and Sweet Potato Lettuce Wraps

Yum yum and another YUM!  Every once in awhile you make a recipe that is so ridiculously good that you feel like you need to drop everything and share it with the world.  This was one of those recipes for me.

I'm sure everyone's familiar with the Asian Lettuce Wraps that are available at places such as P. F. Chang's and I even shared a similar version of that on my blog here.  But this.  This was even more flavorful, even more amazing.  

The cool, crisp lettuce leaves contrast nicely with the slightly spicy chorizo and smoky roasted corn and sweet potatoes.  The color is also quite vivid and gorgeous.  Now, in my case, my husband accidentally picked up Oriental sweet potatoes which I guess are white unlike normal orange sweet potatoes so ours wasn't quite as colorful.  Still delicious and the leftovers became filling for regular flatbread wraps for lunches the rest of the week.  Personally, I preferred the dish without the sauce but it adds another layer of cool creaminess to the meal.  I kind of forgot about the feta, too.  The tang of that would have been a nice addition if you have it but I don't think we missed much by not having it.

One Year Ago: Singapore Mei Fun
Two Years Ago: Orange Berry Muffins

Chorizo and Sweet Potato Lettuce Wraps

Chorizo and Sweet Potato Lettuce Wraps

Ingredients

For the Chorizo Sweet Potato Filling
  • 2 medium sweet potatoes, peeled and cut into 1/2-inch cubes
  • 1 cup frozen or fresh corn
  • 3 Tablespoons canola, divided
  • 2 teaspoons ground cumin
  • pinch of cayenne
  • pinch of sugar
  • kosher salt
  • 1 cup chopped white onion
  • 10-12 ounces chorizo, casings removed (soy or pork both work!)
  • juice from 1 lime
  • 1/2 cup chopped fresh cilantro
For the Cilantro Cream
  • 1 cup  Greek yogurt 
  • 2 T freshly squeezed lime juice
  • 2 T chopped fresh cilantro
  • pinch of salt
To Assemble
  • 1 head of leaf lettuce (green, red, butter, or Bibb), leaves separated, washed, and dried
  • 1 cup crumbled feta
  • Additional lime wedges, for garnish
Directions
  1. Preheat oven to 450 degrees. Place sweet potato cubes and corn on a large rimmed baking sheet. Drizzle with 2 T of the oil and sprinkle with cumin, cayenne, sugar, and a good pinch of salt. Use your hands to toss the vegetables and coat them well with the oil and spices.  Spread them into a single layer and roast for 15-20 minutes, stirring a couple of times during roasting, until the potatoes are tender browned in spots.
  2. Meanwhile, heat the remaining tablespoon of oil in a large skillet over medium heat. Saute the onion, stirring occasionally, until golden brown, about 8-10 minutes. Add the chorizo, breaking up the clumps with the woolens spoon.   Stir and cook until the chorizo is browned and cooked through, about 5-8 minutes. Add the sweet potato mixture to the skillet, then stir in the lime juice and cilantro.  Taste and season with additional salt if necessary.
  3. As the chorizo mixture is cooking, combine the sour cream, lime juice, and chopped cilantro in a small bowl. Stir to combine, adding a pinch of salt to taste.
  4. Assemble the wraps by putting a couple spoonfuls of filling into the middle of a lettuce leaf. Drizzle with the cilantro cream sauce and sprinkle with feta.  Serve with extra lime wedges.
Source: As adapted by and seen on Pink Parsley from Perry's Plate

Monday, November 28, 2011

Tex-Mex Meatloaf with Chipotle-Tomato Glaze

Hi friends.  Did you have a wonderful Thanksgiving filled with food, friends, and family?  I know I certainly did...as evidenced by my lack of posting last week.  I had myself THREE Thanksgiving meals (yikes!) and surprisingly (and proudly) found myself still having an ab line and the scale was still within normal fluctuation the follow day.  I guess that Jazzercise session pre-Thanksgiving helped lessen the blow ;).  Plus, I was having far too much fun holding my adorable cousin's baby, Michaela, and watching her first crawl, too!  What did you do for Thanksgiving?  What did you eat and who did you spend it with?

Today's recipe that I'm sharing is a twist on an American classic.  It is a little tangy and a lotta spicy.  Definitely a fun change.

Tex-Mex Meatloaf with Chipotle-Tomato Glaze


Yields: 6-8 Servings

Ingredients
For the glaze
  • 1 c. crushed canned fire-roasted tomatoes  
  • 1/2 to 2 canned chipotle in adobo
  • 2 TBSP lime juice
  • 1/2 tsp. ground allspice
  • 2 cloves garlic
  • Salt, to taste

For the meatloaf
  • 1/2 TBSP vegetable oil
  • 1/4 medium yellow onion, finely chopped
  • 2 cloves garlic, finely minced
  • 1 1/2 lbs. lean ground beef
  • 1/2 lb. chorizo, removed from casings
  • 1/4 c. chopped cilantro
  • 2 large eggs
  • 1 c. finely ground tortilla chips, crackers, or combination of the two (I highly recommend using chips)
  • 1 tsp. dried oregano
  • 1 tsp. ground cumin
  • 1 tsp. Worcestershire sauce
  • 1 tsp. black pepper
  • 1 tsp. Kosher salt

Directions:
  1. Preheat oven to 350 degrees F.  Either line a large baking sheet with greased foil or grease a loaf pan.
  2. To make the glaze, combine all ingredients except salt in a blender or food processor and puree.  Add salt to taste.
  3. To make the meat loaf, heat oil in a medium skillet over medium-low heat.  Add the onion and cook, uncovered, 5 minutes, stirring occasionally.  Add garlic and salt and cook 30 seconds more.  Slide the onion mixture into a large bowl.  Add the all remaining ingredients to the bowl and mix thoroughly by hand. Form the meat mixture into a loaf and move to the baking sheet.  Alternately, gently press into a loaf pan.  Spread half the glaze on top of the meatloaf.  Place in the oven and bake 50 minutes.
  4. Remove from the oven and spread the remaining glaze on top.  Place back in the oven10 minutes more.  When done, remove meatloaf from the oven and let sit 15 minutes.  Slice with a serrated knife and serve. 
Source: Lisa Fain, The Homesick Texan Cookbook as seen on Apple A Day

Friday, November 11, 2011

Cheesy Italian Meatballs with Marinara Sauce

Happy 11/11/11!  There's only one more time this century that a date with all the same numbers will happen and that's on 12/12/12.  When I bookmarked this recipe and put it on my menu plan I had every intention of making this in the crockpot.  But, apparently when you forget to do the pre-work ahead of time before going to work you end up making it in old fashioned way to speed things along.  Thank goodness for dual oven and crockpot directions on this one :).

I learn all sorts of meatball tricks on Joelen's blog.  Previously with Swedish Meatballs recipe I learned that instead of pan frying your meatballs you can put them in a (mini-)cupcake pan and bake them.  Now from this recipe I learned you can also just put your meatballs on a plate and nuke them.  How amazing and easy is that?!  I love tips and tricks that make your life easier and the thing I particularly love about Joelen's blog is that most recipes have make-ahead tips so they're perfect for new parents and folks with busy lives.

These meatballs were cheesy as promised and a definite crowd pleaser!  Everyone knows that marinara sauce freezes perfectly, too.


Cheesy Italian Meatballs with Marinara Sauce


Ingredients

  • 2 tablespoons olive oil
  • 2 onions, chopped fine
  • 2/3 cup tomato paste (equivalent to one 6 oz can.)
  • 8 cloves minced garlic
  • 1 tablespoon dried oregano
  • 1/2 teaspoon red pepper flakes
  • Salt, to taste
  • 1/2 cup red wine (I used Cabernet Sauvignon)
  • 2 (28-ounce) cans crushed tomatoes
  • 1 cup freshly grated Parmesan cheese
  • 1/2 cup shredded mozzarella cheese
  • 1/4 pound Italian sausage, casings removed
  • 2 large eggs
  • 1 1/4 pounds 85 percent lean ground beef
  • 3 tablespoons heavy cream
  • 2 tablespoons finely chopped fresh basil
  • Minced fresh Italian parsley for garnish

Directions

  1. Heat oil in Dutch oven over medium-high heat until shimmering. Add onions, tomato paste, 6 garlic cloves, oregano, pepper flakes, and 1/4 teaspoon salt and cook until golden, about 8 minutes.
  2. Transfer half of onion mixture to large bowl; set aside. Add wine to pot with remaining onion mixture and cook until slightly thickened, about 2 minutes. Stir in tomatoes, then transfer to slow cooker.
  3. Add 1/2 cup Parmesan, mozzarella, sausage, eggs, 3/4 teaspoon salt, and remaining garlic to bowl with reserved onion mixture. Mash with potato masher until smooth. Add beef and cream to bowl and knead with hands until well combined. Form mixture into twelve 2-inch meatballs.
  4. Microwave meatballs on large plate until fat renders and meatballs are firm, 4 to 7 minutes. Nestle meatballs in slow cooker, discarding rendered fat. Cover and cook on low until meatballs are tender and sauce is slightly thickened, 4 to 5 hours. Skim fat. Stir in basil and remaining Parmesan. Season with salt. Serve over pasta and garnish with minced parsley if desired.

* To make ahead/freezer meal - Prepare the directions as noted above for sauce however allow the sauce cool and set aside. Prepare the directions as noted above for the meatballs however nestle meatballs in an oven- and freezer-proof baking dish discarding rendered fat; allow to cool. Alternately, you can cool the meatballs and place in a gallon sized freezer bag. Cover the meatballs with the cooled sauce (either in the baking dish or freezer bag). Cover/seal and freeze. When ready to prepare, defrost.

If making in the oven - Preheat oven to 350 degrees. Cover baking dish with foil and place baking dish on a baking sheet. Bake in preheated oven for 45 minutes to 1 hour. Stir in basil and remaining Parmesan. Season with salt. Serve over pasta and garnish with minced parsley if desired.

If making in the slow cooker/crockpot - Place contents of freezer bag in a slowcooker/crockpot. Cover and cook on low until meatballs are tender and sauce is slightly thickened, 4 to 5 hours. Skim fat. Stir in basil and remaining Parmesan. Season with salt. Serve over pasta and garnish with minced parsley if desired.


Source: Originally from Cook's Illustrated/Cook's Country as adapted by and seen on What's Cookin, Chicago and The Piggly Wiggly

Wednesday, October 5, 2011

Spaghetti Pie

This is a recipe that I made awhile back in either the winter or early spring (hence the not-so-awesome night-time lighting) but never got around to posting before the weather got too hot to justify using the oven.  Now that we had our first official freezing temperature of the season, I feel like I can dust it off of my "drafts" and share it with you all.

As you know, I aspire to make a pie on my 23 Things in 2011 list.  But, I'd consider it cheating if I counted this dish because the whole purpose of my making a pie was really to challenge myself to make a homemade crust.  And besides, I have a different recipe set aside for that ;).

What I love about this dish is how it tastes a lot like a lasagna to me (because it uses all the same delicious components) but is served in a fun, unassuming way and takes way less time to assemble since there aren't so many layers.  Heck, it kind of even looks like a deep dish pizza, really.  You can change it to suit your tastes (for example, I added basil, cracked red pepper, and some leftover Italian sausage for a boost of flavor and to meet Chris' meet requirements) and while I don't have kids, I have a feeling that this could please the entire family.

Two Years Ago: Cheesecake cupcakes - These remind me of when I was growing up because mom used to always make them.  Nilla wafers form the base of a bite-size cheesecake treat!

Spaghetti Pie


Ingredients

  • 8 ounces spaghetti
  • 2 large eggs 
  • ½ cup parmesan cheese
  • 1 tbsps plus 1 tsp olive oil 
  • 1 14.5 oz can diced tomatoes
  • 1/2 pound ground beef or turkey or Italian sausage (optional)
  • 1 small onion, diced
  • 1 clove garlic, minced
  • 1 tsp oregano
  • 1 tsp basil
  • 1/2 tsp cracked red pepper
  • 1 tsp tomato paste
  • 1 10 oz package frozen spinach, thawed and liquid removed
  • 1 15 oz container part skim ricotta
  • ½ cup shredded mozzarella
  • Black pepper, to taste

Directions

  1. Preheat oven to 350 degrees.  Put water on to boil.  LIghtly grease a 10" pie plate with olive oil or cooking spray then set aside.
  2. In a saute pan, heat 1 Tbsp olive oil.  Add onions, garlic, and meat if using.  Cook until the meat is browned (breaking meat up into small crumbles as you cook) or if not using meat then until onions are translucent.  Add diced tomatoes with their juice, oregano, basil, cracked red pepper, and tomato paste.
  3. Place ricotta in a bowl and combine with spinach.  Add black pepper to taste then stir to combine.
  4. Meanwhile, cook spaghetti until just al dente, drain and toss in a large bowl with 1 tsp olive oil.  Whisk eggs with a fork in a small bowl with 1/3 cup shredded parmesan.  Toss with spaghetti.  Add spaghetti to prepared pie plate.  Shape into crust shape by using fingers to flatten the center and pressing up the sides of the plate.  Add the spinach-ricotta mixture to the indentation in the center.  Top with tomato meat sauce  and bake, uncovered for 25 minutes.
  5. Top with shredded mozzerella and remaining shredded parmesan cheese.  Bake an additional 5 minutes, until cheese is melted.  Remove from oven.  Let cool for 10 minutes.  Then, slice into wedges and serve.

Source: Modified from REC(cession)IPIES

Wednesday, April 6, 2011

Recipe Swap: Spaghetti and Meatballs

Sarah (oct11bride) of Taste of Home Cooking organized another recipe swap due to the smashing success of last time's swap.  It looks like its going to be a weekly thing which is really cool!  The theme of this one was "Pasta".  I submitted Cincinnati Style Chili (because I simply cannot resist sharing this stuff with the world!) and in return I received Displaced_Kiki's Spaghetti and Meatball recipe.  Check out Jey of Cooking's write-up of my beloved chili in her blog...such a great pic for something I know doesn't exactly photograph so well!  Guess it's all in the talent of the photographer :).

When I got the recipe I was both excited and disappointed at the same time.  As I alluded to in a recent post, I recently accumulated a stockpile of about 40 boxes of free (yes, free) pasta.  See...this is what 24 boxes of free pasta (and a few other items which I purchased for a total of just over $4) looks like.  Now imagine 16 boxes more...


Yep...we've got a lot of pasta to work through.  So, the fact the theme itself was pasta made me excited to start and I couldn't wait to get all sorts of new recipes to try out as I worked my way through the stock.  Then I got my recipe.  My heart sunk a bit when I saw spaghetti and meatballs because it was so familiar and I already had a great recipe from my mother-in-law that I frequently make.  But, I looked at the bright side of things and figured in the spirit of trying new things and possibly finding something better, I'd give it a shot.

I was intrigued by the addition of spinach in the meatballs but ended up leaving it out because I didn't want to buy a whole bag of fresh spinach just to throw in a handful of it.  I'm not sure what trio meat is nor how much was in "1 package" so I just used what I had on-hand which is 1/2 pound ground turkey and 1/2 pound ground mild italian sausage.  I figured if it made 12 meatballs this amount of meat seemed about right versus what I'm used to in my normal recipe.  The amount of egg (3) called for though seemed a bit much.  Still, I powered through and had faith.  I probably should have gone with my gut though because after adding all the meatball ingredients together I found it to be extremely wet/mushy and it wouldn't hold its shape.  I ended up adding a couple slices of shredded bread pieces.  I probably should have added more because they were still a bit soft and after baking my meatballs were more like meatmounds.  They didn't hold their shape as I had hoped and once I added them to the sauce they disintegrated into the sauce and kind of became meatsauce.  I also  ended up with over 20 meatballs (roughly 2" in diameter) so I'm still scratching my head over where I went wrong.

The sauce was a bit better.  I added a couple glugs of red wine for depth and cracked red pepper for heat.  I still craved more flavor from the sauce after it simmered.  I think this version tasted more fresh and acidic versus I'm used to and prefer a more deep, slightly sweet slow cooked flavor from simmering for hours.

Overall it was fun to try a new version but I think I'm still sticking with my tried-and-true family recipe.  Below is the original recipe submitted to me, without any of the modification of the ingredients I mentioned...just in case I did something wrong and there's operator error!  I did re-write the directions to reflect how I prepared this recipe.

By the way, time is running out to enter my 2nd Blogiversary Giveaway!  Don't miss out on this opportunity to win an autographed version of Pioneer Woman Cooks!

One Year Ago: It was a Dinner Club Brinner (Breakfast for Dinner) Theme with Bacon Egg and Toast Cups, Belgian Waffles, Pancake Syrup, Strawberry Topping, and Country Fried Steak!

Spaghetti and Meatballs


Ingredients
 
For the Sauce
  • 1 big can crushed tomatoes
  • 1 regular size can tomato sauce
  • 1 small can of tomato paste
  • garlic, salt and pepper,  basil, thyme, oregano, and parsley to taste
  • 2 bay leaves
For the Meatballs:
  • 1 package trio meat
  • 3 eggs
  • 1 cup panko bread crumbs
  • salt and pepper to taste
  • hearty handful of baby spinach
  • 1 medium yellow onion
  • 1 red pepper
  • small handful of fresh basil
  • about a tbsp each of fresh thyme, rosemary, oregano, and parsley
Directions
  1. Preheat oven to 350 degrees and spray a large rimmed cookie sheet with cooking spray.
  2. Combine ingredients for sauce in a dutch oven or large pot.  Bring to a boil then reduce to simmer.  Allow sauce to simmer while you prepare the meatballs.
  3. Add spinach, onion, pepper, and spices in a food processor.  Pulse about 5-6 times until finely chopped.
  4. In a large mixing bowl, using your hands mix together processed vegetables and remaining ingredients until combined.  Shape meat into balls and place onto cookie sheet.  Bake for about 20-25 minutes.
  5. Add meatballs to the sauce and serve.
 Source: Displaced_Kiwi

Monday, March 21, 2011

Recipe Swap: Pierogi and Kielbasa Bake

My co-workers frequently ask me how I manage to work full time and cook the types of meals and treats that I do.  In this day and age, it seems so few actually take the time to make a home cooked meal anymore.  I'll admit in the past, I was one of those people.  I didn't have the slightest clue to how cook anything more than boxed mac n cheese or spaghetti with jarred sauce.  Oh, and if I was feeling really fancy, I'd brown some ground beef and that would be spaghetti with (still jarred) MEAT sauce!  Oooh fancy!

Enter my husband moving in with me and the need to feel domesticated.  On top of that add that I come from a family of cooks (Grandpa owned 2 restaurants and I had 3 aunts/uncles that also owned restaurants...the family that didn't own the restaurants cooked or waited on tables).  I was on the hunt to become a better cook.  This is when I stumbled upon The Nest and eventually, the What's Cooking message board (commonly referred to as simply "WC").  This place is a culinary-lovers dream.  A place for aspiring chefs, food photographers, and bloggers to share their creations with the world!

I'm inspired by the ladies on the WC message board.  They are part of the reason that I began blogging nearly twp years ago.  This is why when Sarah (oct11bride) of Taste of Home Cooking posted a call for people interested in participating in an "Easy Weeknight Meal" themed recipe swap I jumped right in.  The idea is simple.  You send an easy recipe that uses minimal ingredients and can be made in under and hour and then Sarah did some magical behind-the-scenes stuff to swap your recipe with someone else.  Then, you cook the recipe, write a review, and post it to the message board.  Cool!  I submitted a Chicken Bruschetta recipe (which hey, I made nearly 1 year ago to date!) and in return I received Melissa (bride2bnVA) from Lemons and Love's Pierogi and Kielbasa Bake recipe.

I'll have to admit that it was really warm today (a gorgeous 75 degrees! Helloooo first full day of Spring!) and so turning on the oven was the last thing I wanted to do but hey, all for the sake of a good meal, right?  Melissa doubled Cooking Light's original recipe but since it's just Chris and I, I scaled it back down.  To make myself feel more "Spring" and add some nutrition, I threw in some veggies that I had laying around in the fridge.  I didn't really want to open a whole (2 cup) can of chicken broth just to use 1/2 cup of it so instead I substituted a dry white Sauvignon Blanc wine.  And, because I love everything spicy and garlicy, I doubled the garlic and added a couple healthy dashes of cayenne pepper.  All these changes are reflected below.

This recipe was yummy and as promised, easy to create as a weeknight meal.  Okay...so I might have complicated it more than the version Melissa sent in the exchange but I still had dinner on the table in about 30 minutes so you can't say that's not fast!  It's a great base recipe that you can adjust to your personal tastes and make your own just like Melissa and I both did.  Muah, magnifico!

One Year Ago: Stuffed Shells and Look-Alike Hostess Cupcakes


Pierogi and Kielbasa Bake

Pierogi and Kielbasa Bake

Ingredients
  • 1 (16-ounce) packages frozen potato and cheese pierogies (such as Mrs. T's)
  • Cooking spray
  • 1/2 pound (8 oz) kielbasa, cut into small pieces
  • 2 garlic cloves, minced
  • Assorted veggies (used leftovers from my fridge - 1/4 red pepper, 1/4 green pepper, and a couple handfuls of frozen peas)
  • 4 ounces low-fat cream cheese (Neufchantel cheese)
  • 1/2 cup dry white wine (or fat-free, lower-sodium chicken broth)
  • 1/2 cup shredded sharp cheddar cheese
  • 1 diced roma tomato
  • 1/4 teaspoon freshly ground black pepper
  • A few shakes of cayenne pepper (optional)
Directions
  1. Preheat oven to 400°.
  2. Arrange the pierogies in an 11 x 7-inch glass baking dishes coated with cooking spray.
  3. In a saute pan over medium-high heat, add kielbasa and cook about 2-3 minutes, or until sausage begins to slightly brown.  Then, add garlic and fresh veggies (frozen can skip this step) and saute for a couple minutes longer. Add cream cheese, pepper, and cayenne pepper and cook for 1 minute or until cream cheese begins to melt, stirring frequently. Gradually add wine or chicken broth to pan, stirring with a whisk until smooth. Stir in tomatoes. 
  4. Remove pan from heat and spoon mixture over the pierogies.  If you have any frozen veggies, put those on top of the mixture and then top with 1/2 cup of shredded cheese. 
  5. Bake at 400° for 20 minutes or until bubbly and thoroughly heated.  Serve hot.
Source: Adapted from Lemons and Love who had adapted her version of the recipe from Cooking Light  

Wednesday, March 16, 2011

Handheld Breakfast Two Ways

And the award for Worst Blogger Award goes to...me.

Has it really been a month since I updated?  Shoot.  There goes my New Year's Resolution to try to update more frequently.  Somehow anytime I get a break in life (in this case going to New York City for a week long business trip) and/or begin intensely planning a vacation (c'mon, I'm going to Europe next month...don't tell me blogging would be at the top of your mind!) my blogging just goes by the wayside.  Don't get me wrong, I've still been cooking when I'm around...just not sharing the results with the world.  I've noticed that my web traffic and viewership have suffered as a result.  Drat!  How do the hard core bloggers do this so consistently?  Please share your tips!

So, as an apology, I am giving you a recipe two-for-one!  Honestly, it kind of works out in my favor because these two recipes were photographed together :D.  Remember that Quiche Lorraine that I made as part of my 23 Things in 2011 List?  These little handheld treats were also part of that same New Years Family Brunch.

The French Toast Cups with Sausage and Apples was definitely generally preferred over the Savory Muffins.  I mean what's not to love about sweet and salty combined into a single hand-held treat?  And for the cook, it's easy to increase the number of servings because the incremental work is minimal.  If I were to make that one again, though, I think I'd reduce the amount of butter in the apple and sausage mixture.  And, I found it made wayyyy more filling than was needed to fill my French toast cups so maybe reduce that by about half.  These changes are reflected below by simply doubling the french toast amounts and keeping the filling the same.  I also envision this as being a great concept for French Toast stuffed with more traditional cream cheese and fruit filling.  Yummo!

Our beagle Toby I think preferred the Muffins, though.  Of course, he kind of didn't have a choice.  One just kind of fell off of the cupcake tree (look, another purpose for those things!  Oh and thanks Mandy for buying this from my Secret Santa list!) when Mom was getting her serving.  Toby grabbed it in his mouth as soon as it hit the floor.  Thankfully he's good about giving up food when I tell him to so no damage done.

Do you like handheld breakfast treats?  These Bacon Egg and Toast Cups are sure to rock your world!

One Year Ago: Grasshopper Cookie Bars (perfectly green for St. Patty's Day!) and Peanut Butter Oatmeal Chocolate Chip Cookies (a trifecta of cookie classic goodness!)


French Toast Cups with Sausage and Apples
Yields: 12 Servings


Ingredients
For the French Toast Cups:
  • 12 slices of whole wheat bread
  • 6 eggs
  • 2 Tbs brown sugar
  • 1 tsp cinnamon
  • pinch nutmeg
For the Apple and Sausage Filling:
  • 1 cup diced apples
  • 1 cup (8 oz) breakfast sausage
  • 1/2 cup butter
  • 3 Tbs brown sugar
  • 1 tsp cinnamon
  • pinch nutmeg
  • 1/2 tsp vanilla extract
Directions
  1. Preheat oven to 400 degrees and butter a muffin pan. 
  2. Using a cookie cutter or wide rimmed glass, cut circles out of bread slices about 3 inches in diameter.  Whisk eggs and spices together.  Dredge bread circles in egg mixture and remove any excess egg
  3. Press bread circles into the muffin pan, bake in the oven for 12 - 15 minutes, until brown
  4. While bread is in the oven prepare breakfast sausage.  In another hot skillet melt butter, stir in brown sugar, cinnamon, nutmeg and vanilla.  Add apples to brown sugar mixture and cook until apples begin to soften and sugar mixture caramelizes.   Combine sausage and dripping with apples, stir.
  5. When french toast cups are done, allow to cool for a few mintues, remove from pan using a knife to separate from the pan.  Fill french toast cups with apple and sausage mixture, drizzle with maple syrup and serve.
Source: The Noshery 

Savory Breakfast Muffins
Printer-Friendly Version
Yields: 12 Muffins

Ingredients
  • 2 cups whole-wheat flour
  • 1 cup all-purpose flour
  • 1 tablespoon baking powder
  • 1/2 teaspoon baking soda
  • 1/2 teaspoon freshly ground pepper
  • 1/4 teaspoon salt
  • 2 eggs
  • 1 1/3 cups buttermilk
  • 3 tablespoons extra-virgin olive oil
  • 2 tablespoons butter, melted
  • 1 cup thinly sliced scallions, (about 1 bunch)
  • 3/4 cup diced Canadian bacon, (3 ounces)
  • 1/2 cup grated Cheddar cheese
  • 1/2 cup finely diced red bell pepper
Directions
  1. Preheat oven to 400°F. Coat 12 muffin cups with cooking spray.
  2. Combine whole-wheat flour, all-purpose flour, baking powder, baking soda, pepper and salt in a large bowl.
  3. Whisk eggs, buttermilk, oil and butter in a medium bowl. Fold in scallions, bacon, cheese and bell pepper. Make a well in the center of the dry ingredients. Add the wet ingredients and mix with a rubber spatula until just moistened. Scoop the batter into the prepared pan (the cups will be very full).
  4. Bake the muffins until the tops are golden brown, 20 to 22 minutes. Let cool in the pan for 5 minutes. Loosen the edges and turn the muffins out onto a wire rack to cool slightly before serving.
Make Ahead Tip:  Individually wrap in plastic and refrigerate for up to 3 days or freeze for up to 1 month. To reheat, remove plastic, wrap in a paper towel and microwave on High for 30 to 60 seconds.

Nutritional Information: (per muffin) 217 calories; 9 g fat ( 3 g sat , 4 g mono ); 50 mg cholesterol; 24 g carbohydrates; 9 g protein; 3 g fiber; 339 mg sodium; 113 mg potassium; Vitamin C (25% daily value), Fiber (13% dv).
  
Source: Eating Well, April/May 2005

Monday, January 31, 2011

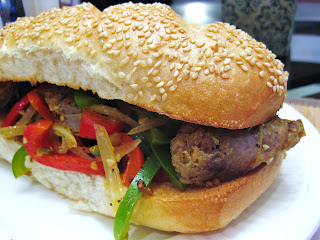
Sausage, Pepper and Onion Hoagies

The inspiration for this recipe came from me scoping out the bakery clearance section at my local Kroger as I often do.  I got a 4-pack of hoagie rolls for $0.99 versus the $2.99 that they were at regular price.

You can save quite a bit of money by checking out the Manager Specials in each section of the store (like bakery, meat, frozen, produce, etc.).  And, if you plan on making the meal that same day or within a day (maybe more depending on what it is and the sell-by date on the package), you won't be compromising freshness.  Another money-saving tip?  My brother-in-law Justin says that if you go to the deli section near closing time, all the meat that is open is offered at half price.  He used to go to Meijer on his way home from work to load up on lunch meat and then make subs for the week. How's that for a deal?!

I had to buy other ingredients like the sausage (whoa that was expensive!...$2.99 for a package.) and bell peppers which increased the overall cost of this meal but if you shop right, this can be an inexpensive meal.  Better yet, it's pretty delicious.

I changed Rachel's recipe a little bit.  The original recipe called for 3/4 pound sweet Italian sausage AND 3/4 pound spicy Italian sausage.  Not wanting to be out $6 just for the meat and seeing that a single package was already about 1 1/4 pounds I decided to just go with a single package of sweet Italian sausage.  She also called for two cubanelle peppers (light green mild Italian peppers) but I couldn't find those so I decided to substitute a single green bell pepper instead.  It gave it a nice color contrast and the flavor was right for me.  Last but not least, instead of investing even more money on a jar of the types of peppers Rachel suggestions, I decided to just use some of my giant jar of sliced jalapenos.  Since I knew this would carry a bit more heat than the more mild peppers she suggests, I figured if I went with the sweet sausage I wouldn't miss the mix of sweet + spicy sausage.

Overall I'd say the filling is very flavorful with the sweet and spicy sausage and the addition of the pepper juice gave it a unique tang.  I loved the crispy bread in this recipe and was reminded how good hoagies can be for a quick dinner.

One Year Ago: Mexican Chicken Spaghetti 

Sausage, Pepper, and Onion Hoagies
Printer-Friendly Version


Cook Time: 15 minutes
Yields: 4 Servings

Ingredients 
  • 1 package (~19 oz) Italian or hot Italian sausage links  
  • 1 tablespoons extra virgin olive oil, 2 turns of the pan  
  • 2 large cloves garlic, crushed   
  • 1 large onion, thinly sliced  
  • 1 green bell pepper, seeded and thinly sliced  
  • 1 red bell pepper, seeded and thinly sliced  
  • Salt and pepper  
  • 2 or 3 jarred hot cherry peppers, banana peppers, pepperoncini or jalapenos, finely chopped  
  • 2 tablespoons hot pepper juice, from the jar

For Assembling Hoagies:
  • 4 crusty, semolina submarine sandwich rolls, 8 inches, sesame seeded or plain
  • 1 tablespoon extra-virgin olive oil
  • 3 tablespoons butter
  • 1 large clove garlic, minced
  • 1 1/2 teaspoons dried Italian seasoning (or 1/2 teaspoons each oregano, thyme, parsley)
Directions
  1. Place the sausages in a large nonstick skillet. Pierce the casings with a fork. Add 1-inch water to the pan. Bring liquid to a boil. Cover sausages, reduce heat and simmer 10 minutes.
  2. Heat a second skillet over medium high heat. Add oil, 2 turns of the pan. Add garlic, onion, cubanelle and red peppers. Season vegetables with salt and pepper.
  3. Drain sausages and return pan to stove, raising heat back to medium high. Add a drizzle of oil to the skillet, brown and crisp the casings. Remove sausages, slice into 2 inch pieces on an angle and set pieces back into the pan to sear.
  4. Split and toast the bread under broiler. Melt oil, butter together in small pan over medium heat. Add garlic and let it sizzle 1 or 2 minutes. Brush rolls with garlic butter and sprinkle with a little dried Italian seasoning blend.
  5. Combine the cooked peppers and onions to the sausages. Add hot peppers and hot pepper juice to the skillet. Toss and turn the sausage, peppers and onions, picking up all the drippings from the pan. Pile the meat and peppers into the garlic sub rolls and serve.
Source: Slightly modified from Rachel Ray

Saturday, January 1, 2011

2010 Recap Part 1: Reader Favorites

Happy 2011!

I thought I'd kick off this (nerd alert: binary!) New Year with a recap of your favorite recipes from 2010.  Because let's face it, I don't just cook and blog for myself.  I do it for you, too!  That's right.  This post is dedicated to all 55 of you that subscribe to me on Google Reader.  All 8 that subscribe via blogger, too.  And, the countless others that follow my blog sans subscription through Google search, my facebook posts, and the like.  Together you checked out my website a whopping 16,635 times!  Whoa!  I'm so honored to have people that *want* to read about my kitchen chronicles and try new recipes with me. 

What I'd love even more is if you began to come out of your shell and start leaving comments on my blog, too.  Let's face it, we all know that my blogging dwindled in the second half of the year and I just couldn't find the motivation to get back on track.  For 2011, I resolve to get back on the blogging band wagon and I need *you* to help hold me accountable.  Cheer me on when you see something you like!  Let me know if you tried something from my blog - successful or not, too!  Together, we can cook great things :).

So now back to Reader Favorite Recipes from 2010.  These recipes are the most popular ones from my website based on number of hits.  Yup, I have this nifty thing called Google Analytics.  It tells me how many people visit my site, what they look at, how long they spend there, and what part of the world they are visiting from.  Neat, huh?  Don't worry my privacy protection fans, it's all aggregated data and so I can't like...internet stalk you or anything :P.

Without further adieu, here are your favorites from 2010.  (And you can see 2009 favorites, here!)

#10: Copy-Cat Chipotle Burrito Bols
(201 pageviews in 2010)


Do you love Chipotle?  Then you'll love these bols. (Yes, not a typo, there's no w.  It's Spanish!)

#9: Spaghetti Meatballs
(213 page views in 2010)

Photo Credit: Amadeo


You really can't go wrong with this classic Italian dish.  This one comes from Chris' Grandmother who was from Sicily and is one of the few dishes that I will make over and over again.  It freezes well so one batch will provide a good 6 meals for the 2 of us!

#8: Spinach, Sausage, and Cheese Manicotti
(291 page views in 2010)

Photo Credit: Eater's Digest


I have smart readers that know a good recipe when they see one.  This is another one of those recipes that actually gets repeated in this household.  The method of stuffing the shells *uncooked* is ingenious.  I like to use sausage, spinach, and cheese (as the title of this recipe suggests) but it is adaptable to the filling of your choice.  Bonus: this one freezes well, too!

#7: Grandpa N's Char Siu Bao (Chinese BBQ Pork Bun)
(337 page views in 2010)


A never-before-seen on the web recipe from my family to yours.  This authentic bun recipe was made countless times by my Grandpa for me.  Since Chinese people tend to not write down recipes, it didn't quite taste exactly as I remembered but is a good starting point.  As I tweak (and document!) this recipe over time I hope to someday get it just as Grandpa used to make.  Stay tuned for future iterations and improvements to this recipe!

#6: Red Lobster's Parmesan Crusted Tilapia
(439 page views in 2010)


This one came straight off of Red Lobster's own website so it's not even a copy-cat - it's the real deal!  Tilapia is one of my favorite types of fish and this preparation is yummy.

#5: Mock Bravo Della Casa Salad
(485 page views in 2010)


Me thinks my readers have a thing for copy-cat restaurants based on Top Reader Picks #10, 6, and 5!  This copy-cat salad is based on my husband's favorite from Bravo! Cucina Italian.  It is the only creamy dressing that he'll eat and he ate this recipe too so I'll take it as a stamp of approval.

By the way, what other copy-cat recipes would you like to see on here?  Now's your chance to leave a comment!

#4: Red Velvet Whoopie Pies (626 page views in 2010)


Each time I see this pictures it practically brings tears to my eyes.  This is by far the most beautiful food photograph that I have ever taken in my life...let alone 2010.  It holds a special place in my heart because it was the first (and only) time that I was accepted to the "food porn" website Food Gawker.  I have no doubt that this recipe made the Top 10 because of the traffic it brought to my site.  That and this recipe is actually quite divine!  Here's to hoping my photography skills continue to improve in 2011.

#3: Lasagna
(662 page views in 2010)

[No food photo.  Sad face.]

This recipe was shared by my Aunt Wah to my mom and I practically grew up on this stuff.  No kitchen should go without a tried and true lasagna recipe.  This one uses cottage cheese instead of ricotta and I find I like the texture better...perhaps because it's what I grew up knowing.  Now to just remember to take a picture of this when I make! 

Garfield would approve.


 #2: Chinese Bakery-Style Cake
(1,278 page views in 2010)


Did you all see the page view count on this one?!  It completely blows all others above out of the water and for good reason, too!  I just wish I had better photography skills to truly capture the magnificence of this cake.  As I said previously, authetic Chinese recipes are hard to come by because the cooks just don't write them down.  I got really lucky and found this one online.  I made some minor modifications and shared it with you.  This is the most commented upon recipe in my blog and I can tell you all love it, too.  What's not to love about the sponge cake layers sandwiching fresh fruit and custard before the entire thing is enveloped in fresh whipped cream.  It looks complicated but it's really not so bad.  And, I gaurentee that it's totally worth it.  If you haven't tried this yet, go.  Now.

Drumroll please....

#1: Chinese Bolo Bao with Nai Wong Filling ("Pineapple" Custard Bun)
(1,590 page views in 2010)


No big surprise here!  The King of 2010 Recipes (mostly due to Google search where it indexes #1!) is the Chinese Bolo Bao with Nai Wong Filling.  This is sort of kind of a Christine's Kitchen Chronicles original because I took 2 existing web recipes to recreate a bun Chris knows and loves.  I have to say that nobody that saw or ate this little beauty was disappointed.  It tasted and looked like it came from a real Chinese bakery.  From its sweet crisp topping to its tender bun leading to a silky custard surprise inside, it is 100% goodness.
There you have it, folks.  Your favorite recipes from 2010.  Be sure to stay tuned to Part 2 of this series - MY favorite recipes from the year!  So far so good on getting back on the blogging wagon, huh? :)

Wishing you a fantastic 2011!
Christine