Showing posts with label berry. Show all posts

Monday, July 1, 2013

Cherry Cheesecake Bites

Today I wanted to share a simple treat that you can make for your 4th of July celebration.  It literally took me minutes to put together and is a super cute way to celebrate America's birthday.

I've had these Cherry Cheesecake Bites bookmarked for quite some time but to add to the red, white, and blue festivity, I decided to try to dye my graham cracker crumbs blue.  Not wanting them to get too wet I ended up using gel food coloring.  If you attempt it with regular food coloring please let me know how it turns out!  And of course you could make them with naturally colored graham cracker crumbs, too.

I feel like most Fourth of July desserts feature strawberries and while that would be great as well, I went with cherries.  Because is there anything more American than Cherry Pie?

Looking for more ideas Summer recipe ideas for your Independence Day Celebration?
Cherry Cheesecake Bites


Cherry Cheesecake Bites

Ingredients

  • Fresh cherries (or strawberries, raspberries, etc.), washed and dried
  • 1/2 block (4 oz) low-fat cream cheese
  • 1/2 cup powdered sugar
  • Pinch of salt
  • Graham cracker crumbs
  • Blue gel food coloring (optional)
Directions
  1. In a small food processor (love my Cuisinart Smart Stick Hand Blender for this!) or bowl with electric mixer, beat together the cream cheese, powdered sugar, and salt.  Transfer sweetened cream cheese mixture to a small bowl.
  2. In a small ziplock bag, add some graham cracker crumbs.  If desired, add a few drops of food coloring then seal bag and mix to combine.  Repeat until desired shade of color is created.  Pour prepared graham cracker crumbs into a bowl.
  3. Make sure cherries are dry then dip into the cream cheese then graham crackers.  Repeat until you've dipped them all.
  4. Eat and enjoy, taking care not to swallow the cherry pit!
Source: Barely modified from Oh, Bite It!

Friday, August 31, 2012

Strawberry Buttermilk Ice Cream

Summer just really wouldn't be complete without ice cream.  I gave my facebook fans a chance to pick which recipe I would post today and Jaida of Sweet Beginnings voted for the dessert option while my normally sweets-loving friend Brenda wanted me to do the savory entree.  Secretly though, I think Brenda wanted to see the dessert recipe first, too.  And seeing as it is Friday, I thought it would be nice to close out this week's posting with a dessert, just like you would with a multi-course meal.

I made this recipe for my friend JJ's birthday.  He had recently been in Japan for an extended business trip and one of his first weekends back was his birthday.  Knowing that he probably wouldn't have food at home nor go shopping or even cook for awhile (because he's a bachelor), I gave him some food as a welcome home gift the night we picked him up from the airport.  This ice cream was my birthday "present" to him.  I chose it because he loves ice cream and he always asked me in the past to make him homemade strawberry ice cream.

How was it, you ask?  I loved the added tang from the buttermilk.  It really complemented the fresh fruit flavor.  To be honest, I kind of didn't want to give him the ice cream once I had tried it.  This one is a keeper!

Strawberry Buttermilk Ice Cream


Strawberry Buttermilk Ice Cream

Ingredients

  • 3/4 lb strawberries, hulled and sliced
  • 3/4 cup sugar, divided
  • 1 Tbsp kirsch or vodka (optional)
  • 1 cup heavy cream
  • 6 egg yolks, lightly whisked in a medium bowl
  • 1 cup buttermilk
Directions
  1. Before you start, make sure you freeze your ice cream maker overnight.
  2. Combine the strawberries, 1/4 cup of the sugar, and kirsch or vodka (if using) in a medium bowl.  Set aside and let the sugars cause the strawberries to soften and release the juices, about 1/2 hour.
  3. In a medium saucepan over medium heat, scald the cream and dissolve the remaining 1/2 cup sugar.  Pour a bit of the cream mixture into the lightly whisked yolk to temper (or warm) the eggs.  Add the remaining hot cream, whisking constantly to combine.  Pour the custard mixture back into the saucepan.  Cook custard until just thickened, whisking constantly, about 4-5 minutes.  Using a fine wire mesh, strain the custard into a medium bowl.
  4. In a blender, puree the macerated strawberry mixture until smooth.
  5. Combine the custard mixture and the pureed strawberries.  Cover and refrigerate until cold, at least two hours but ideally overnight.
  6. Just before churning, add the cup of cold buttermilk and stir to combine.  Churn the ice cream according to your manufacturers instructions.  For a harder, more scoopable consistency, transfer ice cream to a freezer safe container and freeze for at least 1 hour before serving.
Source: As adapted by and seen on Stresscake from The Perfect Scoop by David Lebovitz

Sunday, May 20, 2012

Fresh Strawberry Pie

Strawberries are by far one of my favorite fruits so it's a shame that they're only in season for such a small part of the year.  Eating them at any other time other than their peak just means large berries that appear red and ripe but with a disappointing sub-par flavor because they were shipped green from far far away.

Recall that last year, I had a mission to make a pie crust from scratch as part of my 23 Things in 2011 List.  This is the recipe that I made to complete that task and I remember that I took forever searching for what I thought would be the perfect pie crust.  The theory is that the vodka in the recipe will bake off during cooking resulting in an extra flaky crust.  And, it delivered!

This is me posting this pie recipe nearly a year later so that you can make it with fresh, in-season strawberries, too.  See, there ARE advantages to me being a posting slacker ;).


Fresh Strawberry Pie


Ingredients

For the Crust

  • 2 1/2 c. all-purpose flour, plus more for dusting
  • 1 tsp. Kosher salt
  • 1 tsp. granulated sugar (I like to use vanilla sugar)
  • 1 c. (2 sticks) chilled, unsalted butter, cut into pieces
  • 1 TBSP chilled vodka
  • 1/4 to 1/2 c. ice water, less 1 TBSP
For the Pie
  • 1 (9 inch) pie crust, baked
  • 1 quart fresh strawberries
  • 3/4 cup white sugar
  • 3 tablespoons cornstarch
  • 1/2 cup water
  • 1/2 cup heavy whipping cream
Directions

To prepare the pie crust:
  1. Place the flour, salt, and sugar in the bowl of a food processor.  Process for a few seconds to combine.
  2. Add the butter pieces to the flour mixture and process until the mixture resembles coarse sand, about ten seconds.
  3. Add the vodka then the water in a slow, steady stream through the feed tube with the machine running, just until the dough holds together.  Do not process for more than 30 seconds.
  4. Turn the dough out onto a floured work surface.  Divide into two equal pieces and place on two separate sheets of plastic wrap.  Flatten into disks, then wrap and refrigerate for at least one hour before using.  Make two 8 to 10-inch single-crust pies pies or one 8 to 10-inch double crust pie.  (Extra crust can be frozen for later use.)
To bake and assemble the pie:

  1. Preheat oven to 375 degrees.
  2. Remove a disk of pie crust from the refrigerator and allow to warm slightly.  Roll out on a floured work surface and then transfer the pie crust to a pie plate.  Poke several holes in the bottom with a fork then bake for 25 minutes or until golden brown.  Set aside to cool.
  3. Arrange 3/4 of strawberries in baked, cooled pie crust. Mash remaining berries and combine with sugar in a medium saucepan. Place saucepan over medium heat and bring to a boil, stirring frequently.
  4. In a small bowl, whisk together cornstarch and water. Gradually stir cornstarch mixture into boiling strawberry mixture. Reduce heat and simmer mixture until thickened, about 10 minutes, stirring constantly. Pour mixture over berries in pastry shell. Chill for several hours before serving. 
  5. In a small bowl, whip cream until soft peaks form. Serve each slice of pie with a dollop of whipped cream.


Source: Pie crust from The Martha Stewart Living Cookbook as adapted by and seen on Apple a Day; Strawberry Pie adapted from All Recipes

Wednesday, June 22, 2011

Summer Strawberry Salad with Poppy Seed Vinaigrette

I have a cousin that is OBSESSED with Panera.  I'm talking every time she is in a city that has one it is on her "to do" list.  Sure it's a chain but who can blame her?  They do have really delicious food and chains provide great consistency no matter where you go.

This recipe is being dusted off from the archives.  It sat in the deep dark recesses of that black box that is my husband's computer hard drive for over a year before seeing the light of day again right here, right now.  You see, this time last year I was making lots of food but was lazy about blogging.  And then by the time I got time to blog, it just didn't worth doing so because the season had already changed.
Ah seasons.  This salad TOTALLY captures the spring/summer season.  It embodies all that is good about the bountiful seasonal fruits and veggies.  It is also inspired by my cousin's favorite restaurant, Panera.  Please go make this salad today.  It's a beautiful display of color bursting with natural sweetness and filled with nutrition!


Two Years Ago: Pasta Salad - This one ALWAYS gets gobbled up when I bring it to a party!

Summer Strawberry Salad with Poppy Seed Vinaigrette


Ingredients

For the dressing:
  • 1/3 cup apple cider vinegar
  • ¾ cup sugar
  • 2 tbsp. minced shallot
  • ¼ tsp. dry mustard
  • 1 tsp. salt
  • 6 tbsp. light mayonnaise
  • 3 tbsp. freshly squeezed orange juice
  • 6 tbsp. vegetable oil
  • 1½ tsp. poppy seeds
For the salad:
  • Romaine lettuce, washed and dried
  • Strawberries, hulled and sliced
  • Blueberries
  • Mandarin orange segments
  • Fresh pineapple, cubed
Directions
  1. In the bowl of a food processor, combine the vinegar, sugar, shallot, dry mustard, salt, mayonnaise and orange juice.  Process to blend well.  With the feed tube open and the processor on, add the vegetable oil in a steady stream and continue processing until incorporated.  Add the poppy seeds and pulse briefly just until blended.  Transfer to an airtight container and refrigerate until ready to use.
  2. To make the salad, chop the lettuce into bite-size pieces.  Plate individual servings of the lettuce in salad plates.  Top each serving with strawberries, blueberries, mandarin oranges and pineapple cubes as desired.  Drizzle lightly with the poppy seed dressing and serve immediately.
Source: Salad from Annie's Eats; Dressing from Jamie Cooks It Up

Wednesday, August 25, 2010

Blueberry Almond Cake with Lemon Drizzle

This cake is the epitome of summer.  Blueberries, lemon, and almonds?  Oh and let's not forget to mention that this cake even has a hidden layer of cheesecake goodness inside and not called out in the name.  It's like a secret weapon.  But with all these deliciously fresh flavors, what more can you really ask for?

I made this cake to bring up to my husband's mini-family reunion earlier this month.  It was well received but in my personal opinon a bit too lemony.  I guess that's what you get when you just squeeze in a whole big juicy lemon without regard for the size and how much juice is contained versus actually measuring it.  Whoops!  Note to self, not all lemons are created equal and baking really is a science, not an art.

Speaking of lemons, for whatever reason, my lemond just DID NOT want to zest.  Maybe it's the fact that I don't own a microplane (sad face!) so I use the fine side of my grater.  It probably also doesn't help that said grater is also beginning to break.  Yeah, time to invest in that microplane.

I also kind of read the instructions wrong and accidentally mixed the blueberries into the cream cheese mixture instead of scattering them on top.  Thankfully I had just a few extra berries to scatter on top after I realized my mistake.  Same taste but I think it caused me to need to bake it longer before the cheesecake part set and didn't quite look as pretty as it really should have.  (Check out Beantown Baker's post on this recipe...hers looks so great!)

I think I'll leave this post relatively simple and sweet.  The picture kind of speaks for itself.  Delicious.

One Year Ago: Here's a few of them since I've sucked so bad at blogging lately!  Then again, as I look at the history August must be historically bad for me since there actually is only ONE recipe posted last August, too!  Honey Lime Grilled Chicken, Chicken Lo Mein, and Grands! Taco Melts (AKA Homemade Hot Pockets)

Blueberry Almond Cake with Lemon Drizzle
Printer-Friendly Version


Yields: 1 9-inch cake with 12 Servings

Ingredients

Cake
  • 1 1/2 cup flour
  • 2 tsp baking powder
  • 1/4 tsp salt
  • A pinch of nutmeg, freshly ground
  • 1/2 cup butter, at room temperature
  • 1 cup brown sugar
  • 2 eggs
  • 2/3 cup plain yogurt
  • 2 tsp fresh lemon juice
  • 1/2 tsp almond extract
Topping
  • 8 ounces cream cheese, at room temperature
  • 1/2 cup sugar
  • 1 tsp flour
  • 1 egg
  • 2 tsp lemon zest
  • 2 cups fresh or frozen blueberries
  • 1/2 cup sliced almonds
Glaze

  • 1 Tbsp lemon juice
  • 1/2 cup powdered sugar
Directions
  1.  Preheat the oven to 350. Grease a 9-inch round cake or spring form pan.
  2. Sift together the flour, baking powder, salt, and nutmeg. Set aside.
  3. In a large mixing bowl, beat the butter until creamy. Gradually add 1 cup brown sugar and beat for approximately one minute until light and well blended. Add the eggs, one at a time, beating for approximately two minutes after each addition. Alternately, add one-half of the flour mixture and one-half of the yogurt, beating briefly on low after each addition. Repeat. Stir in the lemon juice and almond extract. Pour the cake batter into the prepared baking pan.
  4. In a mixing bowl, beat together the cream cheese, 1/2 cup sugar, 1 teaspoon flour, 1 egg, and the lemon zest for approximately two minutes until very smooth and creamy. Spoon this cheese mixture over the cake batter and spread, leaving a one-inch margin of cake batter exposed around the perimeter of the cake. Sprinkle the blueberries over the cream cheese mixture and the sliced almonds around the perimeter of the cake.
  5. Bake for 40-50 minutes or until a toothpick inserted in the center of the cake comes out clean. Cool the cake to room temperature and serve.
  6. For the glaze, whisk together the lemon juice with the powdered sugar and drizzle the mixture over the top of the cake.
Source: Originally from Modern Comfort Food as adapted by and seen on Beantown Baker

Monday, July 5, 2010

White Chocolate Strawberry Parfaits

This is an extremely easy dessert that's light and refreshing.  Chris and I put this together assembly line style and were done in no time!  When it was time to serve, we just dalloped each glass with some cool whip and topped it with a fresh strawberry.

It was the perfect ending to the Prom dinner that I made for my sister and her friends.  The other dishes served were Olive Garden Copycat Salad (recipe to come), Garlic Bread, Pizza Bites, Baked Sausage Ziti, and Chicken Alfredo

I was honored that they wanted me to cook for their special night.  It was extremely satisifying to see them clear their plates and go back for seconds.  They said it was better than a restaurant and even asked if they could come back for dinner again in the future!  If that's not a compliment, I don't know what is.  I was amazed by how much those boys ate but I guess teenage boys do eat quite a bit.  Every single one of them must have overate though because Chris had to hand out the Tums afterwards haha.  (I probably should have supported my brand and made them take Pepto instead, huh?)

Anyway, did you know that a traditional parfait of this sort would have 490 calories and 40 g of fat per serving?!  Thankfully this version is lightened up with a slim 198 calories and 3 g of fat per serving.  So, now you have room for dessert!

One Year Ago: Chocolate Peanut Butter Cookie Treats

White Chocolate Strawberry Parfaits
Printer-Friendly Version


Cook Time: 20 minutes
Total Time: 4 hours, 20 minutes
Yields: 4 Servings

Ingredients
  • 1/2 cup low-sugar strawberry preserves
  • 1 1/4 cups sliced strawberries
  • 1 package (1 oz) sugar-free, fat-free white chocolate instant pudding mix
  • 1 1/4 cups low-fat 1% milk
  • 1 1/4 cups thawed fat-free whipped topping
  • 24 mini vanilla wafer cookies
  • Whole strawberries (optional)
Directions
  1. In a microwave-safe bowl, microwave strawberry preserves on high in 15 second intervals until melted.  Add sliced strawberries and toss to coat.
  2. In a separate bowl, whisk pudding mix and milk until well blended, about 1 minute.  Let stand until thickened, about 3-5 minutes.  Stir in 1 cup of whipped topping.
  3. In each (8 oz) dessert glass (I used a wine glass), layer 1/3 cup pudding mixture, 2 Tbsp sliced strawberry mixture, 6 cookies, and 1/4 cup pudding mixture.  Top with remaining sliced strawberry mixture.
  4. Cover and refrigerate 4 hours.  Just before serving, top with remaining whipped topping and if desired, garnish with whole strawberries.
Nutritional Information
Calories: 198
Protein: 4 g
Fat: 3 g (1 g saturated)
Trans fat: 0 g
Cholestrol: 6 mg
Carbs: 39 g
Sodium: 365 mg
Fiber: 1 g
Sugar: 22 g

Source: Woman's World, March 2010 p. 33

Monday, June 21, 2010

Orange Berry Muffins

Hi again.  Sorry I've been so sporadic in posting.  Toby keeps me very busy and even though I wake up at like 6AM daily now because of him I've been spending my extra hours cooking and uploading vacation photos rather than blogging.  There are so many great things I still need to blog about but I've been struggling to sit down and make myself write...err...type. 

Posting recipes is surprisingly a lot of work!  There's witty commentary to be made, photo editing, finding the recipe again months after you made the dish (I was about to give up on finding this one again!), recipe copy/pasting/modifying, and then making a printer-friendly link (another project left unfinished...I was supposed to back convert older recipes and am probably only halfway through.  Mental note to self to finish that up...).  Now add to the mix a dog that you have to watch to make sure he's behaving and you've got yourself some blogging difficulty.  It's a wonder I can even *cook* anymore.  But, I wouldn't trade my beagle Toby for the world.  He's awesome and so loving!

Back to the story on this recipe.  I made this one wayyyy back on EASTER WEEKEND!  Whoa that's a long time ago.  I had made these to eat as a snack in the car and for quick and inexpensive breakfasts while we were spending time with our friends Sig and Kristen on a couples road trip to Washington DC to see the Cherry Blossoms.  They were beautiful albeit I had expected it to be more enchanting.  Guess that's what happens when you go in peak season.  I was so mad when I saw people picking the blossoms and/or whole branches off the trees.  Way to ruin it for everyone!  The city itself was soooo much more awesome than I remember.  The last time I had gone was probably elementary school.  I definitely would like to visit again someday.  We *almost* saw President Obama on the way to Easter Sunday service but got tired of waiting for (at the time) what we thought might actually be nothing.

I'd have to say that Sig and Chris probably had more than their fair share of these muffins.  And I can't blame them.  They're TASTY!  The orange zest (use organic oranges to avoid the pesticides!) gives it a great morning wake-up zing while the berries burst with flavor.  The zest also smelled so fragrant and citrusy when I was rubbing it in the sugar...I'll admit I kind of wanted to stop right there and just eat the orange flavored sugar haha!  They are relatively healthy because I substituted some whole wheat flour for the white and there's relatively little sugar for a sweet bread type recipe.  I must have added strawberries to my muffins because I had some leftover.  The original recipe was just for blueberries but why not do a berry mix for some gorgeous color :).  I definitely plan on making this one again.  Especially with berries being in season now.  Yum!

One Year Ago: Exquisite Pizza Sauce

Orange Berry Muffins
Printer-Friendly Version


Yields: 12 Muffins

Ingredients
  • Grated zest and juice of 1 orange
  • About ¾ cup lowfat buttermilk
  • 2 large eggs
  • 3 tablespoons honey
  • 1 stick (8 tablespoons) unsalted butter, melted and cooled
  • ⅓ cup (2.33 ounces) sugar
  • 2 cups (9.6 ounces) all-purpose flour (I substituted 1 cup whole wheat flour for the same amount of all-purpose white flour)
  • 2½ teaspoons baking powder
  • ¼ teaspoon baking soda
  • ¼ teaspoon salt
  • 1 cup blueberries and/or strawberries – fresh, preferably, or frozen (not thawed)
  • Decorating sugar, for topping (optional)
Directions
  1. Center a rack in the oven and preheat the oven to 400 degrees F. Line the pan with paper muffin cups. Alternatively, use a silicone muffin pan, which needs neither greasing nor paper cups.
  2. Pour the orange juice into a large glass measuring cup or a bowl and pour in enough buttermilk to make 1 cup. Whisk in the eggs, honey and melted butter.
  3. In a large bowl, rub the sugar and orange zest together with your fingertips until the sugar is moist and the fragrance of orange strong. Whisk in the flour, baking powder, baking soda and salt. Pour the liquid ingredients over the dry ingredients and, with the whisk or a rubber spatula, gently but quickly stir to blend. Don’t worry about being thorough – the batter will be lumpy and bubbly, and that’s just the way it should be. Stir in the berries. Divide the batter evenly among the muffin cups.
  4. Bake for 22 to 25 minutes. If you want to top the muffins with decorating sugar, sprinkle on the sugar after the muffins have baked for 10 minutes. When fully baked, the tops of the muffins will be golden and springy to the touch and a thin knife inserted into the center of the muffins will come out clean. Transfer the pan to a rack and cool for 5 minutes before carefully removing each muffin from its mold.
Source: Slightly modified from Dorie Greenspan’s Baking: From my Home to Yours, as seen on The Way the Cookie Crumbles

Tuesday, April 13, 2010

Blueberry Citrus Cake

Happy (Belated) First Birthday Blog!  And, Happy Birthday to my Mother-in-Law Mary Lynn!

In a way, this is a faux birthday for the blog because I didn't actually start this public blog until the Fall of 2009.  However, it's been a year since I first started sharing recipes with my friends and family on our personal website, the Chronicles of the Chrises and those recipes were loaded with backdates this this website.  Back when I started blogging recipes, it was just a way for me to share family recipes and things that I was cooking with those that were close to us.  Back then, I didn't know about food blogging ettiquite but I now know and make an effort to take my own photos.  Eventually I thought why not start a public blog and this blog was born with a name to mirror our other more life-centric website. 

I also can't believe the improvement to my skills that's happened through the past year or so.  Honestly, I used to be kind of the black sheep of my extended family because I NEVER cooked and came from a family of cooks/restaurant owners.  Cooking became a necessity when I was living on my own in college.  It was learn to make food to eat or eat out...which on a poor college student's budget isn't so friendly on the pocket books.  I started by committing myself to trying at least 1 new recipe a week.  After I got married about 2 years ago, the domestic bug must have bit because then I started cooking even more.  I wanted to be a good wife and have dinner on the table for my husband by the time he got home from work!  And most recently, we bought a house last Fall and we gutted our entire kitchen on the same day that we closed.  We remodeled and put in a beautiful gourmet kitchen and I'm so glad that we did because nearly all my free time is spent in the kitchen trying new recipes now.  Hey, gotta get our money worth, right? :)

What I'm not new to is the concept of social media and blogging.  I grew up with the Internet (Prodigy shout out!) and chat rooms (Microsoft Comic Chat woot!).  I had to take a mandatory typing class in Junior High and because I'd been typing since I was like 6 I came into the class typing faster and more accurately than the teacher.  (Unfortunately, they made me take the class anyway...waste of time!).  I have had a personal blog since at least 2001...maybe even 2000 (I'd have to go back and see).  I distinctly remember writing about September 11th in it and was so proud that I've kept posting to it through all these years.  (I think I have to go and get my 2010 post in there!)

Anyway, I hope that you enjoy the recipes that I share with you.  This particular one is deliciously light and refreshing.  I made it for Mary Lynn's birthday and we all really enjoyed it.  I will be making this one again!  Since I started making a lot of things from scratch I've generally started turning my nose up to boxed mixes but this recipe just uses the boxed mix as a base and then adds all these delicious goodies like zested lemon and oranges, blueberries, and a homemade frosting.  In my eyes, this still makes it homemade!

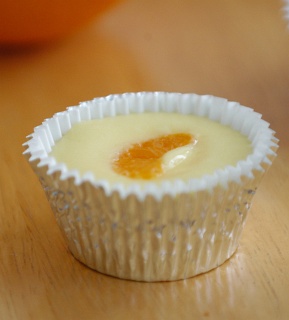
I'm sorry but my sucky photo taking skills don't do this cake justice at all and you must try it!  And/or go to the Better Home and Gardens site where I found the recipe to see a prettier professional picture.  It's the perfect cake for Spring and Summer!

One Year Ago: Crockpot Turkey and Cakeballs

Blueberry Citrus Cake
Printer-Friendly Version


Prep Time: 30 min
Bake Time: 35 min
Cool Time: 2 hours
Yields:  12 Servings

Ingredients
 
For the Cake
  • 1 package 2-layer-size lemon cake mix
  • 1/2 cup orange juice
  • 1/2 cup water
  • 1/3 cup cooking oil
  • 3 eggs
  • 1-1/2 cups fresh or frozen blueberries
  • 1 tablespoon zested orange peel (from approximately 1/2 large orange)
  • 1 tablespoon zested lemon peel (from approximately 1 medium lemon)
For the Citrus Frosting
  • 1 (3 oz) package cream cheese, softened
  • 1/4 cup (1/2 stick) butter, softened
  • 3 cups powdered sugar
  • 2 tablespoons orange juice
  • 1 cup whipping cream
  • 2 tablespoons zested orange peel (from approximately 1 large orange)
  • 1 tablespoon zested lemon peel (from approximately 1 medium lemon)
Directions

To Prepare Cake
  1. Preheat oven to 350 degees F. Grease two 8 inch or 9 inch round baking pans; set aside.
  2. In a large mixing bowl combine cake mix, orange juice, water, oil, and eggs. Beat with an electric mixer on low speed for 30 seconds. Increase speed to medium; beat for 2 minutes. With a wooden spoon or rubber spatula gently fold in blueberries, orange peel, and lemon peel. Pour batter into prepared pans.
  3. Bake for 25-30 minutes (9 inch pans) or 35-40 minutes (8 inch pans) or until a wooden toothpick inserted near center comes out clean.
  4. Cool layers in pans on wire racks for 10 minutes. Remove cakes from pans. Cool thoroughly on racks. While cake is cooling, prepare Citrus frosting using the directions below.
  5. Frost cooled cake with Citrus Frosting. Garnish with orange peel curls, if desired. Store frosted cake in the refrigerator.

To Prepare Citrus Frosting
  1. In a medium bowl beat together softened cream cheese and softened butter until fluffy.  Add sifted powdered sugar and orange juice. Beat until combined.
  2. In a small bowl beat whipping cream to soft peaks; add to cream cheese mixture.
  3. Add zested orange peel and zested lemon peel. Beat on low until combined.
Source: Better Homes and Gardens

Monday, April 5, 2010

Strawberry Topping

This Strawberry Topping was made for our March Breakfast Themed Dinner Club as part of our Make Your Own Belgian Waffle Bar.  It was rediculously simple to make and tasted very fresh.  I added some lemon juice to brighten up the flavor.  Excellent on waffles, pancakes, ice cream, or cheesecake!

My personal contributions for this dinner club consisted of:
Check out our Dinner Club blog for some additional yummies from my friends!

Strawberry Topping
Printer-Friendly Version


Prep Time: 15 Min
Cook Time: 5 Min
Ready In: 35 Min
Yields: 4 Servings

Ingredients
  • 1 pint strawberries, cleaned and stemmed
  • 1/3 cup white sugar
  • 1 teaspoon vanilla
  • 1 Tablespoon lemon juice
Directions
  1. Cut about 1/3 of the strawberries in half.
  2. In a saucepan over medium high heat, combine uncut strawberries, sugar, vanilla, and lemon juice. Cook, stirring occasionally and smashing strawberries with spoon as they soften, until sauce thickens, about 5 minutes.
  3. Remove from heat. Add remaining 1/3 of cut strawberries into cooked mixture. Store in refrigerator to cool before serving over waffles, pancakes, ice cream, or cheesecake.
 Source: Slightly modified from All Recipes

Wednesday, March 31, 2010

Berry Buttermilk Cake

Are you wondering what to do with leftover buttermilk?  Well, as this is apparently a common question, I've now added a "buttermilk" tag to my blog and will be featuring a few different recipes in the upcoming days as additional ideas.  Surprisingly, I already had a good 6-7 recipes using buttermilk before this series of recipes but I generally used the trick of taking regular milk and adding a bit of vinegar or lemon juice to make it sour and curdle a little.  That's all fine and dandy but it really isn't the same as using REAL buttermilk.  And I had a giant half-gallon jug of it to use!  So come explore some recipes with me, my friends...

This. Recipe. Is. Awesome. 

Even better is that it is really really simple.  I whipped it up and was in and out of the kitchen in well under an hour INCLUDING baking and cleaning time.  It's a very light cake with a delicate crumb and the slight crunch of the sugar on top adds a nice contrast to each bite.  It's light enough to be enjoyed as a breakfast yet satisfying enough to serve as your dessert, too.  Chris' family ate it right up and we enjoyed it so much that I made it again that same week.  Now, I don't know if you've noticed or not but I tend to try a bazillion new recipes so anything that gets made multiple times is a keeper in my eyes!  (I'm sorry, the photo really doesn't do this cake justice!)

The original recipe was called Raspberry Buttermilk Cake but I didn't have any raspberries, I only had frozen blueberries (which were leftover from our Belgian Waffle Bar from Dinner Club...I still need to post those recipes...d'oh!).  Thankfully this recipe is very forgiving and you can use whatever the heck berry you want and I found frozen works just fine in this case.

So if you want a lightly sweet treat tonight that's relatively healthy (less than 200 calories a slice = 1/8th of the cake!), make this one.  You won't be sorry!

Berry Buttermilk Cake
Printer-Friendly Version


Ingredients
  • 1 cup all purpose flour
  • 1/2 tsp. baking powder
  • 1/2 tsp. baking soda
  • 1/4 tsp. salt
  • 1/2 stick of unsalted butter, softened
  • 2/3 cup plus 1.5 Tbsp. sugar, divided
  • 1 tsp. vanilla extract
  • 1 large egg
  • 1/2 cup well-shaken lowfat buttermilk
  • 1 cup fresh raspberries (about 5 oz.), blackberries, blueberries, and/or strawberries*
*Note: If using frozen berries, add the berries to the batter frozen.
 
Directions
  1. Preheat the oven to 400, with a rack in the middle. Butter and flour a 9″ cake pan.
  2. In a large bowl, beat together the butter and 2/3 cup sugar at medium-high until pale and fluffy. Beat in vanilla, and then egg.  Add flour, baking powder, baking soda, and salt.  Add the buttermilk.  At low speed, mix until just combined.
  3. Pour batter into a cake pan and smooth the top using a rubber spatula. Scatter berries on top and sprinkle remaining 1.5Tbsp. sugar.
  4. Bake until cake is golden brown and a toothpick inserted in the center comes out clean, about 20-25 minutes. Cool in the pan 10 minutes and then turn onto a rack and cool to warm, 10-15 minutes.
  5. Serve with whipped cream or ice cream, if desired :).  (Sorry that will put you over the 200 calorie per serving mark...but it would taste so delicious!)

Source: Slightly adapted from Gourmet as seen on Elly Says Opa!

Nutritional Information for 1/8 of the cake: Calories: 196 / Fat: 6.7g / Saturated Fat: 3.9g / Carbs: 31.5 / Fiber: 1.5g / Protein: 3.1g

Wednesday, January 20, 2010

Turkey Pumpkin Meatloaf Muffins with Cranberry Glaze

After much anticipation, here is the other recipe that I made with my coveted can of pumpkin puree.  This recipe was healthy which is a plus and decent in flavor.  Where it threw me off was in the texture, which was a little mushy.  Too soft and it fell apart as I was removing it from the tin.  I like my meatloaf to be more...meaty.  So, in the future I'd decrease the amount pumpkin used in the recipe and/or add more ground turkey.

By the way, this is the second recipe in a couple weeks (see Sun-Dried Tomato Basil Parmesan Muffins) that has called something savory and baked in a muffin tin a "muffin" versus a "biscuit".  I guess it's more common than I thought!  I think if I were to name this particular recipe though I'd call it a mini-meatloaf...I still resist on the muffin naming convention!

Turkey Pumpkin Meatloaf Muffins with Cranberry Glaze
Printer-Friendly Version


Yields: 12 meatloaf muffins

Ingredients

For the meatloaf
  • 1 cup finely chopped onion
  • 1 8oz package mushrooms, chopped finely
  • 3 cloves of minced garlic
  • 1 lb 93% lean ground turkey breast
  • 1 cup pumpkin puree
  • 1 egg white
  • 1/3 cup rolled oats
  • 1 tsp each minced fresh thyme and rosemary
  • Freshly ground salt and pepper
  • 1 tbsp Worcestershire sauce
For the cranberry glaze*
  • 1 cup fresh cranberries
  • 1/4 cup sugar
  • 1/4 cup water
*Note: I couldn't find any fresh cranberries on my grocery trip so I bought a can of whole berry cranberry sauce and used that in place of the glaze.

Directions
  1. Preheat oven to 400F. Spray a standard 12-cup muffin tin with nonstick cooking spray.
  2. In a nonstick skillet over medium heat, cook the onions until softened, about 8 minutes. Add the mushrooms and garlic and cook for about 5 minutes more, until vegetables are tender. Add to a bowl with the turkey, pumpkin, egg white, oats, sage, salt & pepper. Toss gently to combine. Divide the mixture evenly among the muffin tin. Place in the oven, bake for 20 minutes.
  3. Combine cranberries, sugar and water in a small saucepan. Bring to a boil and then simmer for 10-15 minutes. Spoon onto the meatloaf muffins, and bake for another 15 minutes. Remove from the oven and let rest for 5 minutes before serving.
Source: As adapated by and seen on Cara's Cravings from Ashlee's Pumpkin Meatloaf with Cranberry Topping

Monday, September 28, 2009

Cheesecake Cupcakes

The theme for this week is to use up as much of the house warming party leftover food as possible.  It takes some creative repurposing so we'll see what I come up with.  The first item that I made tonight were Cheesecake Cupcakes to get rid of some of those nilla wafers that we had leftover from the chocolate fountain (which, omg was awesome!). 

The recipe comes from a site that I discovered during my engineering days at UC.  If you look at the original recipe, the formatting for the instructions is a little different than a traditional cookbook but makes so much sense and takes up so little room.

Cheesecake Cupcakes
(Source: Cooking for Engineers)
Serves 12

Ingredients
  • 1 lb cream cheese, softened
  • 2 large eggs
  • 1 tsp vanilla extract
  • 1/2 c sugar
  • 12 vanilla wafer cookies (such as Nilla Wafers)
  • topping of choice - cherry pie filling, strawberry pie filling, blueberry pie filling, mandarin oranges, chocolate kisses or chips, nuts, etc...choose your poison ;)
Directions
  1. Preheat oven to 350 degrees.
  2. Line a muffin tin with aluminum foil muffin cups.
  3. Place a vanilla wafer cookie in the bottom of each cup.
  4. In a mixing bowl, cream together cream cheese, sugar, vanilla and eggs.  Let rest and disperse air bubbles by tapping mixture.  (This will prevent the cake from "falling" after you remove it from the oven.)
  5. Fill cups about 3/4 full with cream cheese mixture.
  6. Top with topping then bake for 15 minutes at 350 degrees.
  7. Take out of oven and remove cups from pan.  Place on a cooling rack until completely cooled then transfer to refrigerator.  Refrigerate until ready to serve.