Showing posts with label healthy. Show all posts

Monday, May 20, 2013

SRC: Strawberry Cheesecake Smoothie

This month's Secret Recipe Club assignment comes from one of my favorite bloggers, Jennifer at Mother Thyme.  Jennifer had guest posted for me last year with her very popular Cream Cheese Coffee Cake.  It's always fun to get to know a new blog through SRC but sometimes, it's also good to get one you know and follow already because you just know it will be filled with great recipes!   I had already bookmarked her Strawberry Cheesecake Smoothies and so it seemed it was destiny that made her my assignment for the month.

What I loved about this recipe was how it tasted just like strawberry cheesecake filling.  With strawberries in season and having bought FOUR POUNDS from Costco, I added twice as much in my smoothies for extra strawberry oomph.  This made mine a bit thick so I had to add a splash of vanilla almond milk to thin it out.  It was awesome and so simple!

Jennifer topped hers with whipped cream and some graham cracker crumbs for the full cheesecake flavor experience.  Looks pretty, too!

Do you have any favorite strawberry recipes?

One Year Ago: Creamed Chard and Spring Onion Pasta and Fresh Strawberry Pie
Two Years Ago: Lemon-Rosemary Turkey Meatballs

Strawberry Cheesecake Smoothies

Strawberry Cheesecake Smoothies

Ingredients
  • 3/4 cup non-fat vanilla yogurt (I used 0% Fage Greek Yogurt and added about 1/2 tsp vanilla)
  • 3 ounces light or fat free cream cheese
  • 1 cup frozen strawberries
  • 1-2 teaspoons agave nectar (I used about a tablespoon of honey)
  • Vanilla almond milk or regular milk (optional)
Directions
  1. Add all ingredients except for the milk into a blender.  Process until smooth and creamy.  If needed, add milk of choice to thin the smoothie out to your desired consistency.  Serve immediately.
Source: Modified from Mother Thyme

Secret Recipe Club

Wednesday, April 3, 2013

Steak, Asparagus, and Chimichurri Pasta

Is it Spring, yet?

I'm still waiting for the time where delicate flowers begin to poke their heads out of the ground and start to bloom.  Fat robins hatch their young and begin to chirp. Fresh produce can be found and it becomes warm enough to begin grilling again.

Steak, Asparagus, and Chimichurri Pasta

What I have to share with you today is a dish that envelopes the concept of Spring to me.  Fresh grilled steak slices covered in a light and flavorful chimichurri sauce.  Tossed with bright green asparagus and pasta. It's fresh, healthy, and can be thrown together in a pinch!  For those that are on Clean Eating diets, you could easily adapt this recipe to use 100% whole grain pasta.

In case you've never had chimichurri before and are not sure what to expect, I call it Green Goodness.  It's essentially the Argentine version of pesto.  If you love garlic and herbs, you'll love this!

Two Years Ago: Fish Tacos

Steak, Asparagus, and Chimichurri Pasta


Steak, Asparagus, and Chimichurri Pasta

Ingredients

For the Chimichurri
  • 3 cloves garlic
  • 2 cups Italian or curly parsley, loosely packed
  • 1/2 cup cilantro
  • 1 cup extra virgin olive oil
  • 1 tsp red wine vinegar
  • 3 Tbsp lemon juice
  • 1 tsp red pepper flakes (adjust to your desired heat tolerance...I could have used more!)
  • 1 tsp salt
For the Pasta
  • 1 lb pasta (I used Rotini but the original recipe called for Rigatoni)
  • 1 lb skirt steak
  • 1 lb thick asparagus, tough ends removed
Directions
  1. Make the chimichurri by placing all of the ingredients in a blender or food processor and pulsing until all large pieces of parsley, cilantro, and garlic are gone.  You can also do this by hand by finely chopping the garlic, parsley, and cilantro then whisking together with the remaining ingredients.
  2. In a gallon sized ziplock bag, combine flank steak and about 1/4 cup of the chimichurri sauce.  Return to the refrigerator to marinate overnight.
  3. When ready to cook, heat your grill to medium-high heat.  For those in colder climates still, you can use a grill pan on your stove.  Here's the one that I use!
  4. Once the grill is hot, place the steak on and cook to desired doneness (I do about 4-5 minutes on each side), flipping once.  Grill the asparagus , turning often to ensure it doesn't burn.  Remove the asparagus when it is tender but still crisp, about 4-6 minutes.  Remove the steak and allow it to rest 5 minutes.  Slice the steak into thin strips and cut the asparagus into 1-inch pieces.
  5. While grilling, bring a large pot of water to boil.  Salt the boiling water then add pasta to the boiling water and cook until al dente.  Drain and return to the pot.
  6. Toss the pasta and asparagus with chimichurri sauce until well coated (about 2/3 of what remains).  Top with slices of steak and drizzle with additional chimichurri before serving.  Any extra chimichurri sauce can be refrigerated for up to 3 weeks.
Source: Slightly modified from Bitchin' Camero

Monday, December 3, 2012

Mac and Cheese Entry #5: Lighter Baked Macaroni and Cheese

Mac and cheese is the ultimate comfort food and that normally means it comes with the calorie count to match.  But what if I told you that you could get the same deliciousness and flavor at a small fraction of the nutritional bomb?  Normally low-fat, low-calorie substitutes are kind of bleh but this recipe I would not have suspected of being lightened up if I didn't know any better.

Most mac and cheese recipes call for an entire stick of butter.  This one has just ONE TABLESPOON.  That's only 1/8th and a huge savings right there.  Then, they also usually call for low-fat milk and/or cream.  This uses SKIM milk.  More calories banked for later!  But let's talk about the cheese.  I thought that surely a low-fat, pre-shredded cheese would yield a result that's less than creamy, right?  But I was wrong!  This lighter mac and cheese recipe could have passed for one of its full fat counterparts!  In fact, the nutrition is boosted with the use of fiber pasta, spinach, and whole wheat bread crumbs.

My only complaint with this recipe was with the secret ingredient - Frank's Buffalo sauce.  I agree it added a great kick of flavor (tangy with a bit of spice!) but there was a little too much for my taste.  I want my mac and cheese to taste pure if it's not a Buffalo Mac and Cheese recipe (like this Buffalo Chicken Casserole) so I would reduce it by half if I were to make this again.  And, I would consider making this again as a low-fat alternative...especially to help with warding off Holiday weight gain and sticking to New Year's weight loss resolutions!

Thanks Sara for sharing and I hope the rest of you readers do the same!  I think you know the drill by now.  Please share the post then come back and comment on the blog post because that's the only way I can track and enter you into the contest to win either Mac & Cheese by Ellen Brown or Mac and Cheese, Please! by Laura Werlin!  As always, see this page for full contest details :).

One Year Ago: Cranberry White Chocolate Almond Cookies
Two Years Ago: Island Spice Pork Tenderloin
Three Years Ago: Cincinnati-Style Chili

Lighter Baked Macaroni and Cheese


Ingredients

  • 12 oz high fiber elbows like Ronzoni Smart Taste (I couldn't find elbows so used penne)
  • 1 tbsp butter
  • 1/4 cup flour
  • 1/4 cup minced onion
  • 2 cups skim milk
  • 1 cup fat free chicken broth
  • 8 oz Sargento 2% reduced fat mild cheddar
  • 2 tbsp Frank's Buffalo sauce (Stephanie's secret ingredient!)
  • salt and pepper
  • 4 cups baby spinach
  • 1/8 cup grated parmesan
  • 1/4 cup seasoned whole wheat bread crumbs

Directions

  1. Cook pasta in salted water according to package directions. Spray a baking dish with buttered flavor Pam. Preheat oven to 375°.
  2. In a large, heavy skillet, melt butter. Add flour and cook over low heat stirring with a whisk. Add onion and cook another 2 minutes. Add milk and chicken broth and continue whisking, raising heat to medium-high until it comes to a boil and becomes smooth and thick. Season with salt and pepper.
  3. Once it becomes thick, remove from heat, add cheese and buffalo sauce and mix well until cheese is melted. Adjust salt and pepper to taste, add cooked macaroni and baby spinach.Pour into baking dish. Top with grated cheese and breadcrumbs. Spray a little more buttered flavor Pam on top.
  4. Bake for 15-20 minutes, then broil for a few minutes to get the breadcrumbs golden.
Source: Modified by and as seen on Stephanie Cooks from Skinny Taste.  Submitted by Sara M.

Wednesday, October 3, 2012

California Roll Lettuce Roll-Ups

I love it when the stars seem to align between what I receive my CSA basket for the week and the things I have bookmarked to make.  My only regret is having had to wait this long to share this recipe with you since I had been traveling so much recently (food photo adventures have been shared on facebook!).  But, I'll call it a nod to my recent trip to Japan by sharing it now :).

What I loved about this recipe was how quickly you could put it together and how healthy it was.  If you love the flavor of California Rolls but don't want the hassle of creating actual sushi rolls, this is the way to go.  I could even see adding some chopped nori (seaweed sheets) to really get the full flavor experience.  And why stop there?  You could adapt this recipe as a vehicle to contain the flavors of any of your favorite sushi rolls!

One Year Ago: Homemade Girl Scout Samoa Cookies and Chicken, Blueberry, and Summer Squash Salad

California Roll Lettuce Roll-Ups


Yields: 4 servings (3 wraps each)

Ingredients

  • 1 cup dry rice
  • 2 Tbsp seasoned rice vinegar
  • 1 head (~12 leaves) Boston lettuce, leaves removed and washed
  • 1/2 English cucumber, seeded and cut into 1-inch matchsticks
  • 1/2 cup (about 2) carrots, shredded or cut into 1-inch matchsticks
  • 5 oz surimi (imitation crab meat), cut into 1-inch matchsticks
  • 1/2 avocado, diced
  • 3 Tbsp pickled ginger, chopped (optional)
  • 2 Tbsp low-sodium soy sauce
Directions
  1. Cook rice according to package directions.  Once cooked, stir in the vinegar and then set aside.
  2. Assemble the lettuce roll-ups by layering several tablespoons of rice in each lettuce leaf.  Then add 2-3 pieces of cucumber, carrot, crab, and avocado.  Top with pickled ginger if desired and finish with a dash of soy sauce.

Source: Adapted by and as seen on PreventionRD from Good Housekeeping

Wednesday, August 15, 2012

Black Raspberry Frozen Yogurt

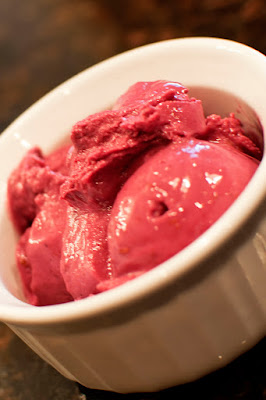
And we're back with the desserts from Emily and my Seasonal Summer Fruit and Vegetable Extravaganza!  We made two desserts and I wasn't sure which to share first so I asked my friend Jackie.  She picked this one to share with you first.  

This healthy froyo was extremely simple and extremely DELICIOUS!!  It was my favorite recipe from the whole night.  The flavor is fresh, the texture was creamy (except for the seeds which I completely forgot to strain out...oops!), and the color was vibrantly spot-on to Graeter's Black Raspberry Chip Ice Cream which made it all the more visually appealing.  By the way, did I mention that if you make it with fat free yogurt (I love Fage 0% Greek Yogurt), that there's only about 2g of fat in the whole batch?  And that fat comes from the raspberries...who would have known that those contained fat??

To recap the Seasonal Summer Fruit and Veggies Extravaganza so far: Watermelon Slush, BLT Corn Salad Wraps, and Cherry BBQ Pulled Pork Grilled Pizza. Check back on Friday for the final dessert course and recap of our latest Extravaganza.  

Only a couple more days left to enter my Beer Flats giveaway so make sure to enter now.  Your chances of winning are pretty high!


Black Raspberry Frozen Yogurt

Black Raspberry Frozen Yogurt
Photo Credit: Emily H.
Yields: 1 quart

Ingredients
  • 2 cups Greek yogurt (whole milk preferred to help keep from freezing rock solid but we used fat free and ate it fresh - it was fine)
  • ¾ cups sugar
  • 2 cups fresh or frozen raspberries
  • 1 tsp. freshly squeezed lemon juice
  • 1-2 tbsp. vanilla extract
Directions
  1. Combine the yogurt, sugar, berries, and lemon juice in a blender or food processor.  Blend until smooth.  Press the mixture through a fine mesh sieve to remove the seeds.  Stir in the vanilla.
  2. Freeze the mixture in an ice cream maker according to the manufacturer’s instructions.
Source: As seen on and adpated by Annie's Eats from The Perfect Scoop by David Lebovitz

Monday, August 6, 2012

Watermelon Slush

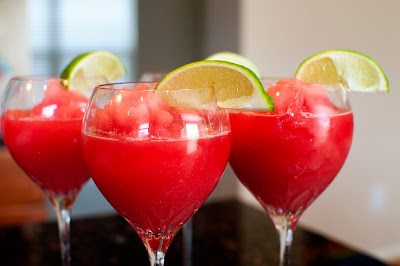
Hello my lovelies!  Remember my extremely talented friend Emily who guestposted this General Tso's Chicken, takes all our Dinner Club photos, and did a Apple Extravaganza bakefest with me last Fall?  Well she and her husband Scott came over recently so we could continue the tradition of the wives creating deliciousness in the kitchen while the husbands did...manly things like watching TV.  But unlike during the Fall, we minimized the use of the oven (because it was hot hot hot!), focused on a theme of using seasonal fruits and veggies, and put the boys to work by manning the grill.

To kick off our Summer Fruit and Veggie Extravaganza, we started with this absolutely refreshing, totally natural and healthy watermelon slush.  The colors were gorgeously vibrant and it quenched our thirst on this hot July day.  It was a wonderful mocktail as is but we won't tell if you add a splash of vodka, tequila, or other favorite liquor to the mix ;).

Four more recipes and another awesome review+giveaway left to share in the next two weeks so stay tuned and keep coming back!

One Year Ago: 5 Minute (Healthy) Chunky Monkey "Ice Cream"
Two Years Ago: Raspberry White Chocolate Swirl Ice Cream
Three Years Ago: Grands! Taco Melts (AKA Homemade Hot Pockets)

Watermelon Slush

Watermelon Slush
Photo Credit: Emily H.
Yields: 4 servings (1 cup each)

Ingredients
  • 4 cups watermelon, seeded, diced, and frozen
  • 2 limes, juiced
  • 2 Tablespoons honey
  • 3/4 to 1 cup water
Directions
  1. Blend all ingredients in a blender until smooth.  Serve immediately.
Source: Prevention RD

Monday, July 23, 2012

SRC: Pineapple "Ice Cream"

It's that time of the month again!  This month for Secret Recipe Club (SRC) I received Erin's blog, A Tale of One Foodie's Culinary Adventures.  Erin started her blog much for the same reasons that I did.  And that's to document the cooking and baking that we do.  When I was browsing Erin's blog, I was greeted by some pretty delicious looking cupcakes in her header and found lots of drool-worthy desserts.

Because my husband and I are watching our weight and we absolutely LOVED the 5 Minute (Healthy) Chunky Monkey Banana "Ice Cream" that I made last year, I thought I'd give her pineapple version a try.  It was very simple to make and definitely tasted of summer.  Not as custard-like and creamy textured as the banana version but I think adding more yogurt could help with the creamy taste.  Or, leave it out entirely for a vegan sorbet treat.  I did leave out the booze in this instance since we ate it right away but you can add it back in if you're into that or plan to save for later.  I hollowed out a pineapple half and scooped the "ice cream" inside it for serving.  It also serves as a great freezer mold :).

Thanks Erin for this healthy recipe and I look forward to going back to try some of your more unhealthy treats like the Frozen Reese's Peanut Butter and Oreo Pie, Peanut Butter Toblerone Cheesecake, or Truffle Filled Chocolate Cupcakes.

As usual a special thank you to April of the blog Angel's Homestead, SRC ring leader and Angela of the blog Big Bear's Wife, our Group C Hostess!

Pineapple "Ice Cream"


Ingredients
  • 1 whole pineapple, cut up into bit size chunks and frozen
  • 1/4 cup sugar
  • 3-4 Tbsp spiced whiskey (omitted)
  • 3 heaping Tbsp non-fat Greek yogurt
Directions
  1. Combine ingredients in food processor until smooth and combined.  Scrape down as needed.  Enjoy!
Source: A Tale of One Foodie's Culinary Adventures

Friday, May 11, 2012

Foil-Baked White Fish with Ginger Over Wilted Greens

It's springtime but this recipe was tried LAST FALL.  By the time I got around to posting it though, the veggies weren't in season so I decided to hold on to posting until this year.  Good thing these types of greens are prevalent in both ends of the growing season...enjoy!
-----------------------------------
I've been getting a crazy amount of greens from our farmshare lately.  Spicy greens, napa cabbage, lettuce, spinach, swiss chard, turnip greens.  Seriously.  You name it, I've probably gotten it in the past month.  Chris and I could only eat so many salads and honestly, I was starting to run out of foods to make with all these greens.  That was, until I saw this recipe in our CSA newsletter.

I'm a sucker for baked foil packet fish.  The last version that I made (Foil-Baked Fish with Black Beans and Corn) pretty much knocked my socks off.  This one was great too!  The foil packet preparation results in a moist fish that cooks in all the yummy juices that you add.  This recipe tasted just like my favorite Chinese Steamed Fish but simpler with its "one dish" preparation.

Do you have any other favorite foil-baked recipes?  I kind of feel like the possibilities are endless!


Foil-Baked White Fish with Ginger Over Wilted Greens


Ingredients

  • 6 cups baby spinach OR any mixed greens
  • 4 – 5 ounce white fish filets
  • 4 teaspoons minced fresh ginger
  • 2 teaspoons minced garlic
  • ½ cup Marsala wine or chicken broth
  • 8 teaspoons soy sauce
  • 2 teaspoon sesame oil
  • 1 lime quartered
  • 2 Tablespoons basil chiffonade
Directions

  1. Preheat oven 400 degrees.
  2. Tear off 4 sheets of foil or parchment paper that are 12 inches long. On individual squares: Place 1 ½ cups of greens in center of the square then on top of the greens add the fish. Sprinkle 1 teaspoon into each packet of ginger, garlic, soy sauce, ½ teaspoonful sesame oil.  Drizzle 2 Tablespoons of liquid or wine.  Bringing the two long sides of the square together, fold over the food.  Fold over three or more times.  Fold and crimp the remaining sides. Repeat until all 4 packets are made.
  3. Bake 10 minutes in hot oven.  Let sit 5 minutes before opening.  Squeeze lime juice and sprinkle basil into each packet and enjoy!
Source: Cedarmore Farm CSA Newsletter

Monday, October 17, 2011

Coconut Potato Curry with Basil and Pecans

This was a quick vegetarian curry that was perfect for a cold night.  I considered making it in the crockpot while I went to work during the day but it comes together so quickly that you don't even need it.  My only wish is that I had made rice to go with this dish to sop up all the delicious juices!

Two Years Ago: Grandma B's Brownies - This recipe comes from Chris' grandmother and she made THE BEST brownies.  Yep, we're letting you in on the secret recipe ;).


Coconut Potato Curry with Basil and Pecans


Yields: 4 Servings (1.5 cups each)


Ingredients
  • 500 g new potatoes, steamed for 10 minutes
  • 1/3 cup pecans (or nut of your choice), chopped
  • 1 cup green beans (or peas, or mixed vegetables), fresh or frozen
  • 1 red bell pepper, seeded and sliced
  • 1 cups cherry tomatoes
  • 2 Tbsp tomato paste
  • 1/2 tsp cumin
  • 1/2 tsp cayenne pepper
  • 1/2 tsp coriander
  • 1/2 tsp garam masala
  • 1 can light coconut milk
  • 1 Tbsp olive oil
  • Handful of basil, chopped
  • Salt and pepper, to taste
Directions
  1. In a large pan, heat the oil and cumin.  When they begin to sizzle, add the pecans and gently roast.  Add the steamed potatoes and toss to coat.  Add 1/2 cup water with the tomato paste and incorporate.  Add the cherry tomatoes and simmer for 5-8 minutes.
  2. Add all of the spices.  Stir well to coat the potatoes.  Mash any tomatoes that are cooked through.  Simmer for 3-5 minutes.
  3. Add the coconut milk and red bell pepper and green beans (or other veggies).  Simmer until the sauce begins to thicken.  Add salt and pepper to taste.  Add chopped basil to garnish.  Serve as is or over rice (or caulirice)  if desired.
Source: Very slightly modified from Prevention RD

Monday, October 3, 2011

Chicken, Blueberry, and Summer Squash Salad

I'll admit I was skeptical about this one at first BUT it had all the right ingredients to use up a good part of my CSA share (big ol bag of salad greens!) and I've had great luck with Kelsey's recipes.  I trusted her and it paid out.

This salad has a symphony of flavors.  A tart, slightly sweet and light dressing that contrasts with fresh pops of blueberry along with the salt and cream of feta.  It just works!  I decided to add one more player to this harmonious dish because I had a small lonely red onion in my cabinet, too.  Caramelized onions.  They make the world go round.  The other change I made was because I just am not a fan of raw squash.  So, I lightly sauteed it before putting it on my salad.

I get it, October is officially Fall and it's pretty dang cold out but I'm hoping that you'll be able to try this one out with the last of your Summer veggies (or *gasp* buy in store off-season) or if not, bookmark it to make next year.  Trust me, you don't want to miss out on this one!

Two Years Ago: Hot Spinach Artichoke Dip


Chicken, Blueberry, and Summer Squash Salad


Yields: 4 servings

Ingredients

For the dressing:

  • 1/4 c. fresh lemon juice
  • 1 tsp. honey (I added a little more because I prefer a more sweet dressing)
  • 1/4-1/3 c. extra-virgin olive oil 
  • salt and pepper, to taste
For the salad:
  • 4 packed c. preferred greens
  • 3 tsp. butter or margarine, divided
  • 1 small red onion, thinly sliced
  • 1 small summer squash, thinly sliced
  • 2 TBSP fresh basil, cut chiffonade
  • 2 c. cooked chicken breast, chopped
  • 1 1/2 c. blueberries
  • 1/2 c. feta cheese, crumbled
Directions:
  1. To make dressing, add lemon, honey, and olive oil to a small container with a lid.  Close the lid tightly and shake vigorously until well mixed.  Season with salt and pepper to taste.  Taste and adjust blend until desired amount of sweetness (add honey) or tartness (add lemon) is achieved.  Put container into the refrigerator while you prepare the rest of the ingredients.
  2. In a large skillet, melt 2 tsp butter or margarine then add onion.  Cook until onions begin to caramelize and brown slightly.  Remove and set aside.  In the same skillet, melt remaining 1 tsp butter or margarine then saute squash until lightly cooked.  It will start to look translucent.  Remove and set aside the squash.
  3. To assemble salad, divide greens among four plates.  Top with squash, caramelized onions, basil, and chicken.  Drizzle dressing over the top, then add blueberries and feta. 

Source: Slightly modified from Apple a Day

Monday, September 26, 2011

French Onion Soup

I was encouraged by my husband and my friend Emily to post a midway status update on my 23 Things in 2011 List.  This is when we realized that the year is actually 3/4 of the way through.  Oh snap.  Still, worth a revisit and you can see what I've made (and blogged about) to date by checking out the link above. 

All in all, I've only made 11 of the 23 things and even worse, only blogged about 4 (after this one) to date.  Where have you guys been to hold me accountable the rest of year?!  Now it looks like I have some serious work to make up on the back end of the year if I want to even come close to achieving all 23 items!

This French onion soup was exactly as I remember it being when I went to France last year.  My brother, the French onion aficionado gave it his stamp of approval, too.

This week, I'm going to post only things from the list to help me get caught up!  See the list for a sneak peek of what this week's posts may be ;).

Two Years Ago: Sausage, Onion, and Green Pepper Fra Diavolo

French Onion Soup


Ingredients
  • 2 tbsp. unsalted butter
  • 2 large red onions, thinly sliced
  • Pinch of sugar
  • 2 leeks, including tender green portions, thinly sliced
  • 2 cloves garlic, minced
  • 3 cups low-sodium chicken broth
  • ¾ cup low-sodium beef broth
  • ¼ cup dry red wine
  • 2 sprigs fresh parsley
  • 1 sprig fresh thyme
  • 1 bay leaf
  • Salt and pepper, to taste
  • Baguette slices, ¾-inch thick
  • Sliced Gruyere cheese
Directions
  1. Melt the butter in a Dutch oven or large stockpot over medium-high heat. Add in the sliced red onions, reduce the heat to medium, and cook, stirring frequently, until the onions have wilted. Mix in the sugar and leeks and continue to cook, stirring frequently, until the onions are completely caramelized and dark in color (about 15 more minutes). Add the garlic to the pot and sauté just until fragrant, about 1 minute. Stir in the chicken and beef broths and red wine, scraping the browned bits from the bottom of the pot. Add the parsley, thyme and bay leaf. Cover, reduce the heat to medium-low and simmer about 30 minutes. Discard the herbs and season with salt and pepper to taste.
  2. Preheat the broiler with an oven rack in the upper-middle position. Portion the soup into oven-safe bowls or crocks placed on a baking sheet. Top each serving with two baguette slices, and layer with thin slices of Gruyere cheese. Place under the broiler until the cheese is browned and bubbly, 2-5 minutes. Cool a few minutes before serving.
Source: Originally from Williams Sonoma and The New Best Recipe as adapted by and as seen on Annie's Eats

Tuesday, September 6, 2011

Oven-Baked Sweet Potato Chips

Okay...hate to tell you this but summer is unofficially over *sad face*.  But, on the flip side, that means the weather is going to start getting cooler and I'll be able to use my oven again without feeling too bad about heating up the house.


If you told me that I could make my own chips in the oven and at home that are crispy, I'd tell you I thought you must be joking.  That is, until I tried these.  They were so addicting that I only regretted not making more of them.  I put some chipotle chili powder on mine and WOW what a  pop of flavor!  Serve it alongside your favorite sandwich or burger or just eat them as a snack.  They're kind of too good to play second fiddle, anyway.

Oven-Baked Sweet Potato Chips
Printer-Friendly Version


Yields: 2 servings

Ingredients
  • 1 sweet potato
  • vegetable or canola oil for spraying
  • sea salt
  • black pepper, chili powder, chipotle chili powder, cumin (optional seasoning)
Directions
  1. Preheat oven to 375 degrees Farenheit. 
  2. Slice potatoes with a mandolin slicer or food processor, if possible.  Spread the slices out in a single layer on baking sheets.  Spray the potatoes lightly with the oil on each side then sprinkle lightly with salt or any other seasoning. 
  3. Bake for 10-20 minutes, flipping halfway through baking time.  Be sure to monitor the chips frequently to make sure they don't burn, puling out any chips that may finish cooking early.
Source: Originally from Tiny Urban Kitchen as seen on Apple a Day

Wednesday, August 31, 2011

Strawberry Peach Frozen Yogurt

I have a confession.  I'm slightly addicted to the tingly, tart taste of Yagoot frozen yogurt.  It's a locally owned froyo place similar to PinkBerry with a mix-in concept like Cold Stone Creamery.  Yum.  Thinking about all the frozen treats from these places is starting me make me drool...


Anyway, after Linda inspired me to make more frozen treats and I kicked things off with the Five-Minute (Healthy) Chunky Monkey "Ice Cream", I decided I should also try my hand at frozen yogurt.  I found a basic recipe from the ice cream guru David Lebowitz and then went from there.  I love fruit flavors and wanted to capture that same tartness that Yagoot is famous for so in went some strawberries, peaches, and my "secret ingredient" for tartness - lemon juice.

Because I knew that adding fruit could result in icy, rock solid froyo, I also added some vodka to help lower the freezing temperature.  It worked...for maybe the first day.  After that, all bets were off and I still got a frozen rock which I waited (impatiently) to soften so I could enjoy the deliciousness that tasted just like my favorite Strawberry Yagoot at a fraction of the cost.  The way I see it, I made a quart (32 oz) of mock-Yagoot froyo for roughly $7 whereas a 1/2 cup small serving (4 oz) at the store would run me $2.50 or $20 for equivalent total ounces.  Yah for huge cost savings!

This froyo is best eaten freshly churned (so it's like soft serve) or within the same day of churning (so it's still soft and scoopable...for me this was the literal sweet spot).  Of course, if you have a bit of patience, you can wait for the frozen rock to thaw and serve.

Any tips for churning a froyo that stays SOFT over time?  I'd love to hear them!


Strawberry Peach Frozen Yogurt


Yields: About 1 quart (32 oz) of frozen yogurt

Ingredients
  • 2/3 pint fresh strawberries, chopped
  • 2 medium peaches, pitted and chopped
  • 2 Tablespoons sugar
  • 2 Tablespoon vodka
  • 2 tsp lemon juice
  • 3 cups Greek-style yogurt (update: Apparently whole milk is best because it has less water which will prevent rock-hard froyo!)
  • 3/4 cup sugar
  • 1 tsp vanilla extract
Directions
  1. In small mixing bowl, mix together the yogurt, sugar, and vanilla. Stir until the sugar is completely dissolved. Refrigerate 1 hour.
  2. In a separate bowl, combined chopped strawberries, peaches, sugar, vodka and lemon juice.  Mix together well, cover and place in the fridge for at least 30 minutes.
  3. Place the yogurt mixture in your ice cream maker and churn per the manufacturer directions.  After about 15 minutes, add the fruit mixture.  Serve immediately to enjoy soft-serve style frozen yogurt.  If desired, pour the mixture into an airtight container and freeze until ready to use.  Fair warning, it gets pretty hard after about 24 hours so you'll need to let it defrost before it's remotely scoopable again!
Source: Christine's Chronicles Original inspired by Poor Girl Eats Well and The Perfect Scoop by David Lebowitz

Monday, August 29, 2011

Grilled Maple-Chili Salmon

This was my play on words for our most recent Dinner Club.  We grilled our salmon up on cedar planks so called it Cedar PLANKed Salmon to go along with the pirate theme.  It was Chris and my first time using cedar planks so we're just glad it didn't catch fire on the the grill :D.  I LOVED the way that this dish turned out.  The flavor was fantastic and I will for sure be making this again.

We bought a gigantic 2.7 pound wild salmon filet from Costco and the maple syrup that I used came from one of our new Dinner Club members, Delia.  She hails from the border of NY and VT so gets some of the best maple syrup.  Scott was skeptical when he saw me drizzling it on as the finishing touch.  I could see it in his eyes lol.  But I think it's safe to say he's converted.  The sweet, smokey, and savory is a wonderful combination.  A total hit!  And if you don't have a cedar plank, no worries, you can do without it and Shawnda from Confections of a Foodie Bride says she and her husband actually prefer it that way.

See the rest of our Pirate themed menu at our Dinner Club blog.  Since we've renewed the club by saying goodbye to two couples due to relocation and welcomed two new ones, we're going to try to make an effort to do a better job of updating the blog :).

Grilled Maple-Chili Salmon


Yields: 3-4 servings

Grilled Maple-Chili Salmon

Ingredients
  • 1 lb salmon, cut into 3-4 fillets
  • 1 tsp chili powder
  • 1/2 tsp paprika
  • 1/2 tsp cumin
  • 1/8 tsp garlic powder
  • 1/8 tsp cinnamon
  • 1/4 tsp salt
  • Fresh ground black pepper
  • 1 Tbsp creole mustard (or any spicy brown mustard)
  • 1 Tbsp olive oil
  • 3-4 tsp maple syrup
Directions

  1. If using, soak the cedar plank per the manufacturer instructions.
  2. Stir together the dry ingredients and then stir in the olive oil and mustard.
  3. Spread the rub over the top and sides of the fillets and let sit while the grill heats.
  4. Preheat grill to medium-high.  Place fish on the soaked plank and cook for ~15 minutes, until the fish flakes and the internal temperature reaches 140.  If not using the plank, place skin side down and cook 8-10 minutes.
  5. Remove from heat and immediately drizzle each fillet with ~1 tsp of maple syrup.
Source: Confections of a Foodie Bride

Tuesday, August 23, 2011

Greek Salsa

Hi!  I'm back from my trip and figured I better post something soon so you know I made it back alive.  I had a blast but have to say that I thought rafting would be more thrilling than it actually was.  I guess I'm a thrill seeker and was expecting more rapids one after another...and with bigger water and drops...like what you see in the movies!  Had everyone in my boat not gotten dumped into the river it frankly might have been a bit boring.  Don't worry though, like I said, we're alive and all okay...the worst injury was a tiny scratch and some bruises (which I suspect were from getting back *in* the raft versus being dumped out of it). 

What happened was at Scramble Like a Rat (class III rapid) we somehow ended moving head on towards a HUGE undercut rock.  Our raft guide yelled "back" so that we'd paddle back but it was too late.  We made contact with the rock and our raft started tipping so she then yelled "high side" and that also failed.  I saw the raft was about to keel over so I was the first to bail.  Others were soon to follow.   Thankfully I went towards the side where the water was very still. I just stood up and when I looked around, to my horror I saw some of my friends floating down river and I had no idea where my husband was.  I also saw our guide.  She somehow was able to climb up the rock and held onto the raft by herself (amazing considering how heavy that thing is...it took 9 of us to move it from the road to the river bank!).  She right sided it and then came my way and I jumped back in.  Then we headed downstream and began collecting everyone else.  It's amazing how strong you can be on an adrenaline rush.  I was pulling folks into the boat that I'm sure were heavier than me.  Our raft guide said had I not bailed at the time that I did, we would have capsized the raft over for sure.  I feel like that's more dangerous because you can get stuck under the raft.  I found out later that my husband was the last to bail from the boat and he did get stuck under for a bit before being carried away by a strong current.  He was picked up by our friends in another raft.

We later found out that we did what is called a "dump truck" which is when a raft dumps all of it's passengers but remains upright.  In our raft guides 10 year career she has only had to call a "high side" manuever 15 tmies and this was only the 4th time she has had a dump truck.  Lucky us.  Some of it was her error (she is the one steering after all and she was kind of hard to hear) some of it was us (we kind of sucked at paddling backwards...give us a break though, 6 of the 8 people had NEVER rafted before!).  Either way, this wouldn't keep me from doing it again or venturing into bigger water.  The next day my entire upper body was sore as was my butt from sitting on that hard raft all day.  This was an awesome tricep, pec, and ab workout for me lol.  I didn't feel so bad about not being able to exercise.

Anyway, so that was our wild rafting adventure.  I recommend it!

Since my friends and I took a "refreshing dip" in the Lower New River I leave you know with this refreshing dip (ba dump dum!) recipe which used my CSA beets.  It's the first time I've ever roasted beets and I wish someone would have told me that they stain your hands  *lovely* color of hot pink when you peel them.  While pink is my favorite color, it doesn't mean I want to be semi-permanently colored that way on my skin!  I loved the flavor of this "salsa"...like a greek salad!

Come back tomorrow to find out what I did with the beet greens :).

Greek Salsa
Printer-Friendly Version


Ingredients

  • 1 Tbsp. red wine vinegar
  • 2 tsp. lemon juice
  • 1.5 Tbsp. olive oil
  • 1.5 tsp. oregano
  • 1 clove garlic, minced
  • 3 Tbsp. chopped parsley
  • 2 tsp. chopped dill
  • 1 cucumber, seeded and diced small
  • 1 large tomato, seeded and diced small
  • 1/3 lb. feta cheese, diced
  • 10-12 kalamata olives, pitted and chopped
  • 1/4 cup chopped green or red onion
  • 1/4 cup diced beets (roasted or pickled)
Directions

  1. Whisk together the red wine vinegar, lemon juice, olive oil, and oregano, and then season to taste with salt and pepper.
  2. In a separate bowl, stir together the remaining ingredients (the beets turn everything hot pink, so add them slowly at the end to partially avoid this).  Stir in the dressing, tossing well to combine.

Source: Elly says Opa! 

Monday, August 15, 2011

Baked Green Bean Fries

You know the old adage: add bacon or fry something to make ANYTHING taste more delicious.  It's totally true.  But did you know that you can trick your taste-buds into thinking something baked is equally delicious to fried?

Enter Panko bread crumbs.  Panko bread crumbs are light and crunchy, the pathway to crispy baked anything.  Thank you, Japanese friends.  I love getting the fried green beans at TGI Fridays but the guilt of turning a healthy vegetable into something fried and not so healthy always made me feel a tinge of regret.  So this healthier at home alternative was awesome!  I used my CSA green beans and halved the recipe.  I served it with a homemade sauce consisting of greek yogurt, ketchup, paprika, cayenne pepper, salt and pepper.  Chris and I happily gobbled them all up.  We wished we had made the full recipe for ourselves lol.

Edited 7/13/12: This recipe was featured on Yummly's list of Guilt-Free Fries of Every Variety so it's now Certified Yummly.  Thank you very much for this honor!


Baked Green Bean Fries


Yield: 6 appetizer or side portions (about 10 green beans). 


Ingredients
  • 1/2 lb green beans
  • 1 cup flour
  • 1 egg
  • 1/2 cup skim milk
  • 2 cups panko bread crumbs
  • 2 tsp garlic powder
  • 2 tsp paprika
  • 1 tsp onion powder
  • Kosher salt, to taste
  • pepper, to taste
Directions
  1. Preheat oven to 425 F.
  2. Fill a large pan with 2-3 inches of water and bring to a boil. While water comes to a boil, trim the green beans. Prepare a large bowl of ice water and set aside.
  3. Blanch the beans for 3 minutes and immediately remove them to the ice bath.
  4. To prepare beans, gather three bowls. In the first bowl, combine the flour and spices. In the second bowl, combine the egg and milk, whisking to combine. In the third and final bowl, place the panko and season with salt and pepper. Remove 2 tablespoons of the flour mixture and whisk into the egg/milk mixture.
  5. Pat the beans dry and dredge in the flour mixture, then into the milk/egg mixture, and finally into the panko to coat. Arrange the beans in a single layer on a baking sheet lined with aluminum foil which has been sprayed with non-stick spray. Prepare all of the beans in that manner. Lightly spray beans with olive oil spray.
  6. Bake beans at 425 F for 15 minutes, or until slightly browned.
Source: Originally from Savory Reviews as adapted by and seen on Prevention RD

Nutrition Information (per serving): 139 calories; 1.5 g. fat; 36 mg. cholesterol; 194 mg. sodium; 27.5 g. carbohydrate; 0.7 g. fiber; 6 g. protein
Certified Yummly Recipes on Yummly.com

Thursday, August 4, 2011

Five-Minute (Healthy) Chunky Monkey "Ice Cream"

Did you catch some key words in that title?  It's healthy.  And it only takes 5 minutes.  And, if you closed your eyes, you'd think you were eating the richest custard-style ice cream.  But it's NOT really ice cream!

I'd heard of using frozen bananas for a quick ice cream before but had never gotten around to try it.  The moment I saw this recipe show up on Pennies on a Platter's website I knew I had to make it.  And, judging by the number of times it was pinned on Pinterest, everyone else had the same idea!  Seriously.  Go take a peek at that photo and tell me you didn't immediately start drooling all over your keyboard.  Yeah, that's what I thought.

What gave me that last push to decide to make this tonight (and post the recipe in the SAME NIGHT...very rare!!) was my friend Linda's suggestion to do iced treats.  And, I needed something to cool me off after a hard, sweaty session of Jazzercise!  L.O.V.E.D this and will be making it more often!  I had to put down my spoon to avoid eating it all in a single sitting :P.

Go freeze some bananas so you can make this in an hour or two!  If you hurry, you can still make it tonight.  Or, if not then maybe for breakfast?  It is, after all, bananas ;).

Five-Minute (Healthy) Chunky Monkey "Ice Cream"

Five-Minute (Healthy) Chunky Monkey "Ice Cream"
 
Ingredients
  • 3 peeled and chopped, then frozen, bananas (I think this would work best if they are frozen in a single layer or somehow broken up manually first...I had trouble getting my blender to break up the big chunk!)
  • 1/4 cup walnuts, chopped
  • Handful of chocolate chunks
  • 2 Tablespoons peanut butter or Nutella (optional)
Directions
  1. Puree the bananas in a food processor or blender until smooth.  Personally I love using my Cuisinart Smart Stick with the Chopper Attachment.  Blend and eat out of the same bowl!  Add the walnuts and chocolate chunks and pulse until mixed in.  Stir in the peanut butter or Nutella, if desired.  Top with extra yummy stuff like walnuts, chocolate chunks, and peanut butter chips if desired.  Serve immediately or freeze for later consumption.  It will be like soft serve initially but left to frozen it will harden up like regular ice cream.
Source: As seen on and adapted by Pennies on a Platter from Kitchen Simplicity

Monday, July 11, 2011

Tomato Basil Orzo Salad

I said I would post this today and so by-golly, at 10:50PM just before bedtime, here goes nothing!  This was a light and fresh accompaniment to the Turkey Kofta Kebabs that I posted yesterday but would be great with many different or a light meal all on its own.

Tomato Basil Orzo Salad
Printer-Friendly Version


Yields: 4 to 6 light-entrée servings or 8 to 10 side-dish servings


Ingredients
  • 1 1/2  cups dried orzo pasta
  • 1 1/4  pounds firm-ripe tomatoes, at room temperature
  • 3/4 cup chopped fresh basil leaves
  • 1 or 2 cloves garlic, peeled and minced
  • 3 tablespoons  extra-virgin olive oil
  • 2 tablespoons  balsamic vinegar
  • About 1/4 cup grated parmesan cheese
  • Salt and pepper
Directions
  1. In a 3- to 4-quart pan over high heat, bring 1 1/2 to 2 quarts water to a boil. Add orzo and cook until barely tender to bite, 8 to 10 minutes.
  2. Meanwhile, rinse and core tomatoes; chop and place in a large bowl. Add basil, garlic, olive oil, and vinegar; mix gently. 
  3. Drain pasta well and add to tomato mixture. Mix, adding parmesan cheese, salt, and pepper to taste.
Source: Sunset Magazine as seen on Proceed with Caution

Nutritional Information
Calories: 255 (32% from fat)
Protein: 7.8g
Fat: 9g (sat 1.8)
Carbohydrate: 37g
Fiber: 2.6g
Sodium: 74mg
Cholesterol: 2.6mg 

Sunday, July 10, 2011

Persian Turkey Kofta Kebabs

This post is for Linda, a girl that I met once through a mutual friend but as I learn more about her I find that she just might be my long-lost twin sister and hope that perhaps we'll get to know each other better.  She recently posted on her facebook that she created a recipe for kofta kebabs and I responded that I actually made some recently too (see the crazy twin thing happening, already?).  Kofta kebabs are essentially log-shaped meatballs on a stick and the flavor they punch are uniquely amazing!

While I have never gone to Persia, kebabs totally take me back to the time I spent in Turkey this Spring.  Turkey is an AMAZING country with beautiful sites (Ephesus is seriously the most well preserved antiquity site I've ever seen!), rich culture (Istanbul has so much to see that we only skimmed the surface in our two days), and best of all, fantastic food.  In every port of call that we had I devoured juicy kebabs, super fresh vegetables, and of course, Turkish Delights (honey pistachio was my absolute favorite!).

My husband and I eating lunch at a carpet making factory in Ephesus, Turkey
I don't remember what these were called but it was grilled meats (chicken, lamb meatballs) served with potatoes and rice pilaf.
A fresh salad served with dressing made of olive oil and lemon
I was *seriously* addicted to this stuff.  Green beans with tomatoes and garlic drizzled with very fresh olive oil.
Turkish greens with Greek yorurt
A variety of Turkish Delights at the Spice Market in Istanbul, Turkey.  They gave away free samples to try to get you to buy some and it was so addicting!
I'm fortunate that I found a local Mediterranean/Lebanese restaurant called Aladdin's Eatery to get my fill but it's nice to know that this is actually a very easy recipe to make at home when I get the urge to be taken back to the memories of our short time in Turkey.

I served my kofta kebabs with a spiced up Greek yogurt sauce (added a drizzle of honey, cumin, chili powder) but I think it would also be fantastic with Tzatziki sauce.  It was accompanied by a side of Tomato Basil Orzo, which I'll share tomorrow :).

One Year Ago: Sauceless Garden Lasagna
Two Years Ago: Chicken Parmesan Meatball Subs

Persian Turkey Kofta Kebabs
Printer-Friendly Version 

 Ingredients
  • 20 oz 93% lean ground turkey
  • 1 small onion, minced
  • 2 cloves garlic. minced
  • 1/4 cup fresh parsley, chopped
  • 2 tbsp bread crumbs
  • 1/4 tsp allspice
  • 1/4 tsp coriander
  • 1/4 tsp paprika
  • 1/4 tsp chili powder
  • salt and fresh pepper (to taste)

Directions
  1. In a large bowl combine the ground turkey, onion, garlic, parsley, breadcrumbs, spices, salt and pepper until evenly blended. Divide into a heaping 1/4 cup portions so you get 12; roll into log shaped ovals. Place on a cookie sheet and refrigerate at least 30 minutes. If using wooden skewers, soak in water at least 30 minutes before grilling.
  2. When ready to eat, preheat grill to high heat. Carefully insert the skewer through the formed meat.  
  3. Grill for 10 to 15 minutes on indirect heat turning occasionally, until meat is no longer pink.
Source: Gina's Skinny Taste
  
Serving Size: 3 kebabs •  Old WW Points: 4 pts • WW Points+: 5 pts
Calories: 185.4 • Fat: 8.3 g • Protein: 22.9 g • Carb: 5.1 g • Fiber: 0.8 g • Sugar: 0.3 g
Sodium: 114.5 mg (without the salt)

Tuesday, July 5, 2011

Summer Pasta Bolognese

Are you up to your ears in tomatoes and zucchini yet?  If you are, kudos to you for having a green thumb and hey, any pointers?  Because mine is black... 
 
I made this recipe at least three times last summer when I had a CSA share with Bergefurd's Farm.  I did not rejoin their CSA this year because they got rid of half shares and frankly, we struggled to use all of our produce last year when the harvest was abundant.  However, I decided at the last minute (ie: less than two weeks ago) to join a different CSA Summer Share with Cedarmore Farm.  It's run by an Amish family using organic methods and I've loved reading their blog online.  They did a cute "meet the animals" series where they wrote a story about each animal on the farm, their name and role.  There's something very feel-good to me knowing these little details about where my food comes from.  I pick up our first share a week from today and can't wait to cook with all the fresh veggies and enjoy succulent, sweet fruits!
 
This healthy sauce was so easy to make and I love how this sauce has a boost of veggie nutrition.  I can only imagine how wonderfully delicious and rewarding it would be to make this meal with all home-grown produce! 

One Year Ago: White Chocolate Strawberry Parfait - My kind of dessert: easy and light!

Summer Pasta Bolognese

Summer Pasta Bolognese

Ingredients
  • 12 ounces fettuccine or spaghetti (3/4 box)
  • 2 Tbsp. olive oil
  • 1 pound ground turkey
  • kosher salt and pepper
  • 2 cloves garlic, minced
  • 1 1/2 pounds beefsteak tomatoes (about 3), chopped or 28 oz. canned diced tomatoes, drained
  • 1/2 cup dry white wine or vermouth
  • 1 small zucchini, coarsely grated
  • 1 carrot, grated
  • 3/4 cup fresh basil leaves, torn
  • parmesan cheese, for serving
Directions
  1. Cook the pasta according to the package directions.
  2. Meanwhile, heat the oil in a large skillet over medium heat. Add the turkey and season with 3/4 teaspoon salt and 1/2 teaspoon pepper. Cook, breaking up the turkey with a spoon, for 3 minutes. Add the garlic and cook for 1 minute. Add the tomatoes and wine and simmer, stirring occasionally, until the turkey is cooked through and the sauce has slightly thickened, 4 to 5 minutes. Fold in the carrot and zucchini and simmer for 10 more minutes, stirring occasionally.
  3. Remove from heat and stir in basil. Serve over the pasta and garnish with parmesan cheese.
 Source: Real Simple as adapted by and seen on Christine's Cuisine