Showing posts with label asian. Show all posts

Tuesday, December 10, 2013

Baked Honey Sriracha Chicken Tenders

Hi everybody.  I'm sorry I've been absent lately.  Alex has been going through a 5 WEEK "Wonder Week" and it's been challenging to say the least.  Add to that the fact that I think he's sensitive to dairy and now we have food challenges that make menu planning even harder.  No more milk, cream, yogurt, ice cream, froyo, or my beloved cheeses :(.  The things we do for our babies.  Am I right?

This is a recipe that's a total keeper AND Alex-friendly!  Who knew that something so simple could taste so good?  It's spicy and sweet with a wonderful crunch.  And get this.  ZERO oil!  The secret to achieving this is by using light, airy panko bread crumbs and baking on a wire rack so that both sides get nice and crisp.

We made them last night and I literally had to make a quick blog post to share with you all.  That's how much we loved this meal!  I apologize for the horrible lighting in the photo but that's what happens when you eat in the dark.  Boo Winter!

Baked Honey Sriracha Chicken Tenders


Ingredients
  • 1/4 cup honey
  • 1/4 cup Sriracha hot chili sauce
  • 14 oz uncooked chicken tenders without breading (or use boneless skinless chicken breast and slice into tender-sized pieces)
  • 1 cup Panko bread crumbs

Directions
  1. Preheat oven to 400F.  Place a wire baking rack on a large cookie sheet and spray with cooking spray.
  2. In a small bowl or large ziplock bag, mix together honey and Sriracha sauce.  Add chicken tenders and toss or squish to coat.
  3. Add bread crumbs in a separate large ziplock bag.  Transfer chicken tenders into bag.  Seal and shake to coat.  Place chicken on wire rack.
  4. Bake for 15 to 20 minutes, until chicken is no longer pink in center and bread crumbs are golden brown.  If desired, serve with additional honey Sriracha sauce for dipping.
Source: Barely modified from Betty Crocker

Saturday, April 27, 2013

Spicy Beef and Basil Vermicelli Noodles

By facebook fan request,  I'm sharing today recipe.  I know I said I'd share it on Friday but things got a little hectic in my household.  I'll make it up to you all by sharing a decadent dessert next week, how's that? :)

This dish is where worlds collide and have a balance of ying and yang.  There's hot and spicy meat mixed together with crispy, cool raw vegetables.  The lime gives it a fresh pop while the fish sauce gives it savory oomph.  It has AMAZING flavor overall and is a bit unique to my tongue.  The closest thing that I've eaten is Singapore Mei Fun (another favorite Asian noodle dish of mine!).

This dish is more meat than noodle but you can always adjust that to your tastes.  Personally I've been advised by my doctor to make sure baby gets plenty of protein and am still watching my carbs because I reallyyyy don't want to develop gestational diabetes or have to deal with the glucose test again.  That was awful!

I highly recommend you give this one a try if you're looking for something different!

One Year Ago: Chocolate Chip Cookie Dough Stuffed Cinnamon Rolls and Stuffed Crust Pizza
Three Years Ago: Slow Cooker Carnitas
Four Years Ago: Szechuan Chicken

Spicy Beef and Basil Vermicelli Noodles

Spicy Beef and Basil Vermicelli Noodles

Ingredients
  • 1 pound lean ground beef (really, any ground meat would work...I had turkey and pork so that's what I ended up using this time) 
  • 1 Tbs. Chinese 5-Spice (Start with this much but add more to taste if you like a spicier, more pungent flavor!)
  • 3 cloves garlic, minced
  • 1 Tbs. freshly minced ginger
  • 3 Thai chiles, minced
  • 1 zucchini, cut into a small dice
  • 1 Tbsp fish sauce
  • 1/2 red bell pepper, cut into a small dice
  • 2 scallions, chopped
  • 1/4 cup chopped parsley
  • 1/2 cup freshly chopped basil
  • 1 lime
  • 3 oz vermicelli noodles
  • Coarse salt and freshly ground pepper, to taste
Directions
  1. Cook the vermicelli noodles in boiling water, then drain and rinse under cool water.  Set aside.
  2. While the noodles are boiling, brown the beef in a medium skillet until cooked through. Drain most of the grease.  Add the Chinese 5-Spice and a pinch of salt and pepper and sauté another minute. Add the garlic, ginger and chiles, sauté another minute.
  3. Add the zucchini and sauté another 2 minutes. Add the fish sauce and toss to combine. Add additional salt to taste.
  4. In a large bowl, combine the cooked vermicelli noodles, the beef mixture, diced red bell pepper, basil, parsley, scallions and a heavy squeeze of lime juice. Toss to combine. Serve with more lime slices if desired.
Source: Barely modified from Bev Cooks

Monday, March 11, 2013

Spicy Tofu Hotpot

Winter is a time for steamy soups and one popular Asian version of this is called "hotpot".  It's essentially the equivalent of fondue.  Thin cuts of meat, dumplings, vegetables, and noodles are boiled in a soup that's placed in the center of a special cook-top table or portable propane stove.  Honestly, as much as I enjoy this meal, I'm too lazy to do it myself because it requires a lot of prep and patience.  Generally this is a social affair and so it's a very prolonged meal that can easily last a couple hours.  Plus, if you try to rush things and  put too much food in at once, the soup gets overloaded and it takes even longer to cook!

That's why I was so excited to find this recipe for hotpot.  It's all the hotpot flavor that I love with a more immediate satisfaction.  Sure, you lose the fun and socialization aspect but when there's just the two of us at home, I can deal with that.

The original recipe would have made an excellent Meatless Monday meal but since my husband is a carnivore, I added some shredded chicken and frozen dumplings.  If I had fish, shrimp, or beef balls those would have likely made an appearance, too.  Udon noodles are my favorite soup noodles but honestly, all I had on-hand was linguine so that's what we used this time.  It's such a versatile recipe with a great base to get you started!

One Year Ago: Korean Style Short Ribs (Crockpot)
Three Years Ago: Chicken Palava (African Peanut Stew), Ragu a la Bolognese, and Look Alike Hostess Cupcakes

Spicy Tofu Hotpot


Ingredients

  • 14 ounces firm tofu, preferably water-packed 
  • 2 teaspoons canola oil 
  • 2 tablespoons grated fresh ginger 
  • 6 cloves garlic, minced 
  • 4 ounces fresh shiitake mushrooms, stemmed and sliced (about 2 cups) (I used regular white mushrooms)
  • 1 1/2 Tablespoons brown sugar 
  • 4 cups vegetable broth, or reduced-sodium chicken broth 
  • 2 cups water
  • 1/4 cup reduced-sodium soy sauce 
  • 1 1/2 teaspoons sriracha sauce, or to taste 
  • 1 teaspoon sugar
  • 4 cups thinly sliced tender bok choy greens 
  • 1 cup shredded chicken
  • 12-18 frozen Asian-style dumplings
  • 8 ounces fresh cooked noodles such as lo mein, udon, or mei fun (I used linguine)
  • 1/2 cup chopped fresh cilantro
Directions

  1. Drain and rinse tofu; pat dry. Cut the block into 1-inch cubes. 
  2. Heat oil in a Dutch oven over medium heat. Add ginger and garlic; cook, stirring, until fragrant, about 1 minute. Add mushrooms and cook until slightly soft, 2 to 3 minutes. Stir in sugar, broth, water, soy sauce and sriracha sauce; cover and bring to a boil. Add the dumplings and cook for about 3 minutes. Add bok choy, chicken, and tofu, cover and simmer until greens are wilted, about 2 minutes. Add the cooked noodles remove from the heat and stir in cilantro. 
Source: Modified from Eating Well

Friday, February 8, 2013

Bourbon Street Chicken

Originally today I was going to share the most authentic and coveted recipe of all...a Chinese Sponge Cake recipe from my Grandmother.  It is one of the few recipes that actually is written down and well documented.  But, as I discovered when I tried to make it, there aren't enough details to get it right without some experimentation first.  So, allow me to play with it a bit more and then get back to you on sharing that one...

Instead, I'm going to share a really tasty but not-so-authentic stir fry recipe so there's a little something for everybody.  This is a dish that you often find at the mall food court where little Asians try to shove chicken samples on a toothpick in your face.  Oddly enough, I never find myself taking those samples nor ordering this dish but I got a hankering to eat it at home recently.

The sauce is sweet and sticky with a good amount of spice that can be adjusted to your liking.  And despite its name (and my love for drunken foods)...contains no bourbon.  Either way, it's really really good.  Good enough that my husband actually agreed to take leftovers to work the next day for lunch.  He NEVER does that!

I happened to use about half as much chicken and then threw in some leftover broccoli that I needed to use up.  I think steamed broccoli a common side dish for this anyway but I wanted mine to be nice and saucy.

Two Years Ago: Chicken Cacciatore

Bourbon Street Chicken


Yields: 4 Servings

Ingredients
  • 2 lb boneless chicken breasts, cut into bite-sized pieces
  • 1 Tbsp olive oil
  • 1 garlic clove, crushed
  • 1/4 tsp ginger
  • 3/4 tsp crushed red pepper flakes (For added heat, add a squirt of Sriracha!)
  • 1/4 c apple juice (I use no sugar added)
  • 1/3 cup light brown sugar
  • 2 Tbsp ketchup
  • 1 Tbsp cider vinegar
  • 1/2 c water
  • 1/3 c low sodium soy sauce
  • 1 Tbsp cornstarch dissolved in a bit of water
Directions
  1. Heat oil in a large skillet.  Add chicken pieces and cook until lightly browned.  Remove and set aside on a plate.
  2. Add remaining ingredients and heat until well blended and dissolved.  Add the chicken back in then bring to a hard boil.
  3. Reduce heat and simmer for 20 minutes uncovered.  Add the cornstarch mixture and continue to cook until thickened.
  4. Serve over hot rice.
Source: Big Oven

Wednesday, February 6, 2013

Ginger Chicken Jook (Chinese Rice Porridge)

Jook, congee, or rice porridge.  No matter what you call this authentic Asian soup, it is downright delicious and comforting.  Many people compare it to the Chicken Noodle Soup of the Asian world.

When I was healing from my miscarriage, my Mom made me a big pot of jook.  When the Thanksgiving turkey carcass or Christmas ham bone are picked through, we make jook.  In fact, Turkey jook is the most coveted of all because the turkey bones provide an extra sweet base flavor and it's a rarity enjoyed just once a year.

Sometimes, jook in its cheapest and simplest form is just rice and water.  That also brings back childhood memories of when my Grandma and Mom would make a pot of rice in the rice cooker and then using the hard bits at the bottom, add some water and allow it to become a magical soup.  I was somewhat addicted to this and steamed rice mixed with ice water growing up.  It's a wonder that I didn't become malnourished.

In this case, the inspiration for making this recipe was a roasted chicken carcass that was given to me by my in-laws after our weekly Sunday dinner together.  Anytime they have bones they know I'll take it home because I love making homemade broths and soups out of them.  Why let it go to waste?  That's what the Asian in my is thinking, anyway.  The frugal person in me is thinking of the cost savings that comes from making my own broth (which is SO EASY) at home without any added salt.

This was my first time making jook on my own.  I'd watched family members do it many times before but as usual, there's no recipe and no measurements.  The only measurements used were based on "bowls" (of the Chinese soup variety).  After some searching, I found a good starting recipe and put my own family spin on it so that it was closer to the way that Mom would do it.

I don't know why I was so intimidated to try this before.  Perhaps it is because I had witnessed too many times where the bottom of the jook ends up burning by accident and thus tainting the entire pot with the unwanted burnt flavor.  But my Mom taught me the trick to avoiding that.  She always told me to NEVER stir your jook or else you'd have to keep stirring it.  As long as you have a vigorous simmer going on, that will be enough to move the rice around and prevent it from burning.

With my first bite I was pleasantly surprised.  In fact, don't tell Mom but I think it might have been the best (non-turkey) jook that I've ever eaten.  This recipe used chicken broth versus my family uses just water.  Needless to say, the broth added a boost of flavor that I had not yet known.  It also integrates ginger directly into the soup.  While ginger is a common garnish that is served with jook, I usually skip it because I hate chomping on a big piece of it.  But, I enjoy the subtle flavor it lends so cooking it directly in the jook was perfect to me.  I ate this for 4 days straight and can't wait to get some more bones to make more!

I hope you give it a try and discover this Asian staple for yourself!

Ginger Chicken Jook (Chinese Rice Porridge)


Ingredients

  • 6 cups water
  • 4 cups low-sodium chicken broth
  • 1 leftover chicken carcass, with some meat intact and skin removed and trimmed of excess fat
  • 1 cup long-grain white rice
  • 1 tsp ginger, finely minced
  • Salt and white pepper, to taste
  • Chopped fresh cilantro, for garnish
  • Thinly sliced scallions, for garnish
  • Thousand year old eggs, for garnish (optional)
  • White pepper, sesame oil and soy sauce, for personal seasoning
Directions
  1. Place all ingredients except the garnishes in a large heavy-bottomed saucepan and bring to a boil over medium-high heat.  Reduce the meat to medium low and cook at a lively simmer.  Do not stir!  Continue to cook until the rice has completely broken down and the mixture is creamy, about 1 hour.  The soup will continue to thicken as it stands but it will get watery if you stir it too much after cooking.
  2. Turn off the heat and remove the carcass to a cutting board.  When it's cool enough to handle, pull off the meat in bite-sized pieces, discarding the cartilage and bones.  Return the chicken pieces to the jook.  Stir to combine and season with salt and pepper as needed.
  3. Ladle into bowls.  If desired, season with more white pepper, sesame oil, and/or soy sauce then top with cilantro and scallions.  If you like thousand year old eggs, throw those on top, too.
Source: Slightly modified from Christine Gallary's recipe on Chow.com

Monday, February 4, 2013

Meatless Monday: Sweet and Spicy Tofu with Green Beans

This week I'm going to be sharing some Authentic Chinese and Asian-inspired recipes in honor of the upcoming Chinese New Year.  Because this holiday follows the lunar calendar, it falls on a different date each year sometime between January and February.  This year, February 10th is Chinese New Year and it will be the year of the Snake.

First up is a vegetarian dish for Meatless Monday.  Getting my husband to eat a vegetarian dish let alone one that features tofu is generally a chore.  My cousin once told him that they are "estrogen cakes" and if eaten too much, would cause him to grow boobs.  As crazy as that sounds (and I'm sure he doesn't actually believe it), this is the excuse he uses to NOT eat tofu lol.

But this recipe was different.  The sauce made everything dripping with deliciousness and I wouldn't hesitate to use it again on other meats and vegetables.  It has hoisin sauce (essentially Chinese BBQ) which I always love.  There were definitely fewer complaints from my husband about this dish than normal so that was a win in my book.  I left out the water chestnuts due to personal preference.  It's a texture thing for me...I just don't dig it but feel free to keep it in if you enjoy the wet crunch.

Two Years Ago: Quiche Lorraine

Sweet and Spicy Tofu with Green Bean


Ingredients

  • 1 block of tofu, cut into 1 inch pieces
  • 2 tbsp olive oil
  • 1 tsp sesame oil
  • 2 tbsp hoisin
  • 1.5 tbsp brown sugar
  • 3 tbsp soy sauce
  • 3 tbsp dry cooking sherry
  • 2 tsp chili garlic paste
  • 2 cloves garlic, minced
  • Large handful of fresh green beans, trimmed into 1-2 inch pieces
  • 1/2 small onion, sliced into 1-2 inch pieces
  • 1/2 can water chestnuts, sliced into 1-2 inch pieces
  • 1/2 c low-sodium chicken or vegetable broth 
Directions

  1. Heat olive oil and sesame oil in a large saute pan or wok
  2. Add tofu; cook until browned on all sides, about 12 minutes.  Remove to a plate lined with paper towels.
  3. Add a touch more olive oil to the pan.  Add garlic and onions, saute 1-2 minutes.  Add water chestnuts and green beans, saute 1-2 minutes.
  4. Mix hoisin, brown sugar, soy sauce, sherry, chili garlic paste, and broth.  Add to the pan and bring to a simmer.
  5. Return tofu to the pan; let cook a few minutes. Reduce heat and let simmer if you want the sauce to thicken.
  6. Serve over rice or noodles.
Source: Mary Ellen's Cooking Creations

Monday, January 28, 2013

Meatless Monday: Chickpea, Spinach, and Tomato Curry

Did anyone make a New Years Resolution to eat more vegetables, eat less meat, eat healthier  and/or to save money?  One way to do this is to plan at least one meal each week that is vegetarian.  It's better for your health, the Earth, and your wallet!  And, to help you in your journey to a better healthier you, I'll try to feature as many Meatless Monday posts whenever possible.

I found this recipe through my friend and old college roommate Rebecca.  It looked easy enough and had great reviews.  I added spinach for extra color and nutrition.  Feel free to substitute your favorite on-hand veggies to make this meal your own.  It turned out spicier than I was expecting (maybe my curry powder which is authentic from India) and surprisingly delicious!  I didn't miss the meat at all in this recipe :).

Two Years Ago: Football Snackadium, Buffalo Chicken Casserole, and Chicken Parmesan Meatloaf
Three Years Ago: Ham and Potato Soup

Chickpea, Spinach, and Tomato Curry


Yields: 6 Servings

Ingredients

  • 1 Tablespoon olive or vegetable oil 
  • 1 medium onion, chopped (1/2 cup) 
  • 3 cloves garlic, finely chopped 
  • 1 Tablespoon finely chopped ginger
  • 1 Tablespoon curry powder 
  • 2 cans (15 oz each) chick peas, drained, rinsed 
  • 2 cans (14.5 oz each) fire roasted diced tomatoes, undrained 
  • 2 cups fresh baby spinach
  • 1/2 cup finely chopped fresh cilantro 
  • 1 Tablespoon fresh lemon juice 
  • 1/2 teaspoon coarse salt (kosher or sea salt) 
  • Hot cooked rice
  • Plain yogurt, if desired

Directions

  1. In a 3-quart saucepan, heat oil over medium heat.  Cook onion, garlic, ginger, and curry powder in the oil about 2 minutes, stirring frequently, until the onion is tender.
  2. Stir in the chickpeas and tomatoes.  Heat to boiling.  Reduce heat and simmer uncovered for 15 minutes, stirring occasionally.  Remove from heat then stir in the spinach and allow the latent heat to make it wilt.  Stir in the cilantro, lemon juice, and salt.
  3. Serve over rice; top each serving with yogurt, if desired.

Source: Barely modified from Betty Crocker


  • Per Serving: Calories 270
    • (Calories from Fat 50),
  • Total Fat 6g
    • (Saturated Fat 1/2g,
    • Trans Fat 0g),
  • Cholesterol 0mg;
  • Sodium 380mg;
  • Total Carbohydrate 42g
    • (Dietary Fiber 10g,
    • Sugars 5g),
  • Protein 12g

Friday, November 9, 2012

Spicy Garlic and Ginger Chicken with Green Beans

Happy Friday!

I knew this recipe had potential when I looked at the ingredients.  But, I tweaked it a bit knowing that sesame oil isn't meant for cooking (too unstable) but rather drizzled as a finishing garnish.  And, following the tried and true method for all good Asian stir fries.  I watched my mom do it as I grew up and the general formula for a good stir fry is simple.  You get the vegetable oil nice and hot in the pan, add aromatics (like garlic, ginger, and onions) to start your base flavor if you're using them.  Add the meat.  Add the veggies.  Finish with sauce.  Easy peasy, right?

Perhaps the best loved thing about stirfy is the fact that it's so quick to pull a meal together.  Equally easy is the ability to customize it to your liking or use up whatever lonely leftover ingredients you might have.  You can mix and match your meats (like I substituted chicken for the shrimp in this recipe) and veggies.  The real deciding factor in determining a good and bad stir fry meal is the sauce.  And this sauce is a flavorful winner! One of the best I've ever had.

One Year AgoCaramelized Onion Mashed Potatoes
Three Years Ago: Chicken Parmesan

PS: Have you shared and commented on last week's Mac and Cheese Monday #1 post?  Only 2 entries to date so the chance to win is great!  Also, sharing entry #2 on Monday so check back to see what I made and to enter again!

Spicy Garlic and Ginger Chicken with Green Beans


Spicy Garlic and Ginger Chicken with Green Beans

Ingredients
  • 3 Tbsp reduced sodium soy sauce
  • 1 Tbsp rice wine vinegar
  • 2 tsp sugar
  • 3 cloves garlic, minced
  • 2 Tbsp fresh grated ginger
  • 1.5 Tbsp vegetable oil, divided
  • 2 tsp chili sauce (recommend Sriracha!)
  • 2 tsp cornstarch, dissolved in 4 tsp cold water
  • 1 lb chicken breast, cut into 1/2 inch pieces
  • 3-4 cups green beans, steamed
  • Sesame oil
  • Sesame seeds
Directions
  1. Combine the soy sauce, vinegar  sugar, garlic, ginger, 1/2 tablespoon of vegetable oil, and chili sauce in a bowl.  Whisk to combine and then set aside.
  2. In a large non-stick skillet, add remaining 1 tablespoon of vegetable oil and heat until shimmering.  Add the chicken and cook until white and nearly cooked through, about 5 minutes.  Add the steamed green beans to the skillet.  Pour in sauce mixture and allow to simmer for 2 minutes.  Add the cornstarch slurry.  Return to a simmer and cool until thickened (it should coat a spoon).
  3. Drizzle with sesame oil and sprinkle with sesame seeds.  Serve over rice.
Source: Modified from Stephanie Cooks

Wednesday, October 3, 2012

California Roll Lettuce Roll-Ups

I love it when the stars seem to align between what I receive my CSA basket for the week and the things I have bookmarked to make.  My only regret is having had to wait this long to share this recipe with you since I had been traveling so much recently (food photo adventures have been shared on facebook!).  But, I'll call it a nod to my recent trip to Japan by sharing it now :).

What I loved about this recipe was how quickly you could put it together and how healthy it was.  If you love the flavor of California Rolls but don't want the hassle of creating actual sushi rolls, this is the way to go.  I could even see adding some chopped nori (seaweed sheets) to really get the full flavor experience.  And why stop there?  You could adapt this recipe as a vehicle to contain the flavors of any of your favorite sushi rolls!

One Year Ago: Homemade Girl Scout Samoa Cookies and Chicken, Blueberry, and Summer Squash Salad

California Roll Lettuce Roll-Ups


Yields: 4 servings (3 wraps each)

Ingredients

  • 1 cup dry rice
  • 2 Tbsp seasoned rice vinegar
  • 1 head (~12 leaves) Boston lettuce, leaves removed and washed
  • 1/2 English cucumber, seeded and cut into 1-inch matchsticks
  • 1/2 cup (about 2) carrots, shredded or cut into 1-inch matchsticks
  • 5 oz surimi (imitation crab meat), cut into 1-inch matchsticks
  • 1/2 avocado, diced
  • 3 Tbsp pickled ginger, chopped (optional)
  • 2 Tbsp low-sodium soy sauce
Directions
  1. Cook rice according to package directions.  Once cooked, stir in the vinegar and then set aside.
  2. Assemble the lettuce roll-ups by layering several tablespoons of rice in each lettuce leaf.  Then add 2-3 pieces of cucumber, carrot, crab, and avocado.  Top with pickled ginger if desired and finish with a dash of soy sauce.

Source: Adapted by and as seen on PreventionRD from Good Housekeeping

Wednesday, September 12, 2012

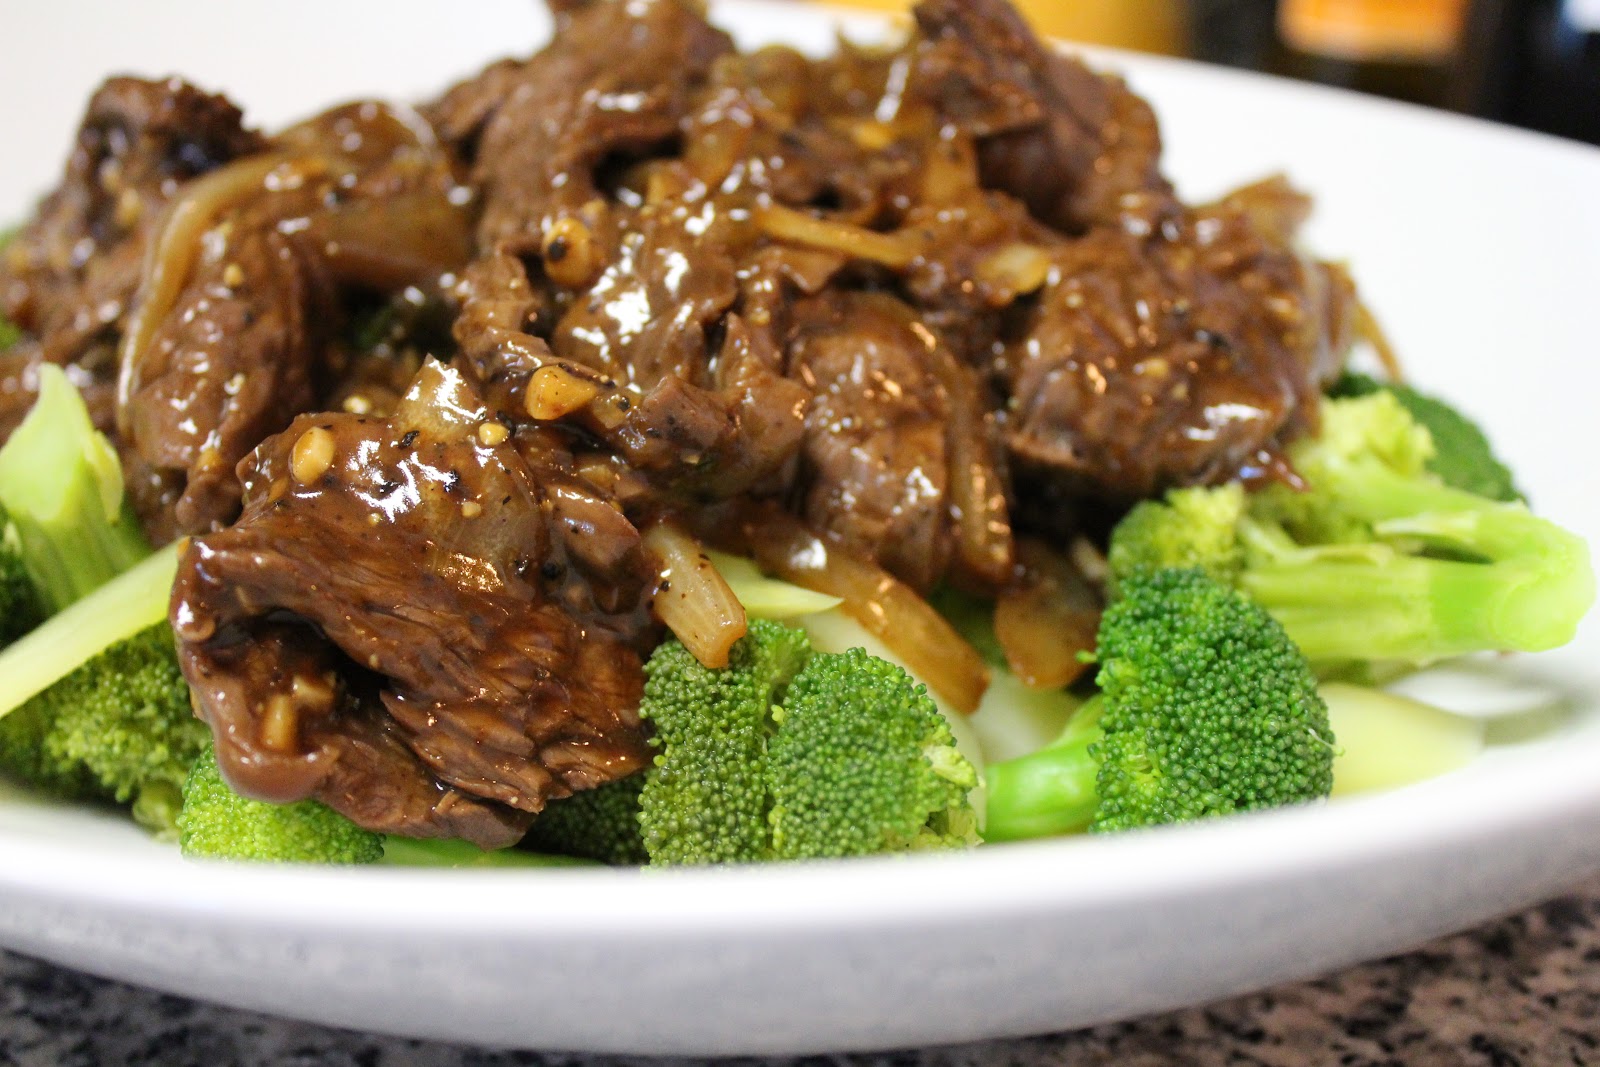
Guest Post by Whisks & Ruffles: Beef with Black Pepper Sauce

Good morning friends!

As this post goes live, it is currently 7PM on Wednesday in Asia and I am STILL on a plane.  Yep, I left just before 7AM on Tuesday (September 11th...still gets small gasps from people...) and will not arrive to my final destination in Kuala Lumpur, Malaysia until nearly 10PM local time (10AM for those in the US Eastern Time Zone).  Aye!

So, while I'm gone, I have several guest posters that I will be featuring here on my site.  I am so extremely thankful for them to be helping me out with posting or I'm pretty sure I'd lose my mind.  I highly encourage you to check out their sites and hopefully you'll follow them regularly as I do, too.

My first guest poster is Angelina of Whisks & Ruffles.  Though she's new to blogging, you can tell she's dedicated to her nurturing her blog because she invested in a custom domain name AND a received a new DSLR to take those beautiful photos that make you drool on your keyboard. A couple of  recipes I would love to try sometime are her Korean Samgyeopsal (Pork Belly) with Ssam Jang (Soybean Past Dipping Sauce) and Pajori (Green Onion Salad) and Fancy 4-Cheese Mac and Cheese (omg am I sucker for a good mac and cheese!).

Angelina volunteered to guest post when I put out a request on my facebook fan page.  When I looked at her profile on facebook, I realized we had a mutual real-life friend in common.  She went to college with my good friend Jackie.  But that's not all we have in common, as you'll see from her introduction below.

By the way, everything she says about growing up in an Asian household and trying to replicate "recipes" is totally true!  If you don't believe me, check out my post on Grandpa N's Char Siu Bao (Chinese BBQ Pork Buns) - See the theme with the recipes scrawled on tiny scraps of paper! - and family recipes tag to see my own (mis)adventures!

-----------------------------------------------------------------------------

Hello! This is Angelina from Whisks & Ruffles. Like Christine, I’m a twenty-something engineer by day and a cooking wife by night. I love to cook, bake, decorate, party plan, and anything wedding-related! Yes, I’m a newlywed and I just can’t help it! Head over to my site to read on my adventures!

Beef with Black Pepper Sauce


Growing up in an Asian household, I’m always in awe of what my mom whips up in the kitchen. It’s so hard to pin-point her recipes though, since she always seems to eye-ball the ingredients. Her food always tastes so amazing, and it’s difficult for me to replicate, because well… her eye-balling is not the same as my eye-balling I guess... but with time, I became wiser, and I learned. At least I’d like to think so!

Whenever I feel like an easy Asian stir-fry, I use the Beef with Black Pepper recipe I found on the Taiwan Center website as a guide. This recipe actually has been posted on my fridge door for quite some time, but whenever I feel like making this dish, I only use it to remind me of the ingredients, and I find myself eye-balling the amount of sauces I add in.

For my guest post at Christine’s Kitchen Chronicles, I attempted to pin-point my recipes, so that you readers can actually try this at home! As I added ingredients, I actually measured them and wrote them down. Finally, I updated the recipe on my fridge! Hooray!

Here’s the before and after recipes (pardon my Disney magnets)


Ingredients:
  • ¾ - 1 Lbs. Beef
  • 2 Tbsp. Chopped Garlic
  • ½ Large Onion, sliced
  • 1 Tbsp. Canola Oil
  • 1 Broccoli Bunch
Beef Marinade (mix all together)
  • 2 Tbsp. Soy Sauce
  • ½ Tbsp. Sesame Oil
  • 1 Tbsp. Corn Starch
  • 1 tsp. Rice Vinegar
Black Pepper Sauce (mix all together):
  • 3 Tbsp. Oyster Sauce
  • 2 tsp. Sugar
  • 4 Tbsp. Water
  • 2 Tbsp. Soy Sauce
  • 1 Tbsp. Freshly Ground Black Pepper (use less if you don’t like your food spicy!)
Directions:


Marinade the beef for about 30 minutes using the marinade recipe above. I used “beef hanging tenders” that’s already pre-sliced, but you can slice your own beef sirloin.

Cut up broccoli and steam. Set aside.

In a large wok, heat up canola oil and toss in chopped garlic and onion. Stir until onions are starting  to brown and garlic becomes fragrant, about 2 minutes.


Introduce the marinated beef and stir-fry for about 3 minutes, until beef is half-cooked.


Pour in the Black Pepper Sauce, and continue to stir-fry for another 3 minutes, until beef is fully cooked.

Serve beef on top of a bed of steamed broccoli from step #2. You can also use Chinese Broccoli (Gai-Lan) or Bok Choy. If you don’t feel like eating veggies you can also skip this part.

I ate my Beef with Black Pepper with a bowl of steamed rice. Delish!

Thank you Christine for letting me guest-post on your blog!

When I ran across the street to buy my last-minute much-needed oyster sauce from a local grocery, I saw some corn on sale, and it reminds me of your Creamed Corn! I wish summer never went away, but Ican’t wait to try this recipe and reminisce the good summer days…

Xo,
Angelina

Friday, June 15, 2012

Recipe Swap: Oven Baked Sriracha Chicken

I'm back at the biweekly recipe swap thing!  I couldn't be happier to re-join for the very popular Blogger's Choice theme.  I was excited to receive the blog So Tasty, So Yummy for this swap.  A lot of the recipes she blogs are things that usually end up on my Google Reader, anyway so this was a win.

I chose this particular recipe because it includes some of my favorite condiments - Hoisin sauce (the equivalent of barbecue sauce in the Asian world and famously used to accompany Peking Duck) and Sriracha (the ever popular Thai hot sauce with a rooster on the bottle).  If you don't have these sauces, don't fret.  They're easily found in the Asian section of your grocery store since they're staples of every good Asian kitchen :).

Overall I was pleased with the flavor that this gave to the chicken and the nice carmelized look that the skin had coming out of the oven.  But, even after I chose to add an overnight marination step, I desired a more intense flavor to the meat itself.  Don't get grossed out but I actually sucked on the chicken skin to savor the flavors more deeply lol.  In the future, I would probably just do boneless, skinless chicken breast (or better yet, kebabs on the grill!) to better suit my husband's and my tastes.  Maybe even serve some extra sauce on the side for dipping.  Yum!

Checkout the roundup at A Taste of Home Cooking to see what everyone else cooked up this week!

Oven Baked Sriracha Chicken


Oven Baked Sriracha Chicken

Ingredients
  • 1 bunch green onions, thinly sliced greens and minced whites
  • ¼ cup Hoisin sauce
  • 1 tablespoon fresh ginger, minced 
  • 2-3 garlic cloves, minced 
  • 2 tablespoons fresh lime juice
  • 1 tablespoon olive oil
  • 1/2 tsp sesame oil
  • 1 tablespoon Sriracha sauce 
  • 4 chicken thighs
  • 1 tablespoon toasted sesame seeds
Directions
  1. Preheat oven to 400 degrees. Spray a 13 x 9 baking dish with cooking spray and set aside. 
  2. In a large bowl, whisk together the minced whites of the green onions, Hoisin sauce, ginger, garlic, lime juice, oils, and the Sriracha. Toss each thigh in the sauce, coating thoroughly.  If desired, marinate in the mixture overnight.  Before baking, spoon the remaining sauce underneath the chicken skin.
  3. Bake for 40 to 45 minutes, turning halfway through baking. Serve topped with green onions and sesame seeds.
Source: Slightly modified from So Tasty, So Yummy

Thursday, March 8, 2012

Korean Style Short Ribs

I'm still here.  And I have a great reason for not posting lately.  But I think some pictures will explain that the best...so here goes and we can make a game of it:
There are mountains and ice in this place.
Sunsets always beautiful but this one was absolutely breathtaking...
An iceberg...know where in the world I went, yet?
How about somewhere with penguins?
Are you my twin?


Yes, I was in ANTARCTICA.  And it was simply AMAZING.  Every single thing that I saw was so beautiful and awe inspiring that I literally had sensory overload.  One of my favorite memories was having a baby penguin come right up to me and stand in between my legs on a windy day as if it was seeking shelter and I was its mommy.  I also saw the most gorgeous sunset of my life. The last photo is me designating that it is the 6th continent that I have visited (the only one left for me is Africa which was originally planned for last year before the Egyptian riots spoiled my plans).

But, now I've been home for a few weeks and I realized that between my new job and vacation, I've severely neglected my blog.  So today I'm sharing with you a recipe that has been circulating the blogosphere awhile ago and I made it in roughly the same time period.  When I dusted it off for posting my mouth started watering.  It was quite possibly one of the most flavorful pieces of meat I have ever eaten and it was so easy to make.  I served mine over rice but I've seen some people making tacos out of them, too.  The flavor gets even better in the event that you have leftovers...but like that would happen! Ha!


Korean Style Short Ribs


Ingredients

  • 1 c. soy sauce
  • 1 c. packed light brown sugar
  • 4 T. sesame oil
  • 3 T. red wine vinegar
  • 2 T. fresh ginger, minced
  • 6 cloves garlic, minced
  • 1/2 c. water
  • 1 t. red pepper
  • 1 t. ground ginger
  • 1 t. black pepper
  • 2 1/2 pounds beef short ribs (I went with boneless)
  • 2 green onions, sliced
Directions
  1. Mix the soy sauce, brown sugar, sesame oil, vinegar, fresh ginger, garlic, and water in the crockpot, stirring until well incorporated.  Sprinkle in the red pepper, ground ginger, and black pepper.  Mix well.
  2. Place the ribs in the crockpot and spoon sauce over top of ribs.  Cover and cook on low for 8 hours.
  3. Remove ribs from crockpot and serve over rice.  Top with green onions.
Source: As seen on and adapted by Hezzi-D's Books and Cooks from What's Cooking Chicago

Friday, November 4, 2011

Napa Cabbage Salad

Typically I find such "Asian salads" to be a crock but this.  I really liked this.  I questioned the dressing based on the ingredients but it really worked and tasted delicious.  There's something about the crunchy ramen topping that makes it pretty irresistible....and in no way healthy.  It IS ramen noodles after all.  Even my husband, who originally turned up his nose at this salad, wanted to add this to the rotation.  Imagine that...he wanted to add a SALAD to the rotation!  Of course, I had to jazz it up with some chicken to round it out and make it a meal that he would approve of but you can leave it off if you prefer.


Napa Cabbage Salad


Yields: 6 Servings

Ingredients
  • 1 head napa cabbage (you can use coleslaw or even regular lettuce in a pinch)
  • 1 bunch minced green onions
  • 1/4 cup butter
  • 1 (3 oz) package ramen noodles, broken into bite-size pieces
  • 2 Tbsp sesame seeds
  • 1 cup sliced almonds
  • 1/4 cup cider vinegar
  • 3/4 cup vegetable oil
  • 1/2 cup sugar
  • 2 Tbsp reduced sodium soy sauce
  • 1 tsp garlic powder
  • 1 tsp onion powder
  • Cooked and cubed chicken (optional)
Directions


  1. Finely shred the head of cabbage; do not chop. Combine the green onions and cabbage in a large bowl, cover and refrigerate until ready to serve.
  2. To make the crunchies: Melt the butter in a saute pan. Mix the ramen noodles, sesame seeds and almonds into the pot with the melted butter. Cook and stir until ingredients are lightly toasted.
  3. To make the dressing: In a small saucepan, heat vinegar, oil, sugar, and soy sauce. Bring the mixture to a boil, let boil for 1 minute. Remove the pan from heat and let cool.
  4. Combine dressing and cabbage then add the crunchies. Serve right away or the crunchies will get soggy.


Source: Slightly modified from All Recipes

Monday, October 17, 2011

Coconut Potato Curry with Basil and Pecans

This was a quick vegetarian curry that was perfect for a cold night.  I considered making it in the crockpot while I went to work during the day but it comes together so quickly that you don't even need it.  My only wish is that I had made rice to go with this dish to sop up all the delicious juices!

Two Years Ago: Grandma B's Brownies - This recipe comes from Chris' grandmother and she made THE BEST brownies.  Yep, we're letting you in on the secret recipe ;).


Coconut Potato Curry with Basil and Pecans


Yields: 4 Servings (1.5 cups each)


Ingredients
  • 500 g new potatoes, steamed for 10 minutes
  • 1/3 cup pecans (or nut of your choice), chopped
  • 1 cup green beans (or peas, or mixed vegetables), fresh or frozen
  • 1 red bell pepper, seeded and sliced
  • 1 cups cherry tomatoes
  • 2 Tbsp tomato paste
  • 1/2 tsp cumin
  • 1/2 tsp cayenne pepper
  • 1/2 tsp coriander
  • 1/2 tsp garam masala
  • 1 can light coconut milk
  • 1 Tbsp olive oil
  • Handful of basil, chopped
  • Salt and pepper, to taste
Directions
  1. In a large pan, heat the oil and cumin.  When they begin to sizzle, add the pecans and gently roast.  Add the steamed potatoes and toss to coat.  Add 1/2 cup water with the tomato paste and incorporate.  Add the cherry tomatoes and simmer for 5-8 minutes.
  2. Add all of the spices.  Stir well to coat the potatoes.  Mash any tomatoes that are cooked through.  Simmer for 3-5 minutes.
  3. Add the coconut milk and red bell pepper and green beans (or other veggies).  Simmer until the sauce begins to thicken.  Add salt and pepper to taste.  Add chopped basil to garnish.  Serve as is or over rice (or caulirice)  if desired.
Source: Very slightly modified from Prevention RD

Friday, September 2, 2011

Thai Peanut Turkey Burgers

Don't put away your grills quite yet.  If you make one more recipe this "season" (or if you're hardcore and grill year-round), this is it.  It has a unique, Thai flavor that you don't really expect from a burger.  And it works.  It was perfect served with oven baked sweet potato chips, which I'll share with you next week :).


Thai Peanut Turkey Burgers
Printer-Friendly Version


Ingredients

For the burgers:
  • 8oz ground turkey (I used chicken because that's what I had on hand)
  • 1 medium carrot, shredded
  • 1 large scallion, minced
  • 1/4 tsp sesame oil
  • 1 tsp chili garlic sauce
  • 2 tbsp natural peanut butter
  • freshly ground salt and pepper
  • 1/2 tsp ground ginger
For the sauce:
  • 2 tbsp light mayonnaise (I used unflavored Greek yogurt)
  • handful of cilantro, finely minced
  • 1-2 tsp chili garlic sauce
For serving:
  • hamburger buns of your choice
  • mixed greens
Directions
  1. Combine burger ingredients a mixing bowl and combine thoroughly. Heat a skillet over medium-high heat. Form the turkey mixture into two patties. Cook for about 7-10 minutes per side, until cooked through. 
  2. Serve on buns with cilantro-chili mayo and greens.
Source: Slightly adapted from A Good Appetite as seen on Cara's Cravings

Nutritional Info, Burgers Only (does not include hamburger bun or cilantro-chili mayo)
Servings Per Recipe: 2
Amount Per Serving
Calories: 276.1
Total Fat: 16.7 g
Cholesterol: 80.0 mg
Sodium: 212.1 mg
Total Carbs: 7.9 g
Dietary Fiber: 2.1 g
Protein: 26.1 g

Tuesday, August 9, 2011

Ultimate Sriracha Burger

I'm still on my spicy kick...I've said it once before and I'll say it again, Sriracha hot sauce is the shizz!  It's like the Frank's Red Hot of the Asian world...but...a million times more delicious.  Spicy, tangy, and sweet....it's perfect on pretty much everything.

I can't say I'm surprised that a burger features this delicious sauce.  It made it onto my list of dinner real fast and as suspected, it was...well, the shizz!  Go make it immediately...especially considering I *know * you don't want to turn on the oven in this record breaking mid-summer heat.  But heat in your mouth is a different story...that's an any-time delight!

Fair warning, it's not for the faint of heart....and it's so delicious I neglected to take a picture.

One Year Ago: Homemade Refrigerator Pickles

Ultimate Sriracha Burger
Printer-Friendly Version

Yields: 4 burgers plus extra sauce...would be great on fries!

Ingredients
  • 1 1/2 lbs. ground grass-fed chuck
  • 2 TBS. soy sauce
  • 5 TBS. Sriracha, divided
  • 2 tsp. freshly ground black pepper
  • 4 slices thick cut bacon
  • 1 large sweet onion
  • 3/4 cup blue cheese dressing
  • 4 brioche buns
  • 4 thick slices Swiss cheese
  • 1 tomato, sliced
  • several handfuls of arugula (omitted...didn't have any on hand)
Directions
  1. In a large mixing bowl, combine the ground beef, soy sauce, 2 1/2 TBS. of the Sriracha, and the pepper. Be careful not to overmix. Form the mixture into 4 patties, and set aside, covered, in the refrigerator.
  2. Preheat grill to medium high heat. In a medium frying pan over medium-low heat, cook the bacon. While the bacon is cooking, peel and quarter the onions. Cut each section into 1/4-inch slices. Once the bacon is cooked through and slightly crispy, remove the slices from the pan, cut each in half crosswise, and drain onto paper towels, reserving the remaining bacon fat in the pan. Cook the sliced onions in the bacon fat over medium-low heat until they caramelize, 20 to 25 minutes.
  3. Grill the burgers, turning once, 4 to 4 1/2 minutes on each side or until a meat thermometer registers 130° to 135°F for medium-rare.
  4. While the burgers are cooking, combine the blue cheese dressing with the remaining 2 1/2 TBS. Sriracha in a small bowl. Lightly toast the buns on the grill during the last minute of cooking time.
  5. Assemble the ultimate burger! Spread the blue cheese mixture on both halves of each hamburger bun. Stack a burger patty, slice of swiss cheese, bacon, caramelized onions, slice of tomato, and a small handful of arugula between each hamburger bun. Open jaw W.I.D.E. and devour!
Source: The Sriracha Cookbook as modified by and seen on Oiishi Food

Thursday, July 14, 2011

Asian Lettuce Wraps

There are some people that L.O.V.E. the restaurant P. F. Changs.  I, however, am not one of those people.  Personally I find the restaurant to be an overpriced version of any run-of-the-mill Americanized Chinese food and usually, it's way too salty.  But, I do love Asian lettuce wraps...and that's something they serve that's a bit more authentic.  People go gaga over these wraps there...and for good reason!

There's something about the contrasting flavors and textures of this meal: crisp, cool lettuce versus the hot (and if desired, spicy) meat filling.  Essentially, it's Asia's version of the taco.  It's also great for low-carb dieters because there's no tortilla, just a lettuce cup holding all the meaty goodness inside.

Asian Lettuce Wraps


Ingredients

For the sauce:
  • 1½ tsp. hoisin sauce
  • 1 tsp. soy sauce
  • ½ tsp. sesame oil
  • 1 tsp. rice wine vinegar
  • Freshly ground black pepper
  • 1 tsp. Sriracha hot sauce
For the filling:
  • 2 tsp. canola oil
  • 1 tsp. minced garlic
  • ½ tsp. grated fresh ginger
  • 2 green onions, chopped
  • 1 lb. ground turkey or chicken
  • 2 cups mixed vegetables 
  • ½ green apple, finely chopped
To assemble:
  • Butter lettuce leaves, washed and separated
  • Shredded carrots for topping (optional)
Directions
  1. Combine all the ingredients for the sauce in a small bowl and mix to blend.
  2. To make the filling, heat a skillet on high heat with cooking oil.  Once the pan is hot, add the garlic, ginger and green onions to the pan, and stir fry for a few seconds, just until fragrant.  Add the ground turkey or chicken, breaking into small pieces, and cook until almost cooked through.  Add the vegetables to the pan and cook for 1-2 minutes.  Mix in the sauce and cook for about 1 minute until thickened slightly.  Add the apples to the pan and toss to coat.  Immediately remove the pan from the heat.
  3. Serve the filling in lettuce “cups” and top with shredded carrots, if desired.
Source: Originally from Steamy Kitchen as adapted by and seen on Annie's Eats

Sunday, June 19, 2011

Singapore Mei Fun

Remember my 23 Things in 2011 list?  Yeah...totally not on track for completing that right now since April and May were totally non-productive.  Up until that point though I had been very good about making roughly 2 items off the list per month but (as usual) not as good about blogging about them in a timely manner.  The only reason I'm blogging about this particular recipe now is because my facebook fans voted on it to be my next blog post!

Singapore Mei Fun made my list of things I wanted to make this year because it is one of my favorite dishes that my mom makes.  Interestingly enough, I recently learned from an Asian Heritage Month work event that this dish isn't even authentic Sinaporean food.  Oh well.  It's delicious.  And it's easy!  I think the real secret to making a good Singapore Mei Fun (Rice Noodle) dish is the fact that the noodles are "cooked" by soaking them in water instead of boiling like your typical noodle.  A quick stir fry is all it takes to finish it off!

My mom gave me a "recipe" but as with all of our family's "recipes" they are more loose guidelines of what ingredients and generally how to make the dish.  There's not any specifics of how much or how long so that's where my Google research helped.  Thank goodness for Google to help fill in the gaps.  This was just like Mom's!

One Year Ago: Firecracker Shrimp


Singapore Mei Fun (Curry Noodles)

Singapore Mei Fun (Curry Noodles)

Yields: 4-6 servings

Ingredients

  • 8 ounces rice vermicelli (mei fun - check your Asian aisle at the local grocer)
  • 2 tablespoons rice cooking wine 
  • 2 teaspoons reduced sodium soy sauce
  • 1 1/2 teaspoons sugar 
  • 1/2 teaspoon salt 
  • 4 tablespoons vegetable oil 
  • 4 ounces small shrimp, shelled and deveined 
  • 1/2 cup finely shredded scallions 
  • 1 small onions, sliced
  • 1 green bell pepper, sliced
  • 1 Tablespoon yellow curry powder 
  • 3/4 cup Chicken Broth 
  • 4 ounces other meat such as Chicken, Beef, or Chinese Barbecued Pork, cut into julienne
  • 1 egg, scrambled, fried, and cut into julienne (optional)
Directions
  1. In a large bowl, soak the rice noodles in enough cold water to cover overnight, or until noodles are limp and softened. Drain in a colander and set aside. In a small bowl, combine the soy sauce, rice wine, sugar, and salt. Set aside.
  2. Heat a 14-inch flat-bottomed wok or skillet over high heat until hot but not smoking. Add 1 tablespoon vegetable oil and stir fry the chicken and/or beef until nearly cooked through.  Remove and set aside on a plate.  Add additional 1 tablespoon oil and shrimp, and stir-fry 10 seconds. Add the scallions and stir-fry 30 seconds, or until shrimp have just turned orange but are not cooked through. Transfer the shrimp mixture to a plate and set aside.
  3. Add the remaining 2 tablespoon vegetable oil, onions and green pepper, and stir-fry 30 seconds. Add the curry powder and stir-fry 10 seconds, or until fragrant. Restir soy sauce mixture and swirl it into the wok. Add the chicken broth, and 1/3 cup cold water, and bring to a boil over high heat.
  4. Add the drained rice noodles and return to a boil, stirring noodles to completely coat in curry mixture (chopsticks work best for this!). Add the meat mixture, and cook, stirring, 1 to 2 minutes, or until shrimp are just cooked through and liquid has been absorbed by the noodles. Add the cooked egg, if desired.  Serve immediately.
Source: Inspired by my Mom and The Wisdom of the Chinese Recipe. Published by Scribner, 1999.  As seen in an Cooking Light message board.

Tuesday, April 12, 2011

Chinese Steamed Fish

Well, based on my Google Analytics for the month, fish is pretty much the new black.  Or, it could just be Lent.  So, as Easter is coming up and you're rounding up the last of your Lenten specialties or you just want to try to eat healthier, I encourage to give this a try.

Asian-style steamed fish is one of my favorite things to order at Chinese restaurants.  I made this along with several other Chinese goodies as part of my Chinese New Year celebration.  Fish, or "yu", is symbolic of richness and abundance.  If you eat the fish for Chinese New Year, you will be prosperous.  And, the saying goes that you should leave a little bit on your plate to save for later...so that you have prosperity in the future, too!  I don't know about all the traditional/superstitious mumbo jumbo but prosperity sounds good to me :).

If you're going all out, you'd buy a very fresh piece of intact fish - skin, bones, and *gasp*...head!  In Chinese culture, it's the head (with the fish's clear glassy eyes) that lets you know that it's really fresh.  Heck, you might have even selected it from the tank yourself!  Since I live in Cincinnati and am personally a bit squeamish, I went with filets and it still tasted just like the restaurants to me.  And, less work because you don't have to pick out tiny bones or (if you're like me), discard the skin while you're eating it.  My mom eats the skin though.  And the meat in the head.  She'll fight you for it because she claims the cheek meat is the sweetest.  Don't worry Mom, it's all yours!

This preparation of fish is relatively healthy since it is steamed.  There is a moderate amount of oil used in the "sauce" but you can either reduce the amount used or just not spoon as much of the "sauce" on top of your fish serving when you go to eat it.  The flavor really comes from the ginger and scallions that flavor the oil in addition to the soy sauce.  Yum!

One Year Ago: Slow Cooker Carnitas
Two Years Ago: Cake Balls (Truffles)

Chinese Steamed Fish
Printer-Friendly Version


Ingredients
  • 1 pound whole fish (or fillets 1″ or thicker) yields the best results
(A)
  • 4 stalks, scallions – cut into 3″ lengths
  • 3″ piece of ginger – slice into “coins”
  • small bunch of cilantro
  • 1 1/2 tablespoons Shaoxing wine to pour on fish prior to steaming (or any cooking wine like dry sherry)
  • salt and pepper
(B)
  • 2 tablespoons rough chopped cilantro
  • 1 teaspoon sesame oil
  • 2 tablespoons soy sauce
  • 1/2 teaspoon sugar
  • 1/4 teaspoon salt + 1/4 teaspoon white pepper (or black pepper if you don’t have white)
  • fresh chilli – thinly sliced (optional)
(C)
  • 2 stalks, scallions – cut into 3″ lengths
  • 2″ piece of ginger – finely julienned to the skinniest, thinnest strips you can possibly manage without a microscope
  • 2 tablespoons cooking oil
Equipment: shallow pan to hold fish and large pot or wok for steaming. If you don’t have a fancy steamer or steamer insert, take a shallow-ish bowl and invert to use as a stand. Or…3 shot glasses inverted.

Directions
  1. Clean and Stuff: Clean your fish, pat dry. Season generously inside and out with salt and pepper. Take half of (A) and stuff inside the fish. If you are using fillets, skip this.
  2. Make your bed: Take the other half of (A) and lay it in a shallow pan. If using fillets, just use all of (A) for the bed. Lay the fish on top of the bed. If fish is too long, cut in half. Pour 1 1/2 tablespoons Shaoxing wine on top of the fish. 
  3. Steam: Add 2″ of water to your large pot, cover and boil. When it is boiling, uncover and wipe the inside of the cover clean of any condensation (all this condensation will drip back down on your fish, diluting the flavor) Put your fish pan inside, propped up with a small inverted bowl. Steam the fish on medium (see below for cooking times).
  • Whole fish 1 lb: check at 12 minutes, add 2 minutes for every 1/2 lb
  • Fillets 1″ and thicker: check at 10 minutes, add 2 minutes for every 1/2″ more thickness
  • Fillets less than 1″: check at 7 minutes
  • Super thin fillets: check at 5 minutes
    1. Check to see if its done at the times indicated.  Poke your chopstick at the flesh near the top fin. If flesh flakes easily near the top fin, then its done. If flesh sticks together still, then add 1-2 more minutes to cooking time. For fillets, just gently poke at the flesh in the middle. Timing really depends on the thickness of your fish.  Also check to make sure you haven’t run out of steaming water.
    2. Aromatics: Towards the end of the steaming process, you’ll want to start preparing the aromatics that garnish the finished dish. Take a microwave-safe bowl, add (B) and microwave for 30 seconds. Set aside. When fish is done steaming, carefully lift the fish out onto a serving platter, discarding all of the cooked cilantro/ginger/scallions and the fish juice in the pan. Pour the hot (B) over fish.
    3. Now we’ll work with (C): In a separate pan or wok, heat up cooking oil until you see smoke. Add the ginger and scallions, fry for 10 seconds to “pop” the flavors. Pour this cooking oil + herbs over the fish. You’ll hear a very satisfying sizzle!
    Source: Steamy Kitchen

    Saturday, January 1, 2011

    2010 Recap Part 1: Reader Favorites

    Happy 2011!

    I thought I'd kick off this (nerd alert: binary!) New Year with a recap of your favorite recipes from 2010.  Because let's face it, I don't just cook and blog for myself.  I do it for you, too!  That's right.  This post is dedicated to all 55 of you that subscribe to me on Google Reader.  All 8 that subscribe via blogger, too.  And, the countless others that follow my blog sans subscription through Google search, my facebook posts, and the like.  Together you checked out my website a whopping 16,635 times!  Whoa!  I'm so honored to have people that *want* to read about my kitchen chronicles and try new recipes with me. 

    What I'd love even more is if you began to come out of your shell and start leaving comments on my blog, too.  Let's face it, we all know that my blogging dwindled in the second half of the year and I just couldn't find the motivation to get back on track.  For 2011, I resolve to get back on the blogging band wagon and I need *you* to help hold me accountable.  Cheer me on when you see something you like!  Let me know if you tried something from my blog - successful or not, too!  Together, we can cook great things :).

    So now back to Reader Favorite Recipes from 2010.  These recipes are the most popular ones from my website based on number of hits.  Yup, I have this nifty thing called Google Analytics.  It tells me how many people visit my site, what they look at, how long they spend there, and what part of the world they are visiting from.  Neat, huh?  Don't worry my privacy protection fans, it's all aggregated data and so I can't like...internet stalk you or anything :P.

    Without further adieu, here are your favorites from 2010.  (And you can see 2009 favorites, here!)

    #10: Copy-Cat Chipotle Burrito Bols
    (201 pageviews in 2010)


    Do you love Chipotle?  Then you'll love these bols. (Yes, not a typo, there's no w.  It's Spanish!)

    #9: Spaghetti Meatballs
    (213 page views in 2010)
    
    Photo Credit: Amadeo


    You really can't go wrong with this classic Italian dish.  This one comes from Chris' Grandmother who was from Sicily and is one of the few dishes that I will make over and over again.  It freezes well so one batch will provide a good 6 meals for the 2 of us!

    #8: Spinach, Sausage, and Cheese Manicotti
    (291 page views in 2010)
    
    Photo Credit: Eater's Digest


    I have smart readers that know a good recipe when they see one.  This is another one of those recipes that actually gets repeated in this household.  The method of stuffing the shells *uncooked* is ingenious.  I like to use sausage, spinach, and cheese (as the title of this recipe suggests) but it is adaptable to the filling of your choice.  Bonus: this one freezes well, too!

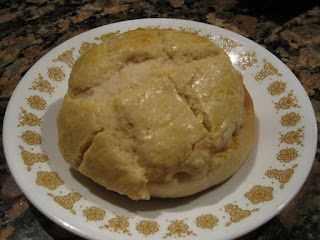
    #7: Grandpa N's Char Siu Bao (Chinese BBQ Pork Bun)
    (337 page views in 2010)


    A never-before-seen on the web recipe from my family to yours.  This authentic bun recipe was made countless times by my Grandpa for me.  Since Chinese people tend to not write down recipes, it didn't quite taste exactly as I remembered but is a good starting point.  As I tweak (and document!) this recipe over time I hope to someday get it just as Grandpa used to make.  Stay tuned for future iterations and improvements to this recipe!

    #6: Red Lobster's Parmesan Crusted Tilapia
    (439 page views in 2010)


    This one came straight off of Red Lobster's own website so it's not even a copy-cat - it's the real deal!  Tilapia is one of my favorite types of fish and this preparation is yummy.

    #5: Mock Bravo Della Casa Salad
    (485 page views in 2010)


    Me thinks my readers have a thing for copy-cat restaurants based on Top Reader Picks #10, 6, and 5!  This copy-cat salad is based on my husband's favorite from Bravo! Cucina Italian.  It is the only creamy dressing that he'll eat and he ate this recipe too so I'll take it as a stamp of approval.

    By the way, what other copy-cat recipes would you like to see on here?  Now's your chance to leave a comment!

    #4: Red Velvet Whoopie Pies (626 page views in 2010)


    Each time I see this pictures it practically brings tears to my eyes.  This is by far the most beautiful food photograph that I have ever taken in my life...let alone 2010.  It holds a special place in my heart because it was the first (and only) time that I was accepted to the "food porn" website Food Gawker.  I have no doubt that this recipe made the Top 10 because of the traffic it brought to my site.  That and this recipe is actually quite divine!  Here's to hoping my photography skills continue to improve in 2011.

    #3: Lasagna
    (662 page views in 2010)

    [No food photo.  Sad face.]

    This recipe was shared by my Aunt Wah to my mom and I practically grew up on this stuff.  No kitchen should go without a tried and true lasagna recipe.  This one uses cottage cheese instead of ricotta and I find I like the texture better...perhaps because it's what I grew up knowing.  Now to just remember to take a picture of this when I make! 
    
    Garfield would approve.
    

     #2: Chinese Bakery-Style Cake
    (1,278 page views in 2010)


    Did you all see the page view count on this one?!  It completely blows all others above out of the water and for good reason, too!  I just wish I had better photography skills to truly capture the magnificence of this cake.  As I said previously, authetic Chinese recipes are hard to come by because the cooks just don't write them down.  I got really lucky and found this one online.  I made some minor modifications and shared it with you.  This is the most commented upon recipe in my blog and I can tell you all love it, too.  What's not to love about the sponge cake layers sandwiching fresh fruit and custard before the entire thing is enveloped in fresh whipped cream.  It looks complicated but it's really not so bad.  And, I gaurentee that it's totally worth it.  If you haven't tried this yet, go.  Now.

    Drumroll please....

    #1: Chinese Bolo Bao with Nai Wong Filling ("Pineapple" Custard Bun)
    (1,590 page views in 2010)


    No big surprise here!  The King of 2010 Recipes (mostly due to Google search where it indexes #1!) is the Chinese Bolo Bao with Nai Wong Filling.  This is sort of kind of a Christine's Kitchen Chronicles original because I took 2 existing web recipes to recreate a bun Chris knows and loves.  I have to say that nobody that saw or ate this little beauty was disappointed.  It tasted and looked like it came from a real Chinese bakery.  From its sweet crisp topping to its tender bun leading to a silky custard surprise inside, it is 100% goodness.
    There you have it, folks.  Your favorite recipes from 2010.  Be sure to stay tuned to Part 2 of this series - MY favorite recipes from the year!  So far so good on getting back on the blogging wagon, huh? :)

    Wishing you a fantastic 2011!
    Christine