Pages

Wednesday, March 31, 2010

Berry Buttermilk Cake

Are you wondering what to do with leftover buttermilk?  Well, as this is apparently a common question, I've now added a "buttermilk" tag to my blog and will be featuring a few different recipes in the upcoming days as additional ideas.  Surprisingly, I already had a good 6-7 recipes using buttermilk before this series of recipes but I generally used the trick of taking regular milk and adding a bit of vinegar or lemon juice to make it sour and curdle a little.  That's all fine and dandy but it really isn't the same as using REAL buttermilk.  And I had a giant half-gallon jug of it to use!  So come explore some recipes with me, my friends...

This. Recipe. Is. Awesome. 

Even better is that it is really really simple.  I whipped it up and was in and out of the kitchen in well under an hour INCLUDING baking and cleaning time.  It's a very light cake with a delicate crumb and the slight crunch of the sugar on top adds a nice contrast to each bite.  It's light enough to be enjoyed as a breakfast yet satisfying enough to serve as your dessert, too.  Chris' family ate it right up and we enjoyed it so much that I made it again that same week.  Now, I don't know if you've noticed or not but I tend to try a bazillion new recipes so anything that gets made multiple times is a keeper in my eyes!  (I'm sorry, the photo really doesn't do this cake justice!)

The original recipe was called Raspberry Buttermilk Cake but I didn't have any raspberries, I only had frozen blueberries (which were leftover from our Belgian Waffle Bar from Dinner Club...I still need to post those recipes...d'oh!).  Thankfully this recipe is very forgiving and you can use whatever the heck berry you want and I found frozen works just fine in this case.

So if you want a lightly sweet treat tonight that's relatively healthy (less than 200 calories a slice = 1/8th of the cake!), make this one.  You won't be sorry!

Berry Buttermilk Cake
Printer-Friendly Version


Ingredients
  • 1 cup all purpose flour
  • 1/2 tsp. baking powder
  • 1/2 tsp. baking soda
  • 1/4 tsp. salt
  • 1/2 stick of unsalted butter, softened
  • 2/3 cup plus 1.5 Tbsp. sugar, divided
  • 1 tsp. vanilla extract
  • 1 large egg
  • 1/2 cup well-shaken lowfat buttermilk
  • 1 cup fresh raspberries (about 5 oz.), blackberries, blueberries, and/or strawberries*
*Note: If using frozen berries, add the berries to the batter frozen.
 
Directions
  1. Preheat the oven to 400, with a rack in the middle. Butter and flour a 9″ cake pan.
  2. In a large bowl, beat together the butter and 2/3 cup sugar at medium-high until pale and fluffy. Beat in vanilla, and then egg.  Add flour, baking powder, baking soda, and salt.  Add the buttermilk.  At low speed, mix until just combined.
  3. Pour batter into a cake pan and smooth the top using a rubber spatula. Scatter berries on top and sprinkle remaining 1.5Tbsp. sugar.
  4. Bake until cake is golden brown and a toothpick inserted in the center comes out clean, about 20-25 minutes. Cool in the pan 10 minutes and then turn onto a rack and cool to warm, 10-15 minutes.
  5. Serve with whipped cream or ice cream, if desired :).  (Sorry that will put you over the 200 calorie per serving mark...but it would taste so delicious!)

Source: Slightly adapted from Gourmet as seen on Elly Says Opa!

Nutritional Information for 1/8 of the cake: Calories: 196 / Fat: 6.7g / Saturated Fat: 3.9g / Carbs: 31.5 / Fiber: 1.5g / Protein: 3.1g

Saturday, March 27, 2010

Carrot Cake

Everyone knows that Easter isn't complete without some carrot cake!  This is my current go-to recipe but I'd love to know if you have a favorite, too.  As you know, I'm always trying new recipes!  I made these little treats a couple weeks ago but am sharing it with you now so that you can add it to your dessert menu for Easter :).  This can be made as a 9x13 cake or 12 cupcakes just by changing the baking time.

Now, I grated my carrots by hand using the small sized holes of my cheese grater because I like the fine texture but you can also buy your carrots pre-shredded or give it a whirl in your food processor.  Speaking of which, my mom bought me this HUGE 9 cup food processor that I have yet to use...any suggestions?

I love the spice flavor of carrot cake, the moistness and nutrition that carrots lend, and the creamy cream cheese frosting.  I had to leave out the nuts so my brother could eat them.  And, I don't dig pineapple chunks nor raisins in my carrot cake but if you're one that enjoys those, feel free to throw them in.  Yum!

Carrot Cake
Printer-Friendly Version


Prep Time: 30 Min
Cook Time: 24 - 50 mins
Yields: 1-9x13 cake OR 12 cupcakes

Ingredients

For the Cake
  • 4 eggs
  • 1 1/4 cups vegetable oil
  • 2 cups white sugar
  • 2 teaspoons vanilla extract
  • 2 cups all-purpose flour
  • 2 teaspoons baking soda
  • 2 teaspoons baking powder
  • 1/2 teaspoon salt
  • 2 teaspoons ground cinnamon
  • 3 cups grated carrots
  • 1 cup chopped pecans (optional)
For the Frosting
  • 1/2 cup butter, softened
  • 8 ounces cream cheese, softened
  • 4 cups confectioners' sugar
  • 1 teaspoon vanilla extract
  • 1 cup chopped pecans (optional)
Directions
  1. Preheat oven to 350 degrees F (175 degrees C). Grease a 9x13 inch pan or prepare a muffin tin by placing liners in each.
  2. In a large bowl, beat together eggs, oil, white sugar and 2 teaspoons vanilla. Mix in flour, baking soda, baking powder, salt and cinnamon. Stir in carrots. Fold in pecans, if desired.
  3. Pour into prepared pan of your choice (9x13 cake pan or prepared muffin tin).
  4. For 9x13 Cake: Bake in the preheated oven for 40 to 50 minutes, or until a toothpick inserted into the center of the cake comes out clean. For Cupcakes: Bake in preheated oven for 24 - 30 minutes, or until toothpick inserted into the center of the cake comes out clean. 
  5. Let cool in pan for 10 minutes, then turn out onto a wire rack and cool completely.
  6. While cake is cooking, prepare frosting.  In a medium bowl, combine butter, cream cheese, confectioners' sugar and 1 teaspoon vanilla. Beat until the mixture is smooth and creamy. Frost the cooled cake or cupcakes.  If desired, sprinkle with chopped pecans.
Source: Method modified from All Recipes

Wednesday, March 24, 2010

The Easiest White Bean Chicken Chili

It's getting a bit warm out for chili (it got up to the mid-upper 60s today!) but I assure you that when I made this a couple of weeks ago, it was a bit chilly out still so this meal was entirely appropriate.  The title isn't lying.  It is by far the easiest chicken chili I've ever made.  Easiest soup at all, for that matter.

The flavor was great but here's the the thing.  My cheese cubes didn't melt and disperse into the soup.  They stayed as softened/melted brown colored cubes of cheese which just weirded me out.  Maybe it was the type of cheese I used?  I don't know.  It was Kraft Pepper Jack Cheese in a block and I sliced it into cubes like the directions said I should.  Next time if I make this again, I'd probably shred the cheese instead in hopes that it just might go INTO the chili instead of staying separate.

The Easiest White Bean Chicken Chili
Printer-Friendly Version


Ingredients
  • 3 cans white beans, drained and rinsed
  • 1 can diced tomatoes with chilis
  • 1 can corn
  • 1 tsp. cumin powder (optional for more flavor)
  • 1 tsp chili powder (optional for more flavor)
  • 3 boneless, skinless chicken breasts, trimmed of fat
  • 8 ounces Pepper jack cheese, cut into 2-inch cubes (I'd shred them next time instead)
  • 2 cups salsa
  • Optional garnishes: shredded cheese, sour cream, avocado, sliced green onions, fresh cilantro, diced fresh tomatoes, crushed tortilla chips, extra salsa, tabasco/cholula hot sauce, etc.
Instructions

  1. Combine the beans, tomatoes, corn, cheese, spices (if desired), and salsa in a crockpot. Nestle the chicken breasts into the mixture, and cook on low 6-8 hours.
  2. Shred chicken breasts with a fork then stir to combine.  Serve with desired garnishes.
Source: Modified from Pink Parsley

Tuesday, March 23, 2010

Chicken Bruschetta

We've jumped the clocks forward, the sun is shining, and Spring has returned.  Hooray!  This also means that it's time for garden fresh veggies.  Okay...a little early for the garden fresh veggies (especially when you don't even HAVE a garden!) but hey, a girl can dream and this recipe DOES use lots of delicious veggies!

Actually, there were SO many veggies made in this dish that I actually put some of the leftovers on top of my Stuffed Shells leftovers (which was already a re-make of the Ragu a la Bolognese to begin with!).  OMG that brought new life to that dish entirely.  It knocked my socks off!  I loved the veggie "bruschetta" topping so much that I think it'd be great on all sorts of things...chicken, fish, beef, pork, pasta...everything, seriously!

This was a very light yet flavorful main dish.  I love all the color in it.  Somehow color makes me feel like it's going to be healthier for you :).  Really make sure to use fresh herbs and good quality oils and vinegars since they are really what flavors this dish.  So once you build up your little bumper crop or if you're like me and just can't wait, give this one a try!

Chicken Bruschetta
Printer-Friendly Version


Yields: 4 Servings

Ingredients
  • 1.5-2 lbs boneless, skinless chicken breasts, pounded thinner
  • 9 minced garlic cloves, divided
  • Salt
  • Pepper
  • Cooking spray
  • 2 Tbsp olive oil, divided
  • 8-oz package of sliced mushrooms
  • 2 small zucchini, quartered length-wise and sliced
  • 2 cups chopped plum tomatoes or 14.5-oz can of diced tomatoes
  • 1/2 cup chopped red onion
  • 1/2 cup chopped fresh basil (1 small package)
  • 4 tsp balsamic vinegar
  • 1/4 cup (1 oz) grated fresh parmesan cheese
Directions


  1. Remove chicken breasts from package and lightly season with garlic salt and pepper. Rub 5 cloves of minced garlic onto the chicken.
  2. In a large sautepan, spray pan with cooking spray and over medium-low heat and 1 Tbsp of olive oil.  Add chicken to the sautepan and cook until lightly browned and cooked through. Remove chicken from pan, and keep warm.
  3. Spray the sautepan with cooking spray and heat the additional Tbsp of olive oil. Turn the heat to medium.  Add 1/4 tsp salt, mushrooms, zucchini, and remaining 4 cloves of minced garlic. Saute 2-4 minutes (until zucchini is tender).  Add 1/8 tsp black pepper, tomato, red onion, basil, and balsamic vinegar. Saute 5-7 minutes.
  4. Serve the vegetable mixture over chicken; sprinkle with freshly grated parmesan cheese.  If desired, can serve over angel-hair pasta, rice, or caulirice for a complete meal.
Source: As seen on The Piggly-Wiggly Blog as loosely adapted from Cooking Light

Creme Brulee

What do you do with leftover egg yolks from making the Look-Alike Hostess Cupcakes?  Well, you could make ice cream...but I don't have an ice cream maker :(.  You could make custard or pudding...but...that seems to mundane.  I know!  How about making CREME BRULEE?!

Had I known all these years how simple it is to make, I might have tried it sooner.  The egg yolks that I had leftover were perfect to make 2 small ramekins of creme brulee for me and Chris.  Ok...both of them were actually for me because we all know Chris doesn't like eggs! 

The hardest part was getting that signature toasted sugar crust on top because I didn't have a torch.  At first I tried one of those long grill lighters and it sorta-kinda worked.  It melted the sugar in a small area reallyyyy slow and probably would have taken up all the fuel just to do one.  So, I tried another trick which was to stick them under the broiler for a bit.  Worked like a charm but almost too effective as it can burn easily.  The other thing that was tricky when not having a torch and needing to use the broiler was you don't want to warm the custard back up yet you don't want to put it back in the fridge after carmelizing the sugar because then it won't be crunchy anymore.  My creative solution to this was to surround the ramekins with ice when they went in the broiler and then let them re-chill in the ice awhile longer before consuming.  Perfect.  A smooth and creamy custard and carmelized crunchy sugar top.

Man...I'm realizing that this particular recipe is at least 2 weeks behind.  I've really got to get a move on to catch back up again!  Oh and apologies for this really bad picture.  It was a late night!  Anyway, without further adieu...here's the recipe.

PS:  Did I mention that Chris and I are going to Paris for a couple days in May?!  I bet they have awesome Creme Brulee among other things there...I'm going to be in culinary heaven!!!

Creme Brulee
Printer-Friendly Version


Yields: 2 Servings

Ingredients
  • 1 cup heavy cream
  • 1/4 cup white sugar, divided
  • 1 pinch salt
  • 1/4 teaspoon vanilla extract
  • 3 medium egg yolks
Directions
  1. Preheat oven to 300 degrees F (150 degrees C).
  2. Beat egg yolks, 3 Tablespoons sugar, salt, and vanilla in a mixing bowl until thick and creamy.
  3. Pour cream into a saucepan and stir over low heat until it almost comes to boil. Remove the cream from heat immediately. Stir cream into the egg yolk mixture; beat until combined.  Pour mixture into two 6 oz. ramekins.
  4. Place ramekins in baking dish, and place dish on oven rack. Pour boiling water into dish to halfway up the sides of the ramekins taking care not to splash any water into the ramekins.
  5. Bake 25 to 30 minutes in the preheated oven, until custard is just set. Chill ramekins in refrigerator 4 to 6 hours.
  6. Before serving, sprinkle remaining 1 tablespoon sugar over each custard. Use a kitchen torch or oven broiler to brown top, 2 to 3 minutes.  If broiling, place ramekins in a container of ice to keep chilled while browning and then allow to continue chilling out of oven for an additional 30 minutes.
Source: Methods modified from All Recipes

Tuesday, March 16, 2010

Grasshopper Cookie Bars

I was inspired by my friend  Kristen who posted to her facebook that she was making Grasshopper Cookies.  I remembered that I had saved a recipe a while back that was for Grasshopper Cookie Bars and with the pretty green color, deemed them worthy of being this year's St. Patrick's Day treat.  Better yet was the fact that I had almost every single ingredient on hand to make these.  And, I'm jumping it ahead of a few other recipes that need posting in case you want to make it too. 

Now, I love me a strong mint flavor so I went ahead and doubled the amount of peppermint extract that the original recipe called for.  I suggest you do the same and am reflecting this change, below (it wasn't overly minty so no worries!).  I had considered making brownies from scratch but ended up having a coupons for the cookies that were actually listed in the original recipe so bough those for $1 instead.  Why mess with the simplicity?  Super simple and super addicting.  Want to make this recipe even easier?  I don't see why you couldn't just buy a tub of vanilla frosting and add in the peppermint extract and green food coloring.  These cookie bars taste like thin mints but a million times better.  I mean let's all agree - anything homemade and with frosting to boot is automatically better!  Oh, and about that frosting, it doesn't dry/harden so you can't stack them which was a bit annoying but don't worry, these will get eaten right up anyway so no need to store!

So, top of the morning to ya and Happy St. Patrick's Day!

PS:  Does anybody know why they are called Grasshopper anyway?  Is it just because they're green??

Grasshopper Cookie Bars
Printer-Friendly Version


Prep Time: 10 mins
Cook Time: 15 mins
Total Time: 1 hour
Yields: 36 bar cookies (You can cut the pieces larger or smaller to get more or less pieces.  I usually cut mine in 4 rows by 8 columns in a 9x13 pan so usually end up with 32 of them myself.)

Ingredients

For the Bars
  • 1 pouch (1 lb 1.5 oz) Betty Crocker® double chocolate chunk cookie mix
  • 1/3 cup vegetable oil
  • 2 tablespoons water
  • 1 egg
For the Frosting

  • 3 cups powdered sugar
  • 1 small package (3 oz) cream cheese, softened
  • 1/4 cup butter, softened
  • 2 tablespoons milk (omitted but add in for a thinner frosting)
  • 1/2 teaspoon mint extract
  • 3 to 4 drops green food color (more or less to get desired tint of green)
For the Chocolate Drizzle

  • 1 oz unsweetened baking chocolate
  • 1 tablespoon butter
Directions
  1. Heat oven to 350°F. Spray bottom of 13x9-inch pan with cooking spray.
  2. In large bowl, stir all Bar ingredients until soft dough forms. Press into pan; bake 15 minutes. Cool about 10 minutes.
  3. In large bowl, stir all Frosting ingredients until smooth. Spread over bars.
  4. In small microwavable bowl, microwave chocolate drizzle ingredients on High 30 seconds; stir until smooth. Drizzle over frosting.
  5. Refrigerate 30 minutes or until set. For bars, cut into 9 rows by 4 rows. Store covered in refrigerator.  
Source: Betty Crocker

Monday, March 15, 2010

Stuffed Shells

Remember that big batch of Ragu a la Bolognese that I made?  Well, it found second life as another Italian meal...Stuffed Shells!  And, I found that though I found the sauce over spaghetti alone to be just so-so, it was AMAZING over these shells and was a great way to add some meat to an otherwise vegetarian dish.  I mean, its use in this dish just might have changed my overall opinion of that sauce.  Maybe the Ragu just needed some extra days to blend in my fridge? 

In addition to re-purposing my sauce, I had many large shell pastas leftover from the time that I made Tacos in Pasta Shells and some tomatoes, spinach, and red pepper from the Chicken Palava (African Peanut Stew) so this utilized quite a bit of material from my pantry and fridge.  I love those types of meals, don't you? 

I'm always amazed by how you can take the same/similar ingredients and then make them into something entirely new with which to tantilize the tastebuds.  In fact, I actually made another meal later in the week (Chicken Bruschetta - to be posted soon!) that had some lightly flavored balsamic vegetables leftover.  I put those extra veggies on top of some leftover stuffed shells and phew that was one DELICIOUS leftovers luch.  Gourmet!

This one is very versitile and can be prepared the night before and popped into the oven when you get home from work to create a quick meal.  I used a recipe to form the basis of the dish and then like I said, just threw in some leftover this and leftover that in to add color and nutrition to the meal.  I'll post exactly what I used for this recipe but like I said, feel free to modify to your tastes.

Stuffed Shells
Printer-Friendly Version


Prep Time: 25 Min
Cook Time: 25-35 Min
Ready In: 50-65 Min
Yields: 4-6 Servings

Ingredients


  • 1/2 (16 ounce) package jumbo pasta shells
  • 2 cups large curd cottage cheese
  • 2 cups (8 ounces) italian blend cheese, shredded and divided
  • 1 egg, lightly beaten
  • 1/3 red pepper, diced
  • 1/4 onion, diced
  • 1 medium tomato, diced
  • 2-3 cups fresh spinach, washed and dried
  • 1/2 teaspoon garlic powder
  • 1/2 teaspoon dried oregano
  • 1/2 teaspoon dried parsley
  • 1/2 teaspoon dried basil
  • 1/2 (26 ounce) jar spaghetti sauce (used about 2 or 3 cups of Ragu a la Bolognese)
Directions
  1. Cook shells according to package directions. Place in cold water to stop cooking. Drain.
  2. Mix together cottage cheese, egg, garlic powder, and dried herbs.  Mix in prepared vegetables and 1 1/2 cups (6 ounces) of shredded italian cheese. Stuff mixture generously into the shells.
  3. Spread a thin layer of spaghetti sauce in the bottom of a 9x13 inch pan. Place shells open side up, and close together in pan. Spread remaining sauce over top, taking care to cover the shells to avoid them drying out during baking.  If making ahead, cover dish and place in refrigerator at this time. 
  4. Bake at 350 degrees F (175 degrees C) for 15 to 25 minutes.  If dish is refrigerated, add 15 minutes to initial cooking time.  Then sprinkle remaining 1/2 cup (2 ounces) of shredded Italian cheese over top of shells and return to oven for another 10 minutes or until hot and bubbly. 
  5. Let stand 10 minutes before serving.  Serve with a green salad and garlic bread, if desired.
Source: Inspired by All Recipes

Wednesday, March 10, 2010

Look-Alike Hostess Cupcakes

I'm sure you've heard of "death by chocolate" before, haven't you?  Well this is pretty much it.  This is one chocolatey rich dessert thanks to the extra moist chocolate cake filled with light and fluffy frosting and blanketed with a rich chocolate ganache. 


Whoa.  Sensory overload.  At the same time, they're so airy and delicate that you could easily eat two...and that's bad! :P

I couldn't tell you what a real Hostess® CupCake (yeah, that circle R there is for you, Sig...you know what I'm talking about! haha) tastes like because I honestly don't know if I've ever had one.  A sad childhood but alas it's true!  Twinkies yes, but these chocolatey little cupcakes I do not recall.  Either way, this cupcake sure does look authentic with the signature 7 white squiggles on top and creamy filling :).  And the vintage slogan said, "You get a big delight in every bite."...that's pretty much true, too!

Is it nerdy to admit that I was just excited to break out my cake decorating tools again?  I got to use 3 different tips for this one!  A fat round one to fill the cakes, a skinny round one to make the squiggles, and then another one with texture (heck...I don't know what it's called!) to pipe filling onto the top of some cupcakes when I ran out of ganache.  I'm suggesting you double the ganache from the original recipe to get enough...and my modified instructions below accounts for this.

Not sure how people get their ganache to look so smooth...mine when dipped you could see the hole still so I had to take a rubber spatula to put more chocolate across the top to fill the gaps and smooth it back out.  This is probably why I ran out of ganache :D.

It's a little time consuming but hey, they're ultra cute and pretty darn addicting!  If anything, I'd at the very least file this chocolate cake and the seven minute frosting to make plain....the cake is really chocolatey, moist, and overall yummy!  The frosting is made without any butter or cream and uses egg whites for a light fluffy and relatively healthy frosting.

Look-Alike Hostess Cupcakes
Printer-Friendly Version


Yields: 24 cupcakes

Ingredients

For the cupcakes:
  • 2 cups sugar
  • 1 3/4 cups all-purpose flour
  • 3/4 cup HERSHEY'S Cocoa (any baking cocoa will do, most people prefer Dutch Process)
  • 1 1/2 teaspoons baking powder
  • 1 1/2 teaspoons baking soda
  • 1 teaspoon salt
  • 2 eggs
  • 1 cup milk
  • 1/2 cup vegetable oil
  • 2 teaspoons vanilla extract
  • 1 cup boiling water
For the cream filling (Seven Minute Frosting):
  • 2 large egg whites
  • 1/2 cup sugar
  • 1/4 cup light corn syrup
  • 2 tablespoons water
  • 1 1/2 teaspoons pure vanilla extract
For the chocolate ganache:
  • 1/2 cup heavy cream
  • 8 oz. bittersweet chocolate, finely chopped
  • 2 tablespoons unsalted butter, softened
Directions

To make the cupcakes
  1. Heat oven to 350°F. Line cupcake pans with paper liners.
  2. Stir together sugar, flour, cocoa, baking powder, baking soda and salt in large bowl. Add eggs, milk, oil and vanilla; beat on medium speed of mixer 2 minutes. Stir in boiling water (batter will be really thin). Fill cups about 3/4 full with batter.
  3. Bake 22 to 25 minutes in preheated oven. Cool completely on a wire rack.
To make the fillling (Seven minute frosting)
  1. While waiting for cupcakes to cool, combine filling ingredients with a pinch of salt in a metal bowl set over a saucepan of simmering water and beat with a handheld electric mixer at high speed until frosting is thick and fluffy, 6 to 7 minutes.
  2. Remove bowl from heat and continue to beat until slightly cooled. Reserve 1/2 cup of the filling to use for piping the swirls on top of the cupcakes at the end.
To make the chocolate ganache
  1. Do this after the cupcakes have been filled (Step #3 in assembly below).  In a small saucepan, heat cream over medium heat until steaming, stirring constantly. Remove from the heat, add the chocolate and let stand for 5 minutes. Add the butter and stir until smooth.  Transfer to a small bowl.
To assemble the cupcakes
  1. Once cupcakes are cool, use the cone method to create a hole in each cupcake.  Using a thin sharp knife, insert knife at an angle (pointing towards center) about 1/2 way between edge and center of cupcake.  Keeping the tip in the center position inside the cupcake, gently saw a circle around the cupcake.  Remove the cake plug, which will look like an upside down cone.  Cut the tip off the plug and then set the remaining plug aside to use later.  Repeat until all cupcakes have been cut.
  2. Prepare a piping bag with a large round tip, and fill bag with the vanilla filling.  (If you don't have a piping bag, a gallon sized ziplock bag with the tip cut off will also work.)
  3. Squeeze filling into middle of cupcakes.  Replace cake plug into top of each cupcake.
  4. Dip the top of each cupcake in chocolate ganache to thoroughly coat.  If there are bare spots (such as where the plug was cut), spoon additional ganache on that area and then use a spatula to smooth it back out.
  5. Prepare another piping bag with a small tip. Fill with the reserved 1/2 cup of cream filling. Pipe swirls across the top of the cupcakes. For Hostess accuracy, there are exactly 7 squiggles on each cupcake.
  6. Allow chocolate ganache to set before enjoying or storing in an airtight container.
Source: Cake from Hershey's, Filling from Smitten Kitchen, and Ganache/Concept from Annie's Eats as seen on Heather Drive

Sunday, March 7, 2010

Ragu a la Bolognese

This was good again for a change of pace but I still prefer the Marinara Magnifica recipe and just adding some browned beef or sausage for when I want a meat sauce.  That sauce recipe I think is just going to be very hard to top!  I did get a pretty good photo of this sauce this time.  I think the fresh basil leaves gave it that real gourmet look and contrasted beautifully with the redness of the sauce :).

To be honest, I didn't even realize that Bolognese sauce isn't even meant to be a tomato based sauce!  Guess it's been way Americanized from its original intent.  I couldn't tell you how authentic this recipe is because I guess I've never had a true Bolognese sauce until this, perhaps.  As far as I can tell from doing some research on Google, it seems to be authentic as very little tomato is actually used in the recipe, it uses the multiple in-between cook times which are needed to help build the complex flavors, and milk is used to tenderize the meat.

The original recipe says to let the sauce simmer for 2 hours in an oven heated to 350 degrees but since I wasn't sure that I had a large enough oven-proof vessel to handle this, I did my simmering on the stove and am showing my modified cooking method below.  Speaking of, I really should invest in a dutch oven given all the cooking I do.  What brand do you recommend?  You can click on the source link to see the original method if you'd like to try that.

Like almost every Italian sauce that I've ever made, this recipe makes a lot (I'd estimate that it makes a good 4-5 meals for 2 people as a sauce over noodles).  But, given the long simmering time, you might as well just make a big pot and let it go then freeze the leftovers in small portions for the future. 

I don't think it'll be going into my personal rotation because I prefer more tomato flavor.  If anything it almost reminded Chris and me of Cincinnati-Style Chili!  I think it might be because it consisted of a beef sauce simmered for a long time and maybe the nutmeg in the sauce that made it a little similar.  Either that or it's because I love that chili so much my mind was being tricked into thinking it was eating it.  Strange, huh?

Ragu a la Bolognese
Printer-Friendly Version


Ingredients
  • 1 pound ground beef
  • 1 pound mixed ground pork/beef (Used mild italian sausage)
  • 7 oz bacon or pancetta, sliced (Used turkey bacon)
  • 1 large onion, diced
  • 2 celery stalks, sliced
  • 1 medium carrot, diced
  • 2 garlic cloves, minced
  • 2 14 oz cans diced tomatoes
  • 2 1/2 tbsp tomato paste
  • 2 cups milk
  • 1 tsp salt
  • 1/4 tsp ground nutmeg
  • 1/4 tsp pepper
  • 3 1/2 cups beef broth*
  • 2 1/2 tbsp fresh basil, chopped
  • pinch of dried basil
  • 1 bay leaf
  • 2 tbsp butter
  • 2 tbsp olive oil
*Note: A dry red wine can be substituted for the beef broth.  I ended up using 2 cups (1 can) broth and then 1 1/2 cups of red Shiraz wine.

Directions 
  1. In a large stockpot or dutch oven over medium-high heat, melt butter and oil.  Add the bacon and cook for 4 minutes.  Add the vegetables and garlic then cook an additional 5 minutes.  Crumble the ground meat into the pot and cook for 8-10 minutes, until browned.
  2. Pour in milk and nutmeg.  Bring mixture to a boil then reduce heat and simmer uncovered for 10 minutes.  Stir in tomato paste and simmer for an additional 10 minutes.
  3. Add the diced tomatoes, broth (and/or wine), fresh and dry basil, bay leaves, pepper, and salt.  Bring the sauce back to a boil and then reduce heat and simmer for 2 hours, stirring occasionally.
  4. After sauce as rested for a little while, skim the grease off the top of the sauce.  Adjust seasonings as needed and serve over hot pasta. 
  5. If desired, divide leftover portions into containers and freeze.  To re-used, put frozen sauce container in fridge the evening before you plan on serving it.  This will allow it time to thaw before you re-heat it on the stove or in the microwave.
Source: Delicious Magazine, June 2009 as seen on Kayotic Kitchen

Chicken Palava (African Peanut Stew)

Are you ready to travel to Africa?  I decided to give this recipe a try because it seemed a bit different.  Surprisingly when you look at the ingredients list its not so exotic...to the point where I'm not really sure what makes this African.  Either way, it was a pretty easy week night meal and a refreshing change of pace.  I added more peanut butter and hot sauce to the original recipe because I thought the flavor needed a little boost for personal preference.  I brought leftovers to work and the aroma was enough such that my administrator, who sits across from my cube wall, popped her head up and asked me what it was because she said it smelled delicious.

Look closely at the picture below.  You think I served this over rice, I bet.  Well, I'll let you in on a little secret.  That "rice" is really shredded steamed cauliflower!  "Caulirice" as its sometimes called, is a great substitute because it not only helps to cut down on your carb intake, but it also gets in some extra servings of veggies!  Genius!  All you do is to shred your raw cauliflower using a cheese grater or food processor and then steam it (I used the microwave and some veggie steaming bags).  We used half a head for the 2 of us so I guess if you grated the whole head you could serve 4 entree sized portions.  I have to say that I was skeptical (I mean, I LOVE carbs!) but it really was pretty darn good.  You can use it as you would use rice except for when you need it to really absorb.  But as a base for this dish or other Asian dishes (I've even seen it used in fried rice!), it works like a charm.

Give this stew and caulirice a shot today!

Chicken Palava (African Peanut Stew)
Printer-Friendly Version


Ingredients
  • 1 pound boneless, skinless chicken breast
  • 1 large onion, sliced
  • 1 large red bell pepper, sliced
  • 2 large garlic cloves, minced
  • 2 large tomatoes, coarsely diced
  • 1/2 pound fresh spinach, washed and dried
  • 4 tbsp peanut oil (used vegetable oil because that's all I had)
  • 1 tsp sesame oil
  • 1/4 tsp chili powder
  • 1/2 tsp ground ginger (omitted)
  • 2 tsp brown sugar
  • 1/2 tsp dried thyme
  • 6 tbsp peanut butter
  • 2 cups chicken broth
  • Hot sauce, to taste
  • Extra brown sugar, salt, and pepper, to taste
Directions
  1. Cut chicken breast into 1" cubes.  In a gallon sized ziplock bag or bowl, combine chicken, peanut oil, sesame oil, chili powder, ginger, garlic, brown sugar, thyme, and some salt and pepper.  Put in refrigerator and marinate at least 15 minutes.
  2. Heat a large saute pan over medium-high heat.  After chicken has marinated, add chicken to hot pan and cook until the outside turns white and loses its rawness.  Add onion and red bell pepper, sauteeing for 5 more minutes.  Stir in peanut butter, chicken broth, and tomatoes.  Bring the mixture to a boil.
  3. Reduce heat and simmer over low heat for 20-25 minutes with the lid off.  Stir occasionally.  Adjust seasoning with additional brown sugar, salt, pepper, and hot sauce to taste.
  4. Add spinach and when it has wilted, turn off the heat.  Serve over rice (or caulirice).
Source: Slightly modified from Kayotic Kitchen

Thursday, March 4, 2010

Peanut Butter-Oatmeal Chocolate Chip Cookies

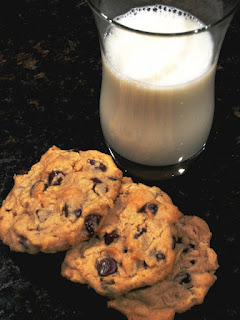
Yes, you read that title right and it sure is a mouthful!  This cookie is pretty much 3 awesome cookies smashed into one and a definite keeper.  It also might win the award for least time between bookmarking on Google Reader and actually making because these are ingredients most people have on hand at any given time.  It has peanut butter for protein, chocolate chips to comfort the soul, and rolled oats to make it healthy(er)...so you can eat two in a single sitting :).  If it makes you feel any better, maybe you could use low-fat and/or low-sugar peanut butter.  But what's the fun in that?  It's a COOKIE for crying out loud!  Seriously, Chris and I have trouble keeping our hands off these.  They're so good and soft.  I love me a soft cookie!

To get the perfect softness of this cookie, you do need to take it out before you think the cookie is actually done.  The edges will be lightly browned and set but the middle will be puffy and soft to the touch.  The cookies continue to cook a little bit on the hot baking sheet after you take it out so don't worry.  Just take it out and you will be rewarded with a good soft cookie with lightly crispy exterior...the way cookies were meant to be in my opinion!  The original baking time for this cookie was 10 minutes but it took me 12 to get the light browned edges.  So start with 10 and then adjust as needed to suit your oven.  With the 2 minutes extra baking time in my oven, it was still soft, still delicious.

Oh, and watchout for the batter when you go to lick the spoon.  You might just try to eat all of the dough raw!  Don't say I didn't warn you...

Peanut Butter-Oatmeal Chocolate Chip Cookies
Printer-Friendly Version


Yields: About 16 large cookies (I got about 20 of them...again, I apparently make mine relatively small...more reason to have 2 at a time!)


Ingredients
  • 1 cup all-purpose flour
  • 1 teaspoon baking soda
  • ¼ teaspoon salt*
  • 1 stick (½ cup) unsalted butter, at room temperature*
  • ½ cup creamy peanut butter
  • ½ cup granulated sugar
  • 1/3 cup light brown sugar
  • ½ teaspoon vanilla extract
  • 1 egg
  • ½ cup rolled oats
  • 1 cup semisweet chocolate chips
*Note: Sometimes all I have on hand is salted butter in which case I'll just use that and omit any added salt.

Directions
  1. Preheat oven to 350 degrees F. Line two baking sheets with parchment paper and set aside.
  2. Whisk together the flour, baking soda and salt; set aside.
  3. On medium speed, cream together the butter, peanut butter, granulated sugar, brown sugar and vanilla extract, about 3 minutes. Add the egg and beat to combine. On low speed, gradually add the flour until just combined. Stir in the oats, and then the chocolate chips.
  4. Use a large cookie scoop (3 tablespoons) and drop dough onto prepared baking sheets about 2 inches apart. Bake for 10 minutes, or until the cookies are lightly golden. Cool completely on the baking sheet and then store in an airtight container at room temperature.
Source: Originally from Jane as seen on Brown Eyed Baker

Awesome Slow Cooker Pot Roast

I'm pretty sure this is my favorite crockpot recipe.  It's rediculously simple and tastes so good!  The meat makes its own gravy as it cooks!  A hot, comforting meal that's ready for you when you come home.  I like to add some veggies (carrots, potatoes, onions, celery) to mine to make it a one-pot meal and usually serve it over rice or egg noodles.  This time, I only had a 2.5lb piece of beef so I halved the recipe and we ate it plain like a stew.  I've made the full recipe before and it does freeze well if you want to do easy freezer meals (like this one isn't easy enough to begin with, though!).

Now for an interesting story...because every recipe has one.  One of the ingredients in this recipe is onion soup mix.  I usually buy whatever is on sale or cheapest for these types of ingredients and Kroger brand was significantly cheaper when I went shopping.  I made the meal on a Friday and when I went shopping the following Monday, the cashier notifies me that my Kroger Plus Card shows that we may have purchased a product that was recently recalled.  It turns out that the onion soup mix was being recalled for potential Samonella contamination.  Awesome!  Bad news is that I had already used some of the product.  Good news is that 1) We ate it and didn't get sick (I suspect either because it cooked in the crockpot for over 8 hours and probably killed anything bad or ours wasn't contaminated to begin with) and 2) by having Kroger stalk our buying habits with the plus card, we now know that our product is bad.  I had leftovers (at least 2 more meals worth!) but out of fear I'm throwing them out.  The remaining product is being returned to Kroger on my next shopping trip and we'll get a full refund.  Wonder if they'll refund me the cost of the other materials like my meat, condensed soup, and veggies, too...sheesh.

Try to ignore my photo...I know it looks like...vomit...or something.  Do you realize how hard it is to photograph certain types of food??  And I must have stirred mine too much this time because it was much more shredded than normal...usually it's chunks of meat rather than shreds.  Anyway, I assure you it tastes AWESOME, just as the namesake says it will :).

Awesome Slow Cooker Pot Roast
Printer-Friendly Version 


Yields: 12 Servings

Ingredients
  • 2 (10.75 ounce) cans condensed cream of mushroom soup (I like to sub a cream of celery soup for one of the cream of mushrooms and always use the low fat versions...you can use your favorite cream of whatever soup)
  • 1 (1 ounce) package dry onion soup mix
  • 1 1/4 cups water (if desired, for a more sophisticated taste can substitute with a dry red wine)
  • 5 1/2 pounds pot roast
  • 3 large potatoes, scrubbed and diced (optional)
  • 1 large onion, sliced (optional)
  • 3 carrots, peeled and sliced (optional)
  • 2 stalks celery, sliced (optional)
  • 3 Tablespoons flour (optional)
Directions
  1. If desired, add vegetables to bottom of slow cooker.  Then, mix in cream of mushroom soup, dry onion soup mix and water. Place pot roast in slow cooker and coat with soup mixture.
  2. Cook on High setting for 3 to 4 hours, or on Low setting for 8 to 9 hours.  If a thicker gravy is desired, add about 3 Tablespoons of flour to the crockpot 30 minutes before serving and stir well.
Source: Modified from All Recipes

Jalapeno Cornbread Whoopie Pies

Mmm this was the perfect accompaniment to my mother in law, Mary Lynn's, Chili.  Once I saw this recipe, I knew it was a match made in heaven.  Chris ate the bread plain because he won't touch cream cheese with a 10 foot pole and I made the filling with all neufchatel cheese (reduced fat cream cheese) instead of a blend because I didn't want to spend the extra money on goat cheese.  I bet it would have been even more awesome with the goat cheese...

Anyway, I've experimented quite a bit now in the sweet-type whoopie pies so this was a nice change from the ordinary.  Since it was just the two of us, I halved the recipe and it was just enough for 2 meals of chili and jalapeno cornbread whoopie pie accompaniments.  For simplicity, I used about 2 Tablespoons of canned diced jalapeno peppers.  In the future, I'd add more peppers or a splash of Tabasco for more kick.  You know I like it spicy!

Rather go with the traditional sweet whoopie pies?  Try one of these - one for every season!:
Or, try this regular Buttermilk Cornbread recipe if you want a no-frills cornbread.

Jalapeno Cornbread Whoopie Pies
Printer-Friendly Version


Yields: 10-12 assembled pies

Ingredients

For the Cornbread

  • 1 1/4 cups all-purpose flour
  • 1 cup cornmeal
  • 1/4 cup packed brown sugar
  • 2 teaspoons baking powder
  • 1 teaspoon salt
  • 1 cup buttermilk, at room temperature
  • 4 tablespoons unsalted butter , at room temperature (used 2 Tbsp salted, 2 Tbsp unsalted)
  • 1 large egg, at room temperature
  • 2 jalapeƱo chiles, seeded and finely chopped (used about 2 Tbsp canned diced jalapenos)
For the Cheese Filling

  • 6 slices bacon
  • 4 ounces soft fresh goat cheese, at room temperature (omitted)
  • 4 ounces cream cheese, at room temperature (used neufchatel cheese and doubled it to accomodate lack of goat cheese)
  • 2 tablespoons milk
  • 1 tablespoon chopped fresh scallions
Directions

To Make the Jalepeno Cornbread
  1. Position a rack in the center of the oven and preheat the oven to 375 degrees. Line two baking sheets with parchment paper.
  2. In a medium bowl, stir together the flour, cornmeal, brown sugar , baking powder, and salt. In the work bowl of a stand mixer fitted with the paddle attachment, beat together the buttermilk, butter, and egg on low speed until just combined. Increase the speed to medium and beat until thoroughly combined, about 3 minutes. Add the flour mixture and the chopped jalapeno to the batter and beat on low until just combined.
  3. Using a spoon, drop about 2 tablespoons of batter onto one of the prepared baking sheets and repeat, spacing them at least 2 inches apart. Bake one sheet at a time for about 12 minutes each or until the cornbread begin to brown around the edges. While the cornbread is cooking, prepare the cheese filling using the instructions below.  After the cornbread is cooked, remove from the oven and let the them cool in the pan for about 5 minutes before transferring them to a rack to cool completely.
To Make the Cheese Filling
  1. While the cornbread is baking, in a medium skillet, cook the bacon over medium heat until crisp. Using a slotted spoon, transfer to a paper-towel-lined plate to drain and cool. When cool, crumble into small pieces.
  2. In the work bowl of a stand mixer fitted with the paddle attachment, beat together goat cheese (if using), cream cheese and milk on low speed until just combined. Increase the speed to medium and beat until smooth and creamy, about 3 minutes. Add the crumbled bacon and the scallions and beat on low until combined.
To assemble
  1. Spread filling onto the flat side of one cake using a knife or spoon. Top it with another cake, flat-side down. Repeat with the rest of the cakes and filling. You can also use a pastry bag with a round tip to pipe the filling onto the cakes, which will give you a smoother, neater presentation.
Source: Modified from the Star Telegram newspaper, as modified and seen on Sing for Your Supper